let them eat cake

IMG_3044
the chocolate cake to make when you need it most: low-sugar, low-carb peanut butter banana chocolate cake

I don’t like cake.

Seriously. I just don’t like it. I personally prefer cake’s more moist cousin the brownie–you get all the goodness without the sickeningly sweet frosting. Or, if I’m really getting to choose, I’ll just take ice cream cake, por favor. You can never go wrong with ice cream.

um, yes please.
um, yes please.

That being said, there is just something overtly comforting about cake. I don’t know if it’s its association with celebratory moments or the fact that baking a cake fills your home with some of the most devastatingly delicious aromas known to mankind, but a homemade cake seems to be one of the most inviting, warm, and wonderful food items in the world.

Knowing this–and even though I am not a cake-lover–a few weeks ago I found myself in my kitchen soundlessly measuring and mixing a cake together because it was all I knew to do.

Why? Because life was feeling like everything was falling out beneath me. And gosh darn it, I needed some cake like I’ve never needed cake before.

Let me explain.

In the series of a few weeks, it seemed like everything went from hunky-dory to absolute disarray. Being that it’s springtime, life in general just got busier. Tom started up his softball leagues (yes, leagues) again and I started my coaching season as a coach for Girls on the Run. On top of that, I had made it to the final rounds of interviewing for a a big promotion at work for a different team that does some really cool stuff. Between endlessly prepping for the interview and running like crazy between our activities, life was busy…but it was good.

But then the phone rang.

My dad called and told me they thought my mom had cancer and she was going in for more tests. Following endless tests and a biopsy, they confirmed she needed to have a lumpectomy.

Then the phone rang again.

Following my annual physical, my doctor called me to tell me that my white and blood cell counts were scarily low and that I needed to start coming in for weekly appointments and injections starting the very next day.

And then the phone rang again.

I didn’t get the really-cool, super-exciting, very-impressive new job. It was the first time in my life I applied for something and I didn’t get it. While it’s a good thing to have happen to teach you how to deal with failure, it felt like a slap in the face when paired with everything else.

So, what did I do? I baked a cake. 

Now you may think I’m insane, but at the time I needed that cake more than I’ve needed anything before. I needed the comfort, I needed the warmth, and I needed the chocolate.

What didn’t I need? I didn’t need the sugar. In fact, with my health already being less than stellar and as a pre-diabetic I needed to be even more careful about my sugar intake.

So while most of my culinary compromises are to create better-for-you versions of food that Tom loves so we can both enjoy it–this time it was different. This time I just needed to be create and bake for me.

I needed to get out of my distracted and worried brain and focus on testing and failing in my safe space: the kitchen. I needed to create something that would bring me joy without the guilt of eating something that was bad for my body. And, perhaps more than anything, I needed to taste and be present in the moment of pure bliss when you take a bite of delicious chocolate cake.

So…where’s the compromise?

Here’s my answer:

  • Swap out the white flour and bring in my trusty almond flour to be the low-carb, low-sugar base of the cake
  • Ditch the refined sugar and use bananas and a touch of honey as the sweetener
  • Amplify the flavor and texture of traditional chocolate cake by adding peanut butter and chopped peanuts…as well as a few of those delectable chocolate chips…because sometimes you just need the real thing
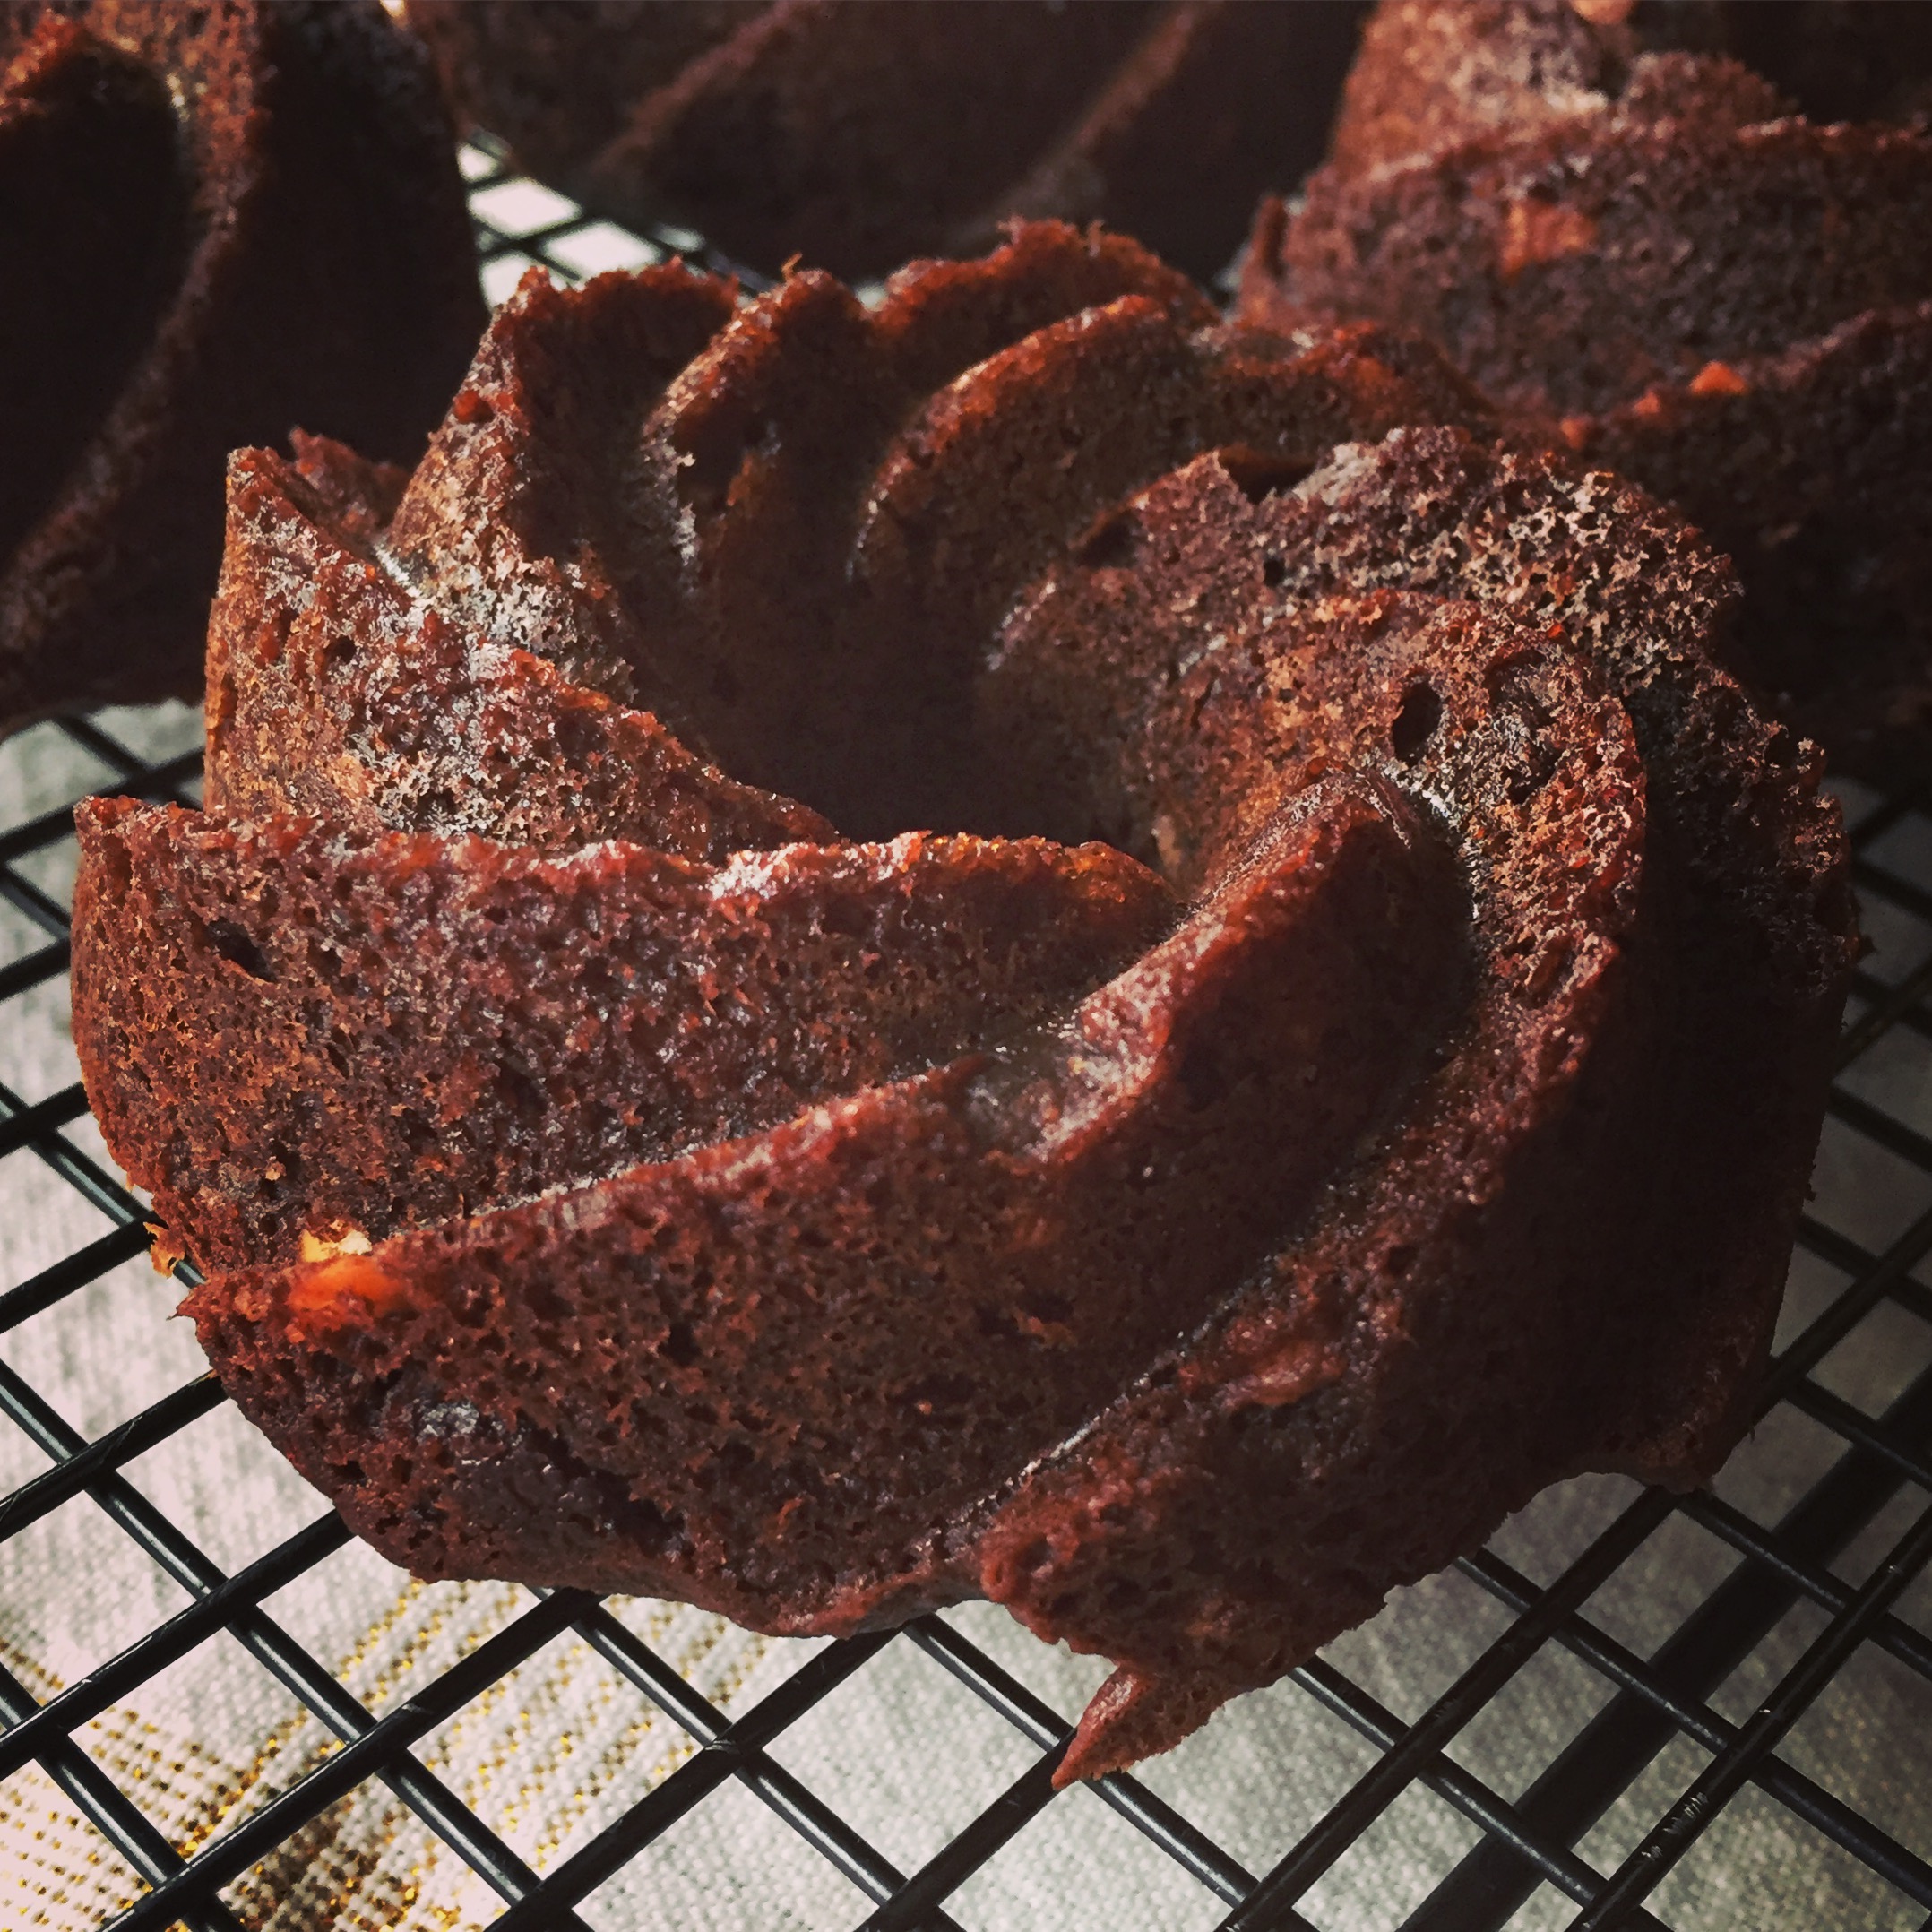
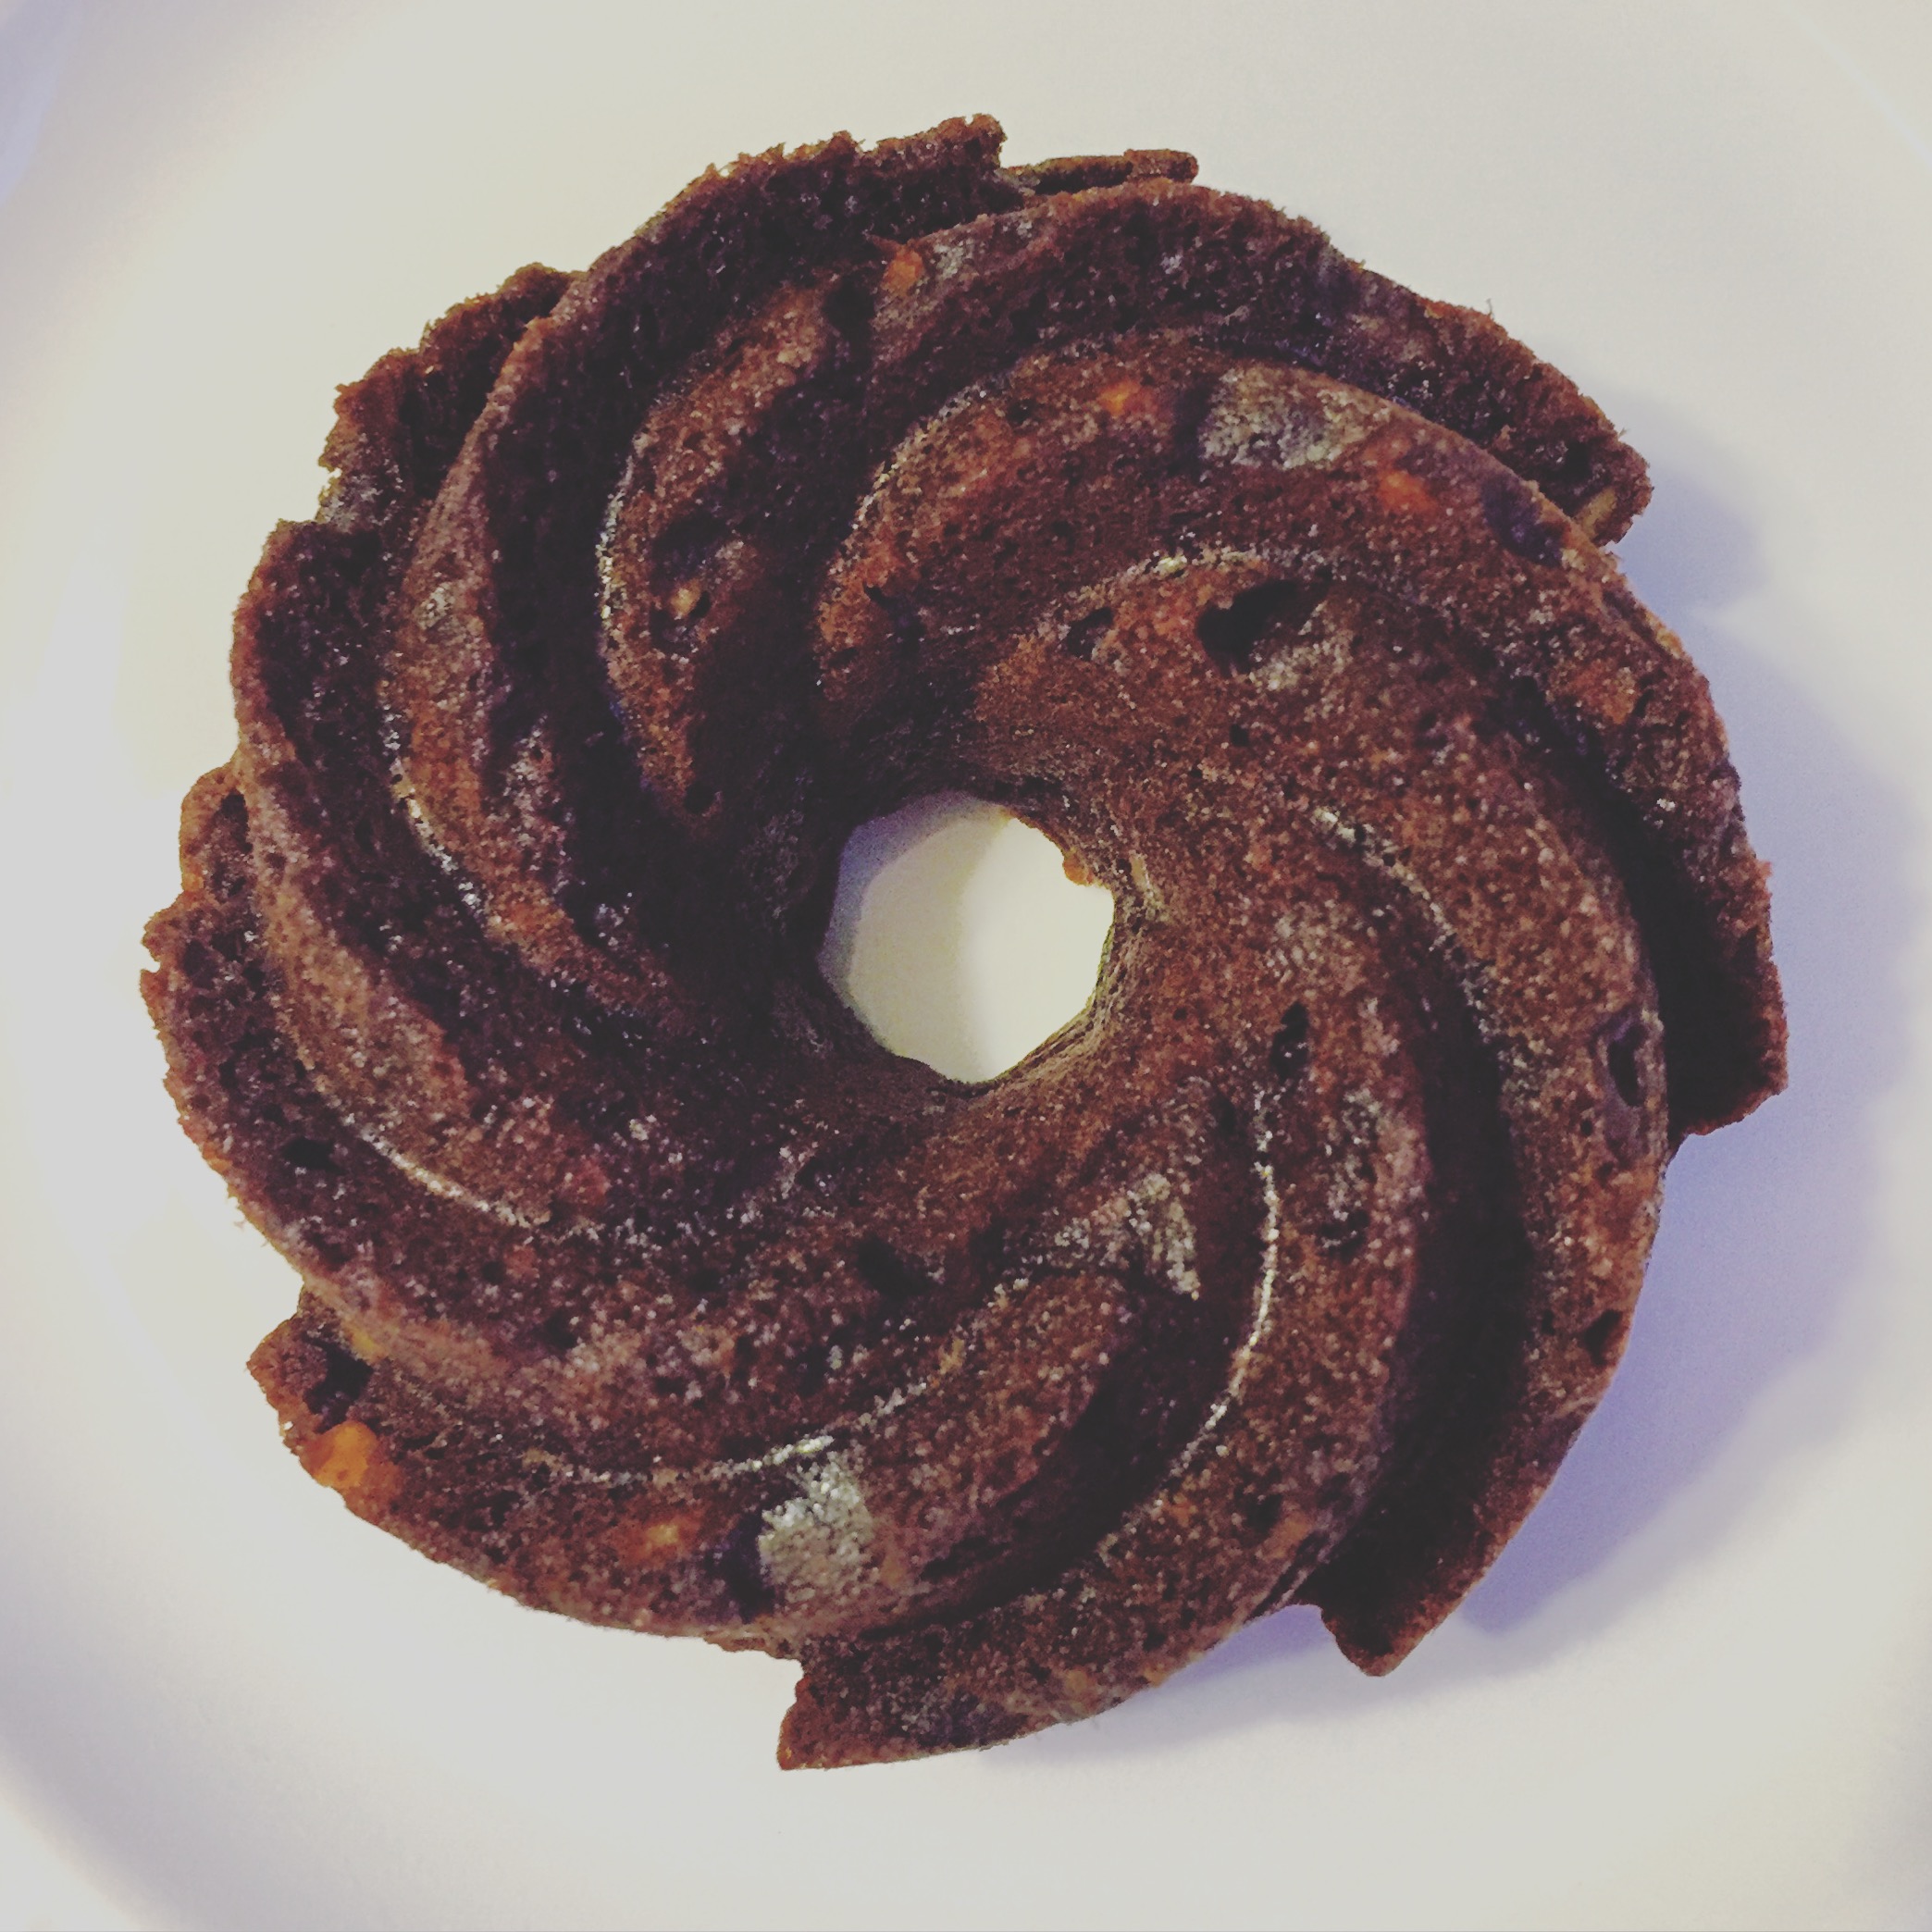
  • Use a mini-bundt pan…because I love bundt cakes and this cake is for me after all!

| Alaina’s Cake |

Serves: 4 Tom’s or 8 Alaina’s

Ingredients Needed:

Dry Ingredients:

  • 1 cup finely ground almond flour
  • 3 tbsp. cocoa powder
  • 1 1/2 tsp. baking powder
  • 1/2 tsp. baking soda

Wet Ingredients:

  • 2 ripe bananas, mashed
  • 2 eggs
  • 1/4 cup peanut butter
  • 2 tbsp melted butter (preferably salted)
  • 1 tbsp. pure honey
  • 1 1/2 tsp. vanilla

Mix-Ins:

  • 1/2 cup semi-sweet chocolate chips
  • 1/4 cup chopped peanuts (preferably salted)
    • Why salted? Because salt makes things sweeter!

Directions:

First, you need to get prepped!

  • Preheat your oven to 300 degrees F
  • Lightly spray your mini-bundt pan with non-stick cooking spray, set aside
    • Note: If you don’t own a mini-bundt cake pan, you should really go buy one! It will make your baking life exponentially happier. If you don’t want to buy one, you can make the same recipe with a cupcake pan and reduce the cooking time to 15-20 minutes or use a regular cake pan and increase the baking time to 40-45 minutes. It’s not the same…but it’s still pretty dang good!
IMG_2888
so fun!

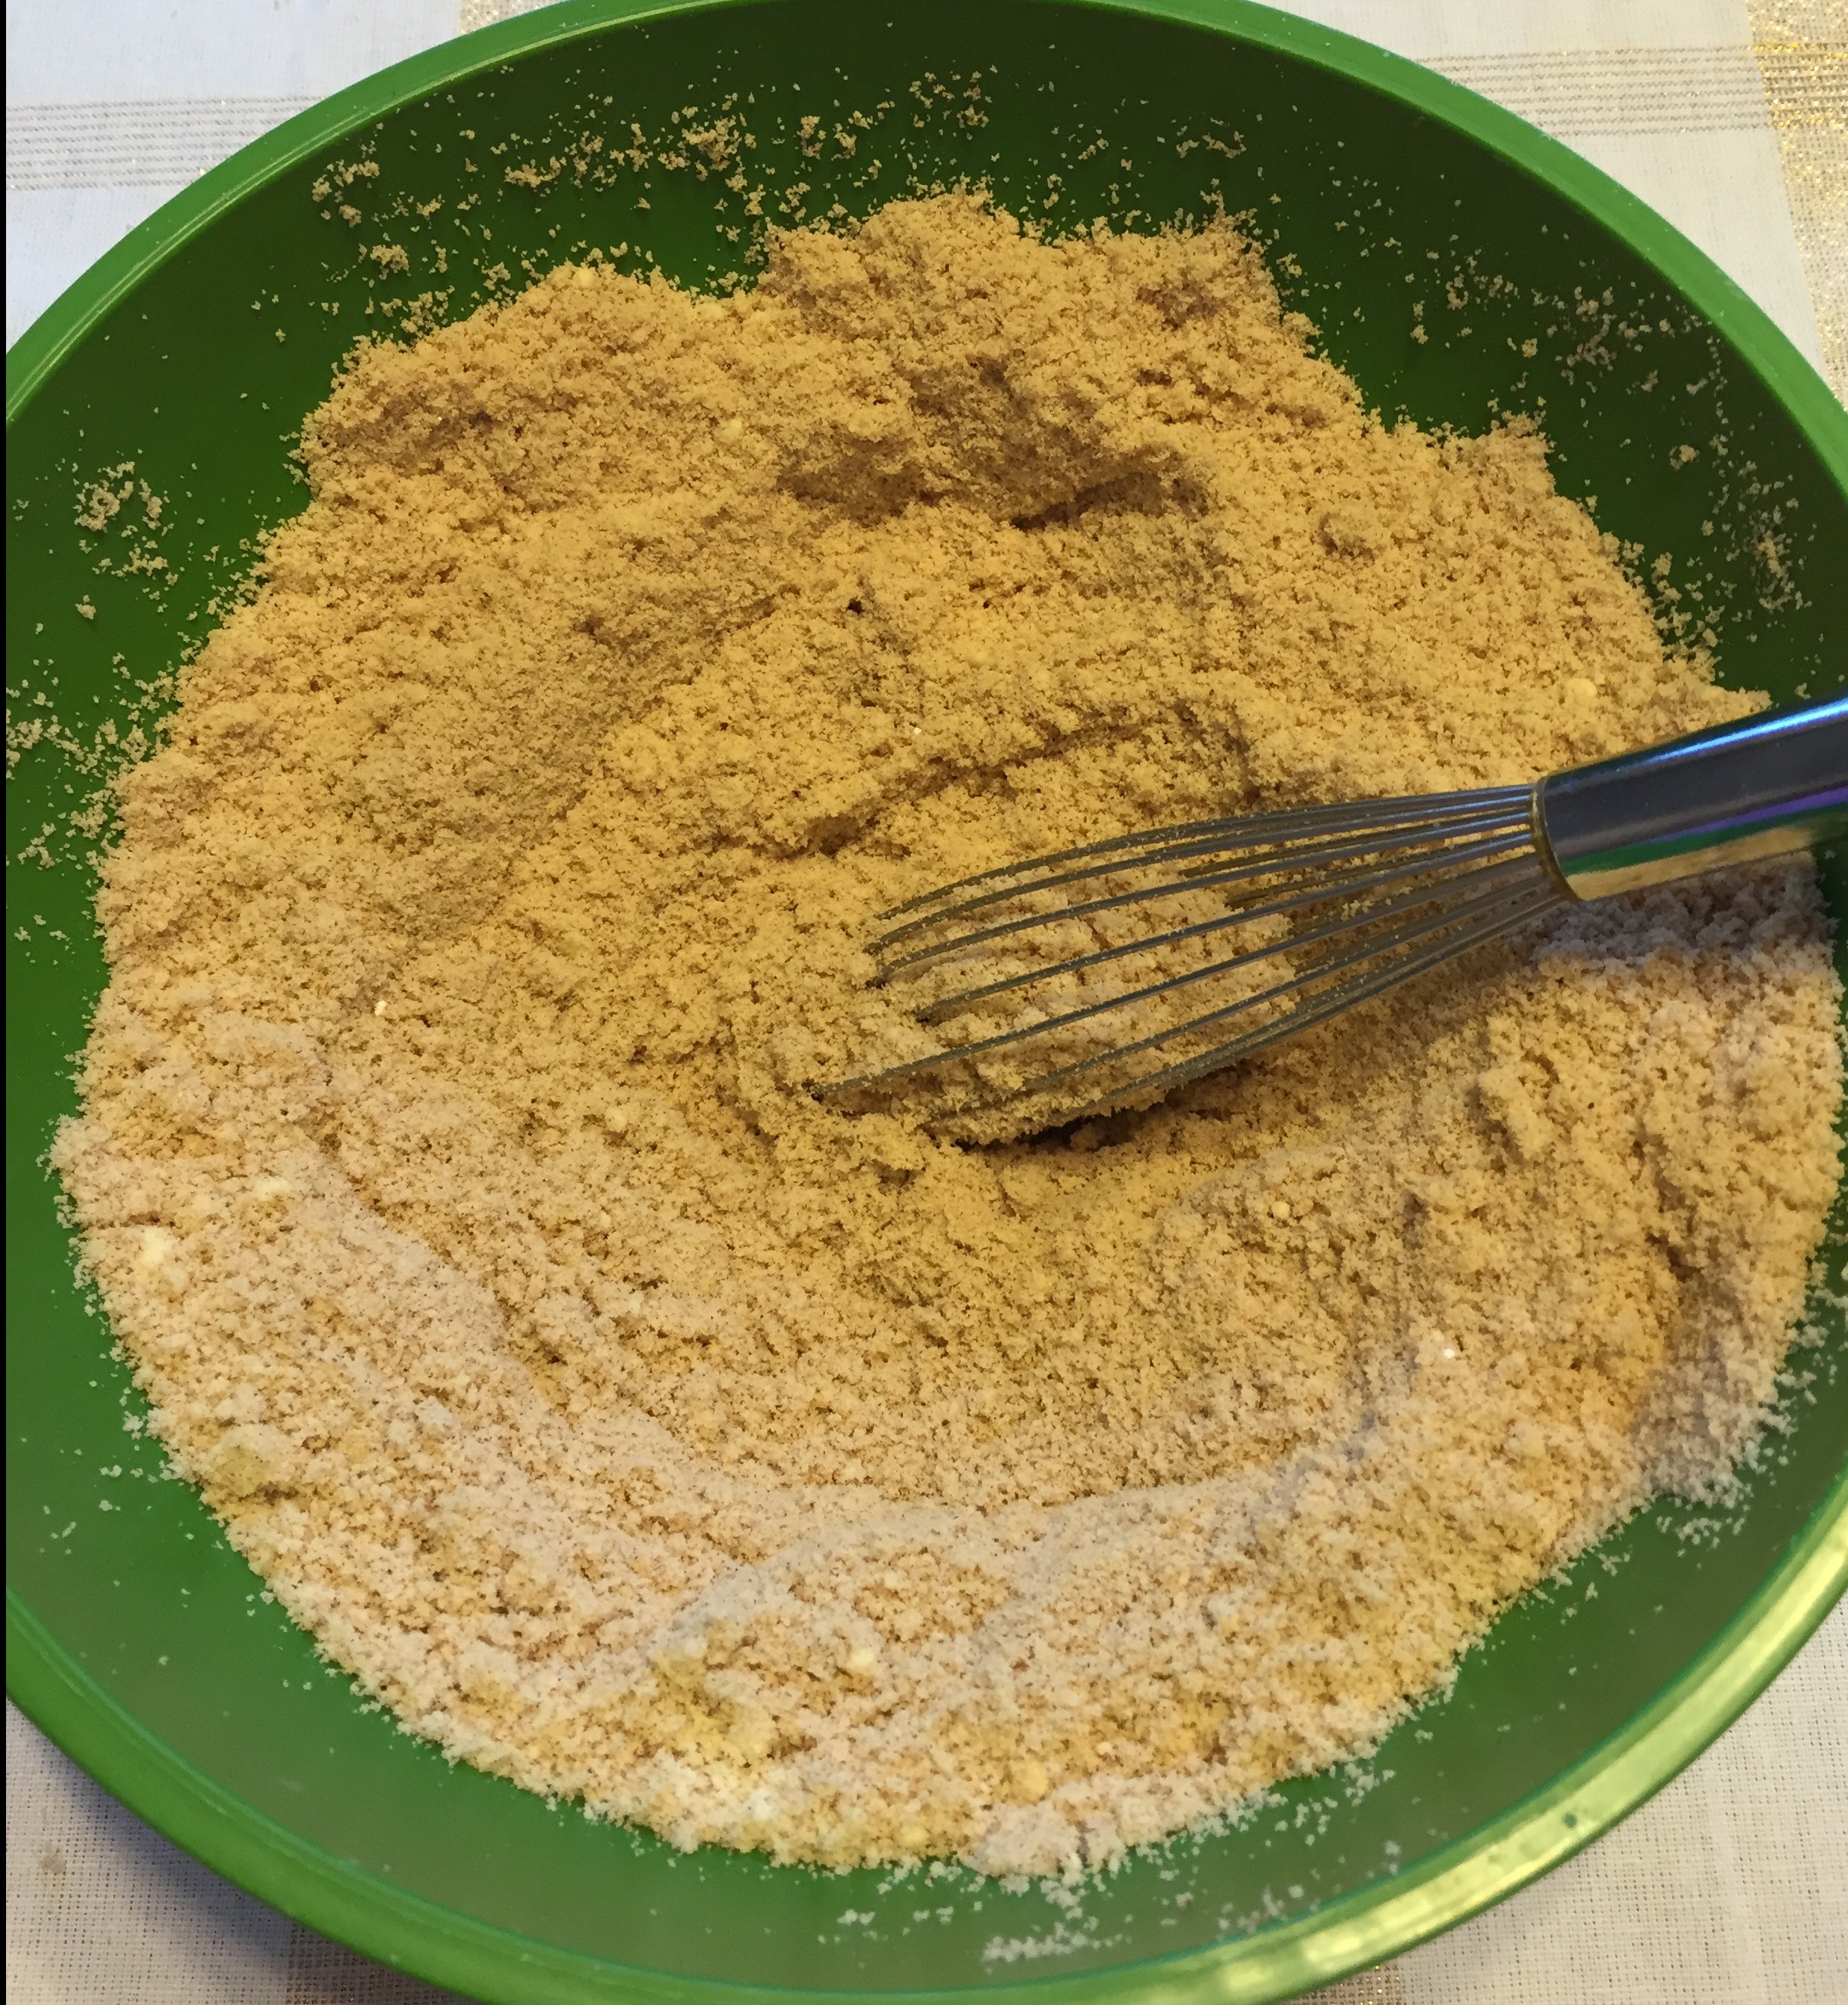
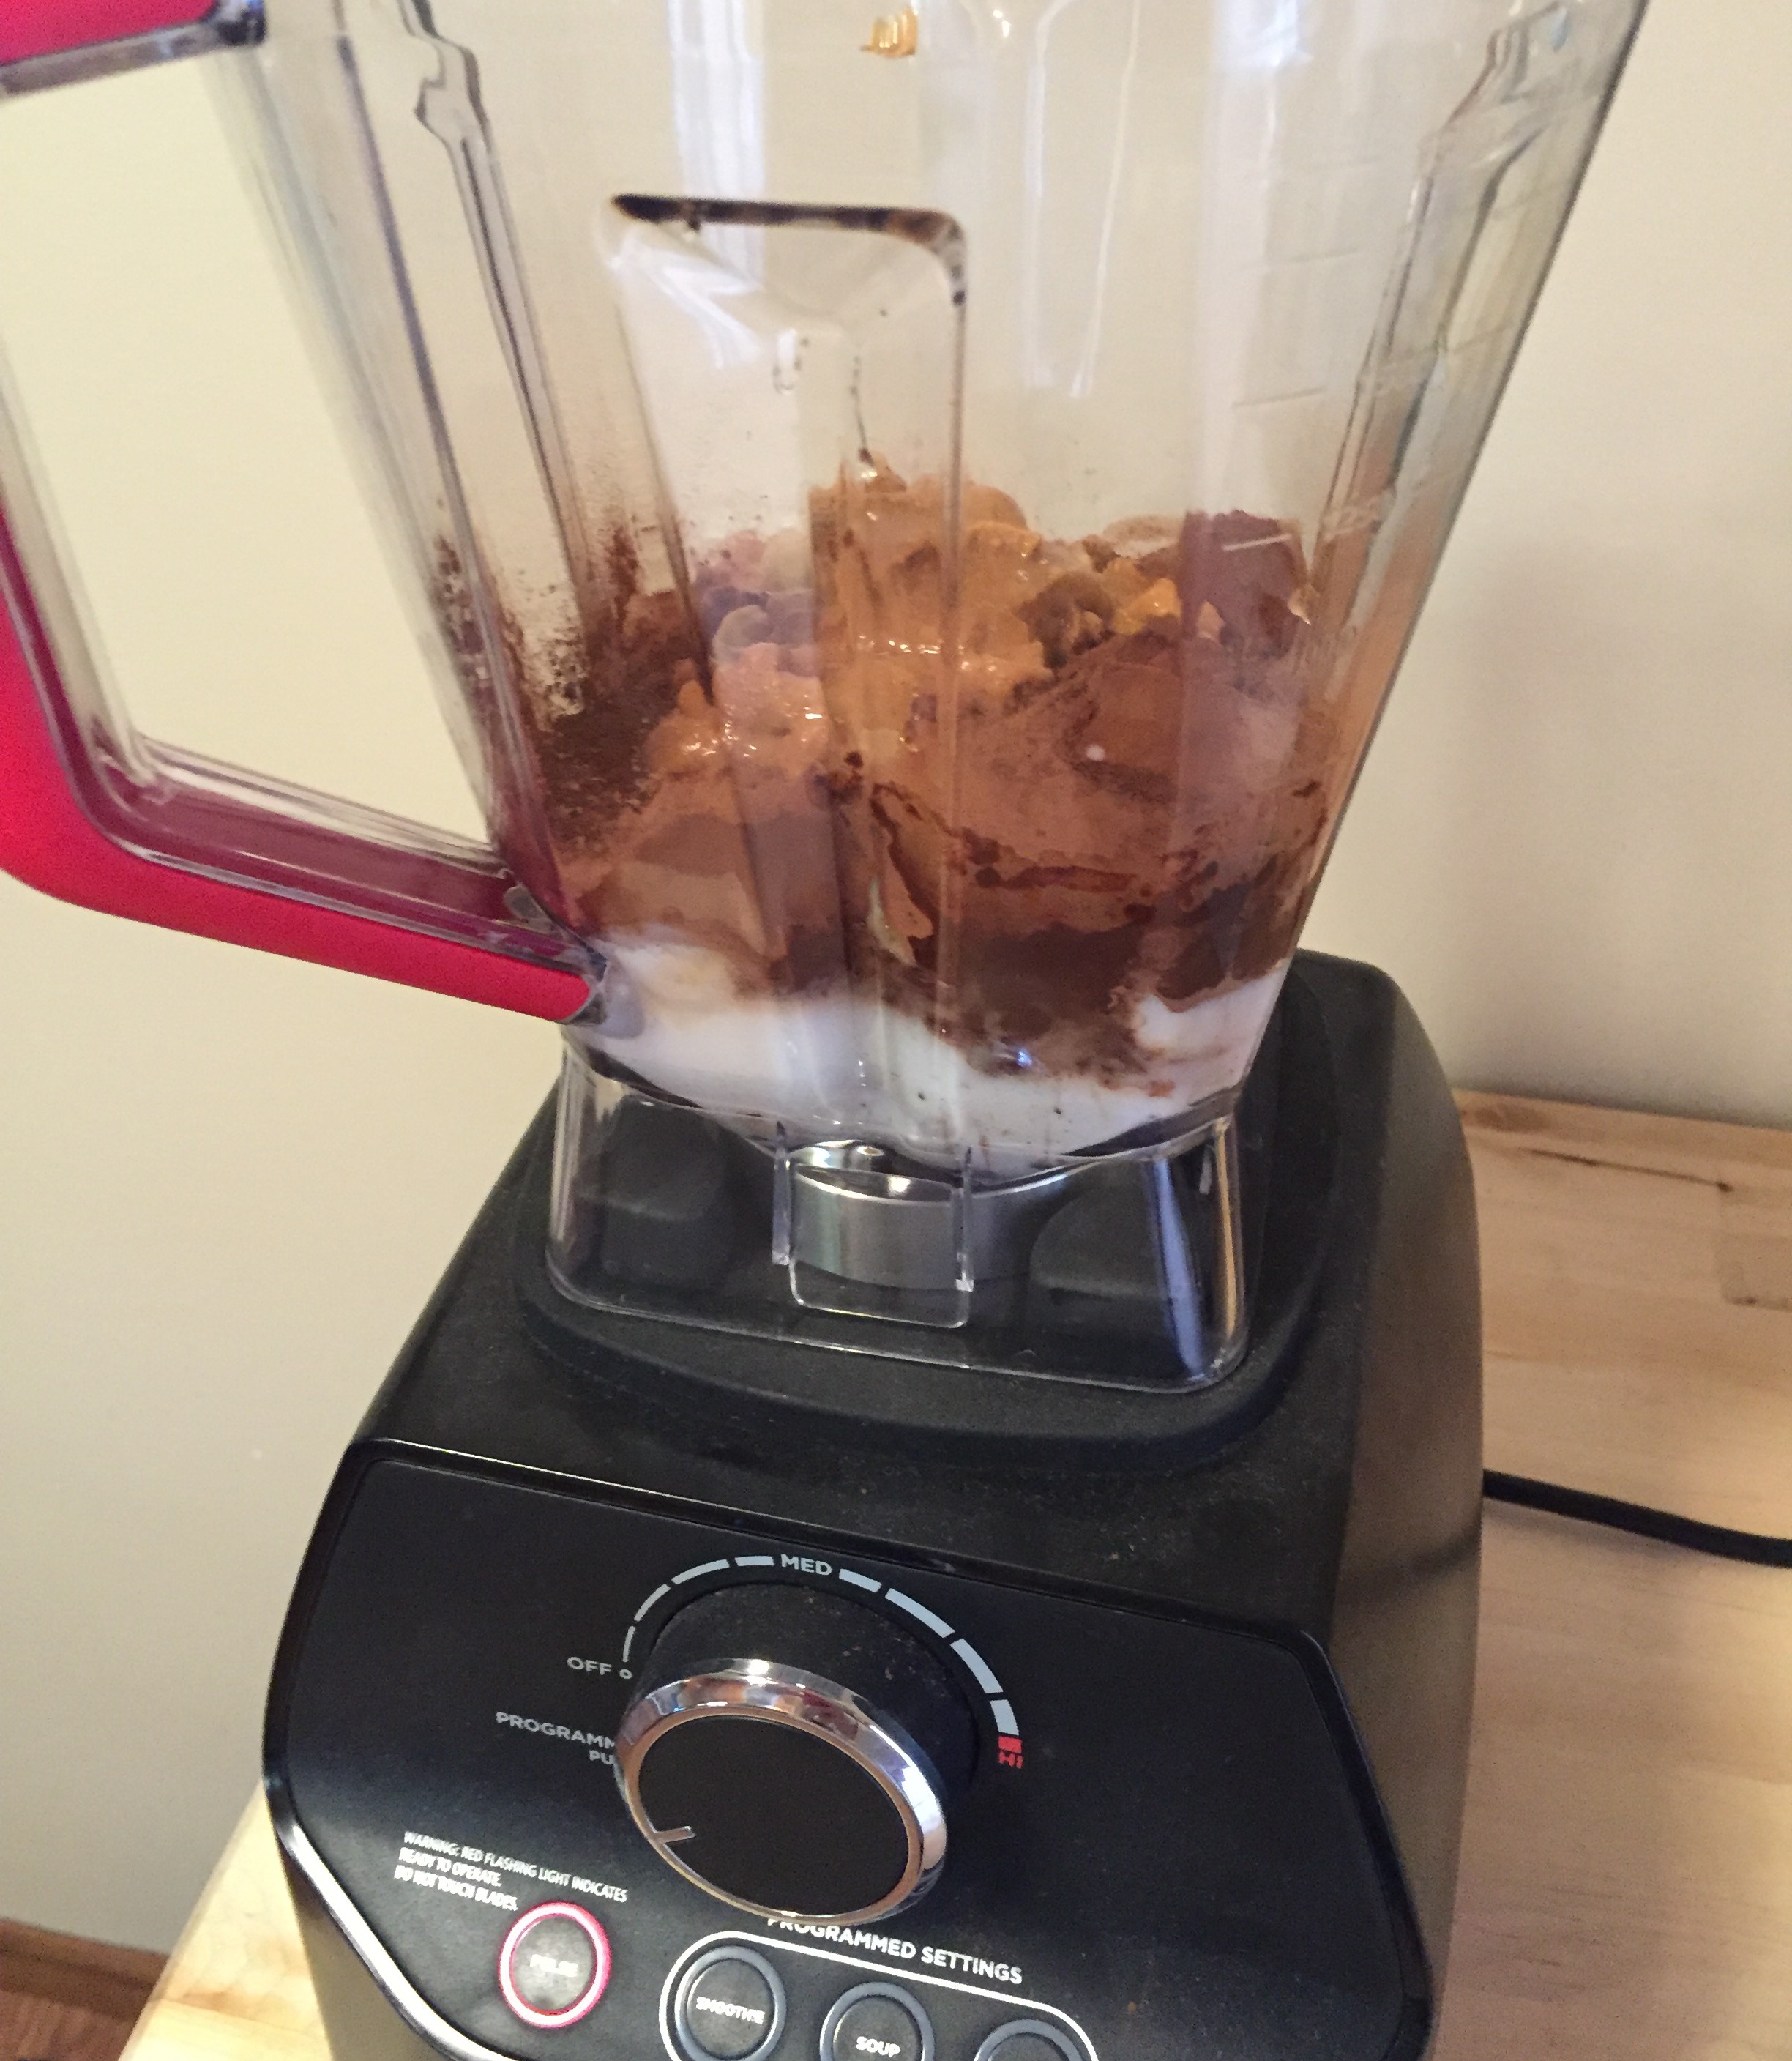
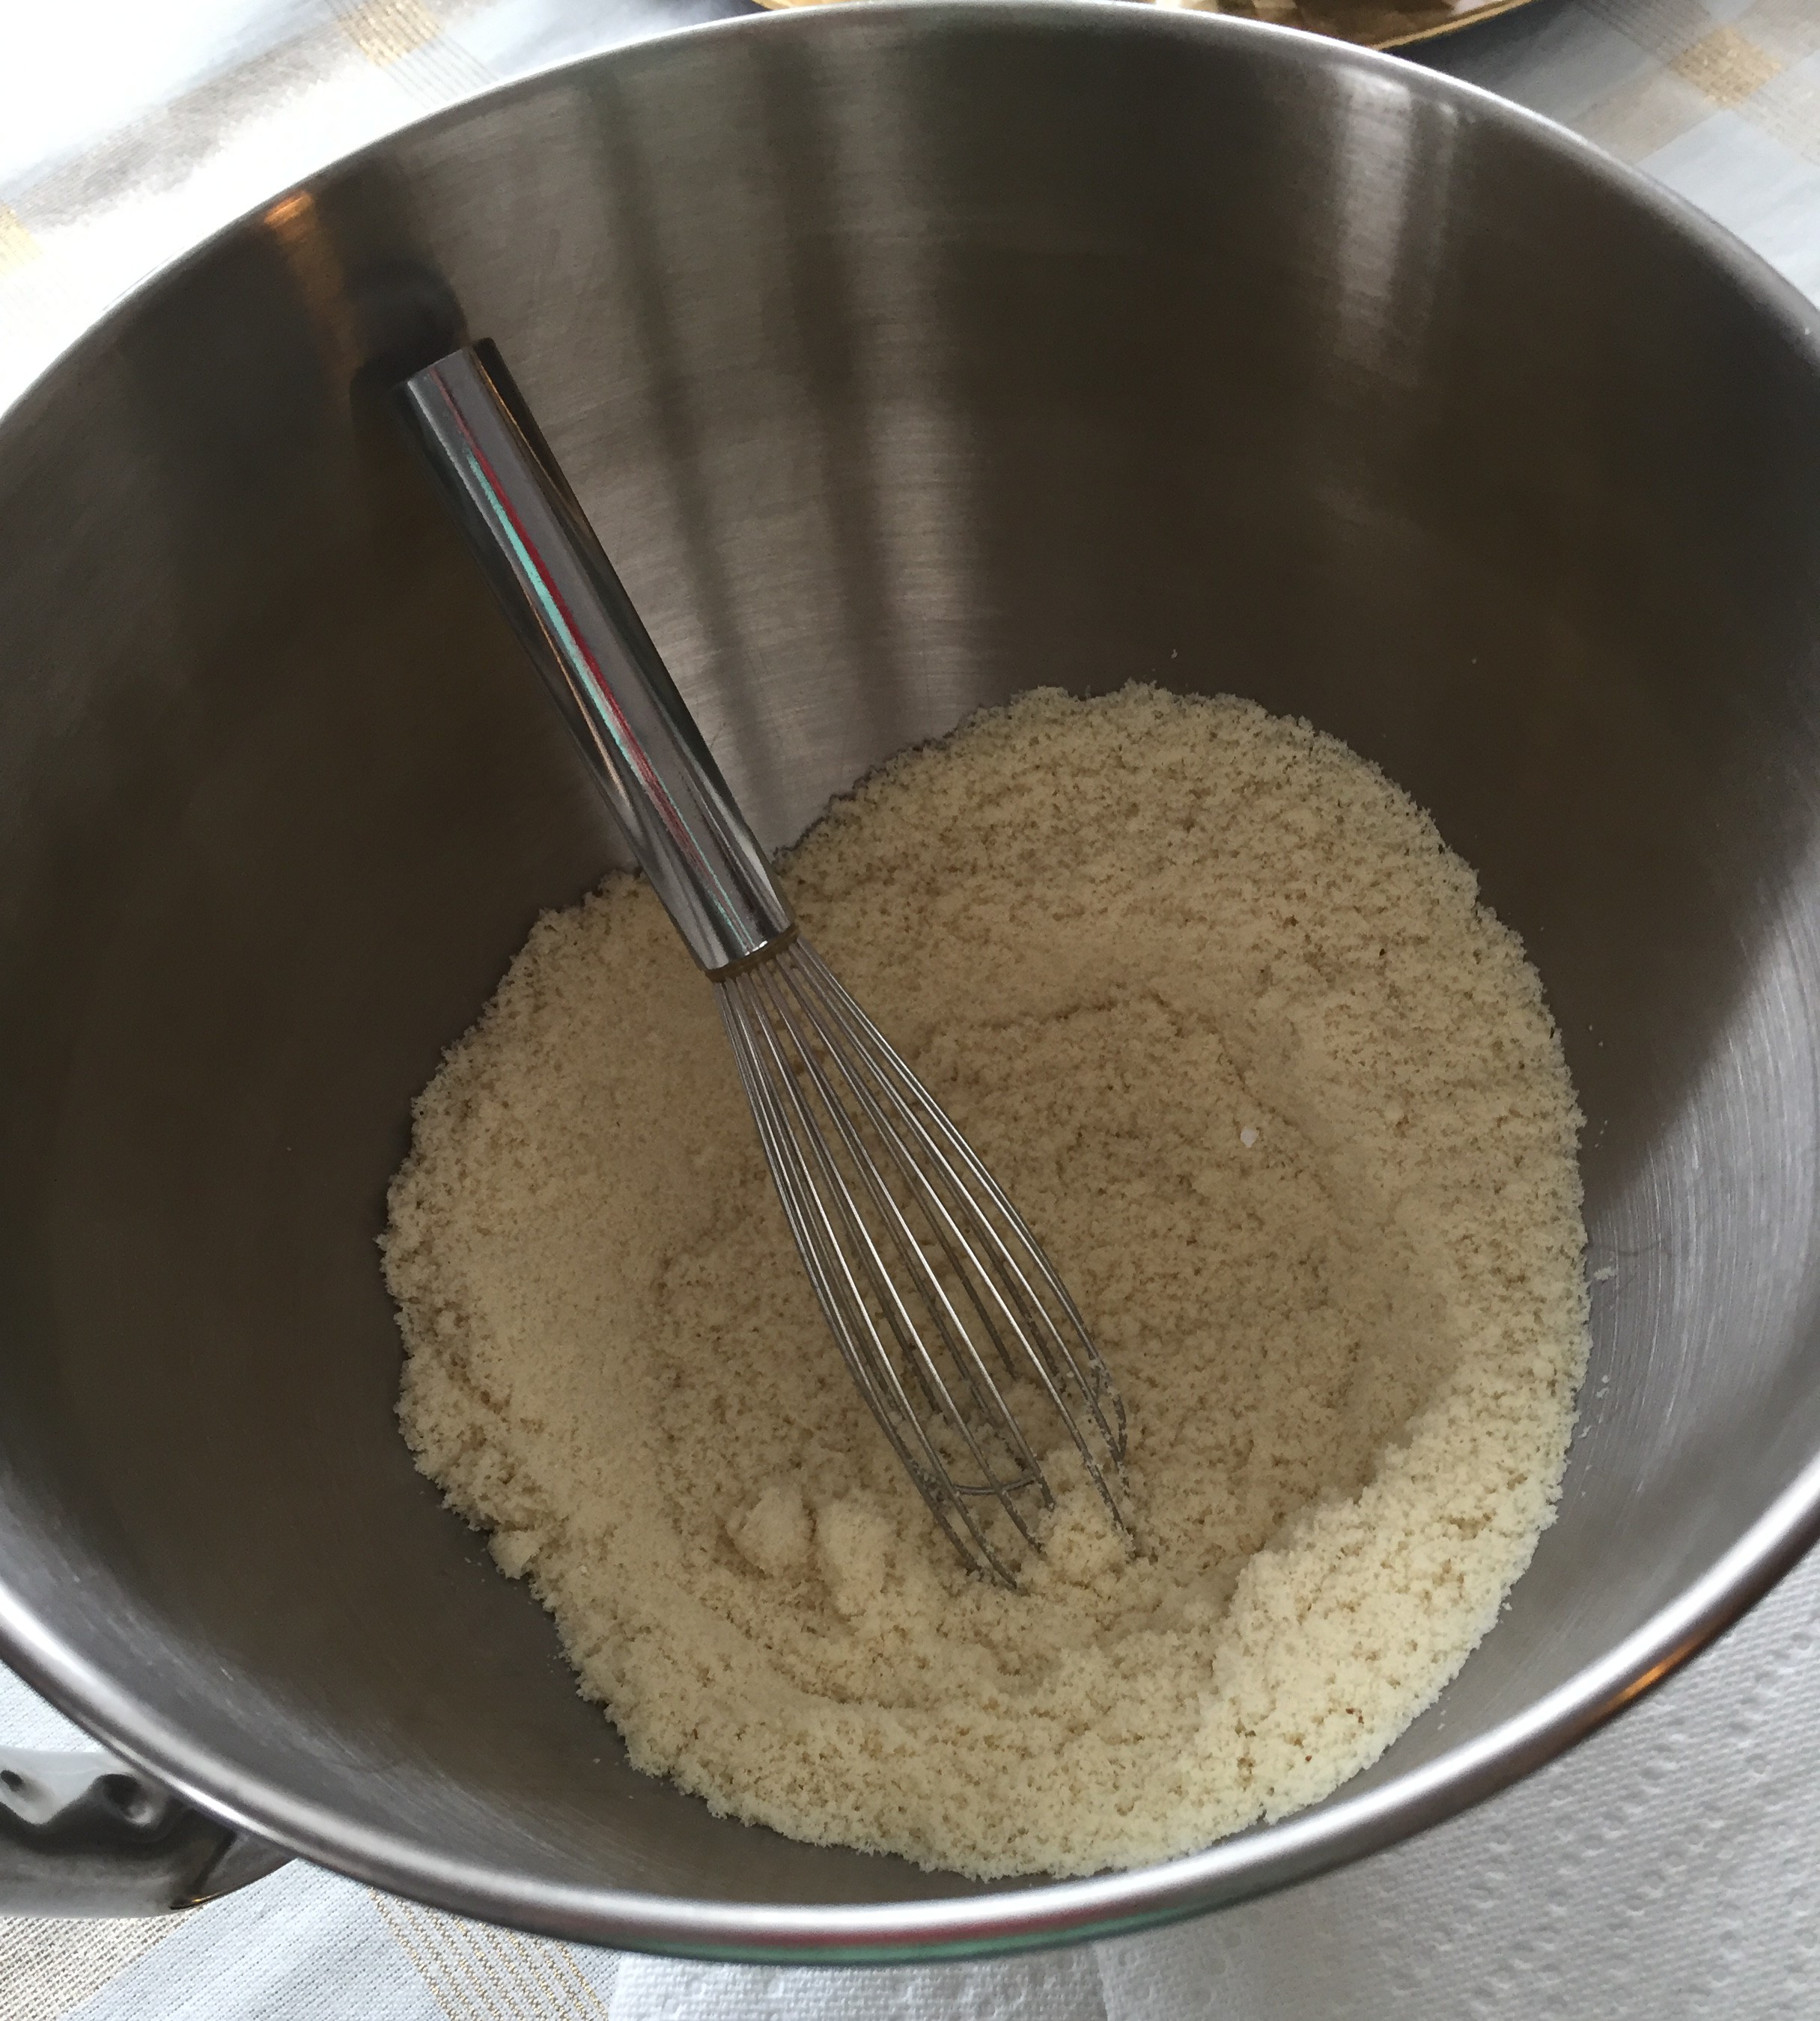
Once you’re prepped, get your dry ingredients together…

  • Add all of your dry ingredients to a medium mixing bowl and mix well using a whisk, set aside
    • Using a whisk helps ensure all ingredients get evenly distributed when working with almond flour that has a bit of a oilier, coarser texture than normal white flour 

Next up, get your wet ingredients combined…

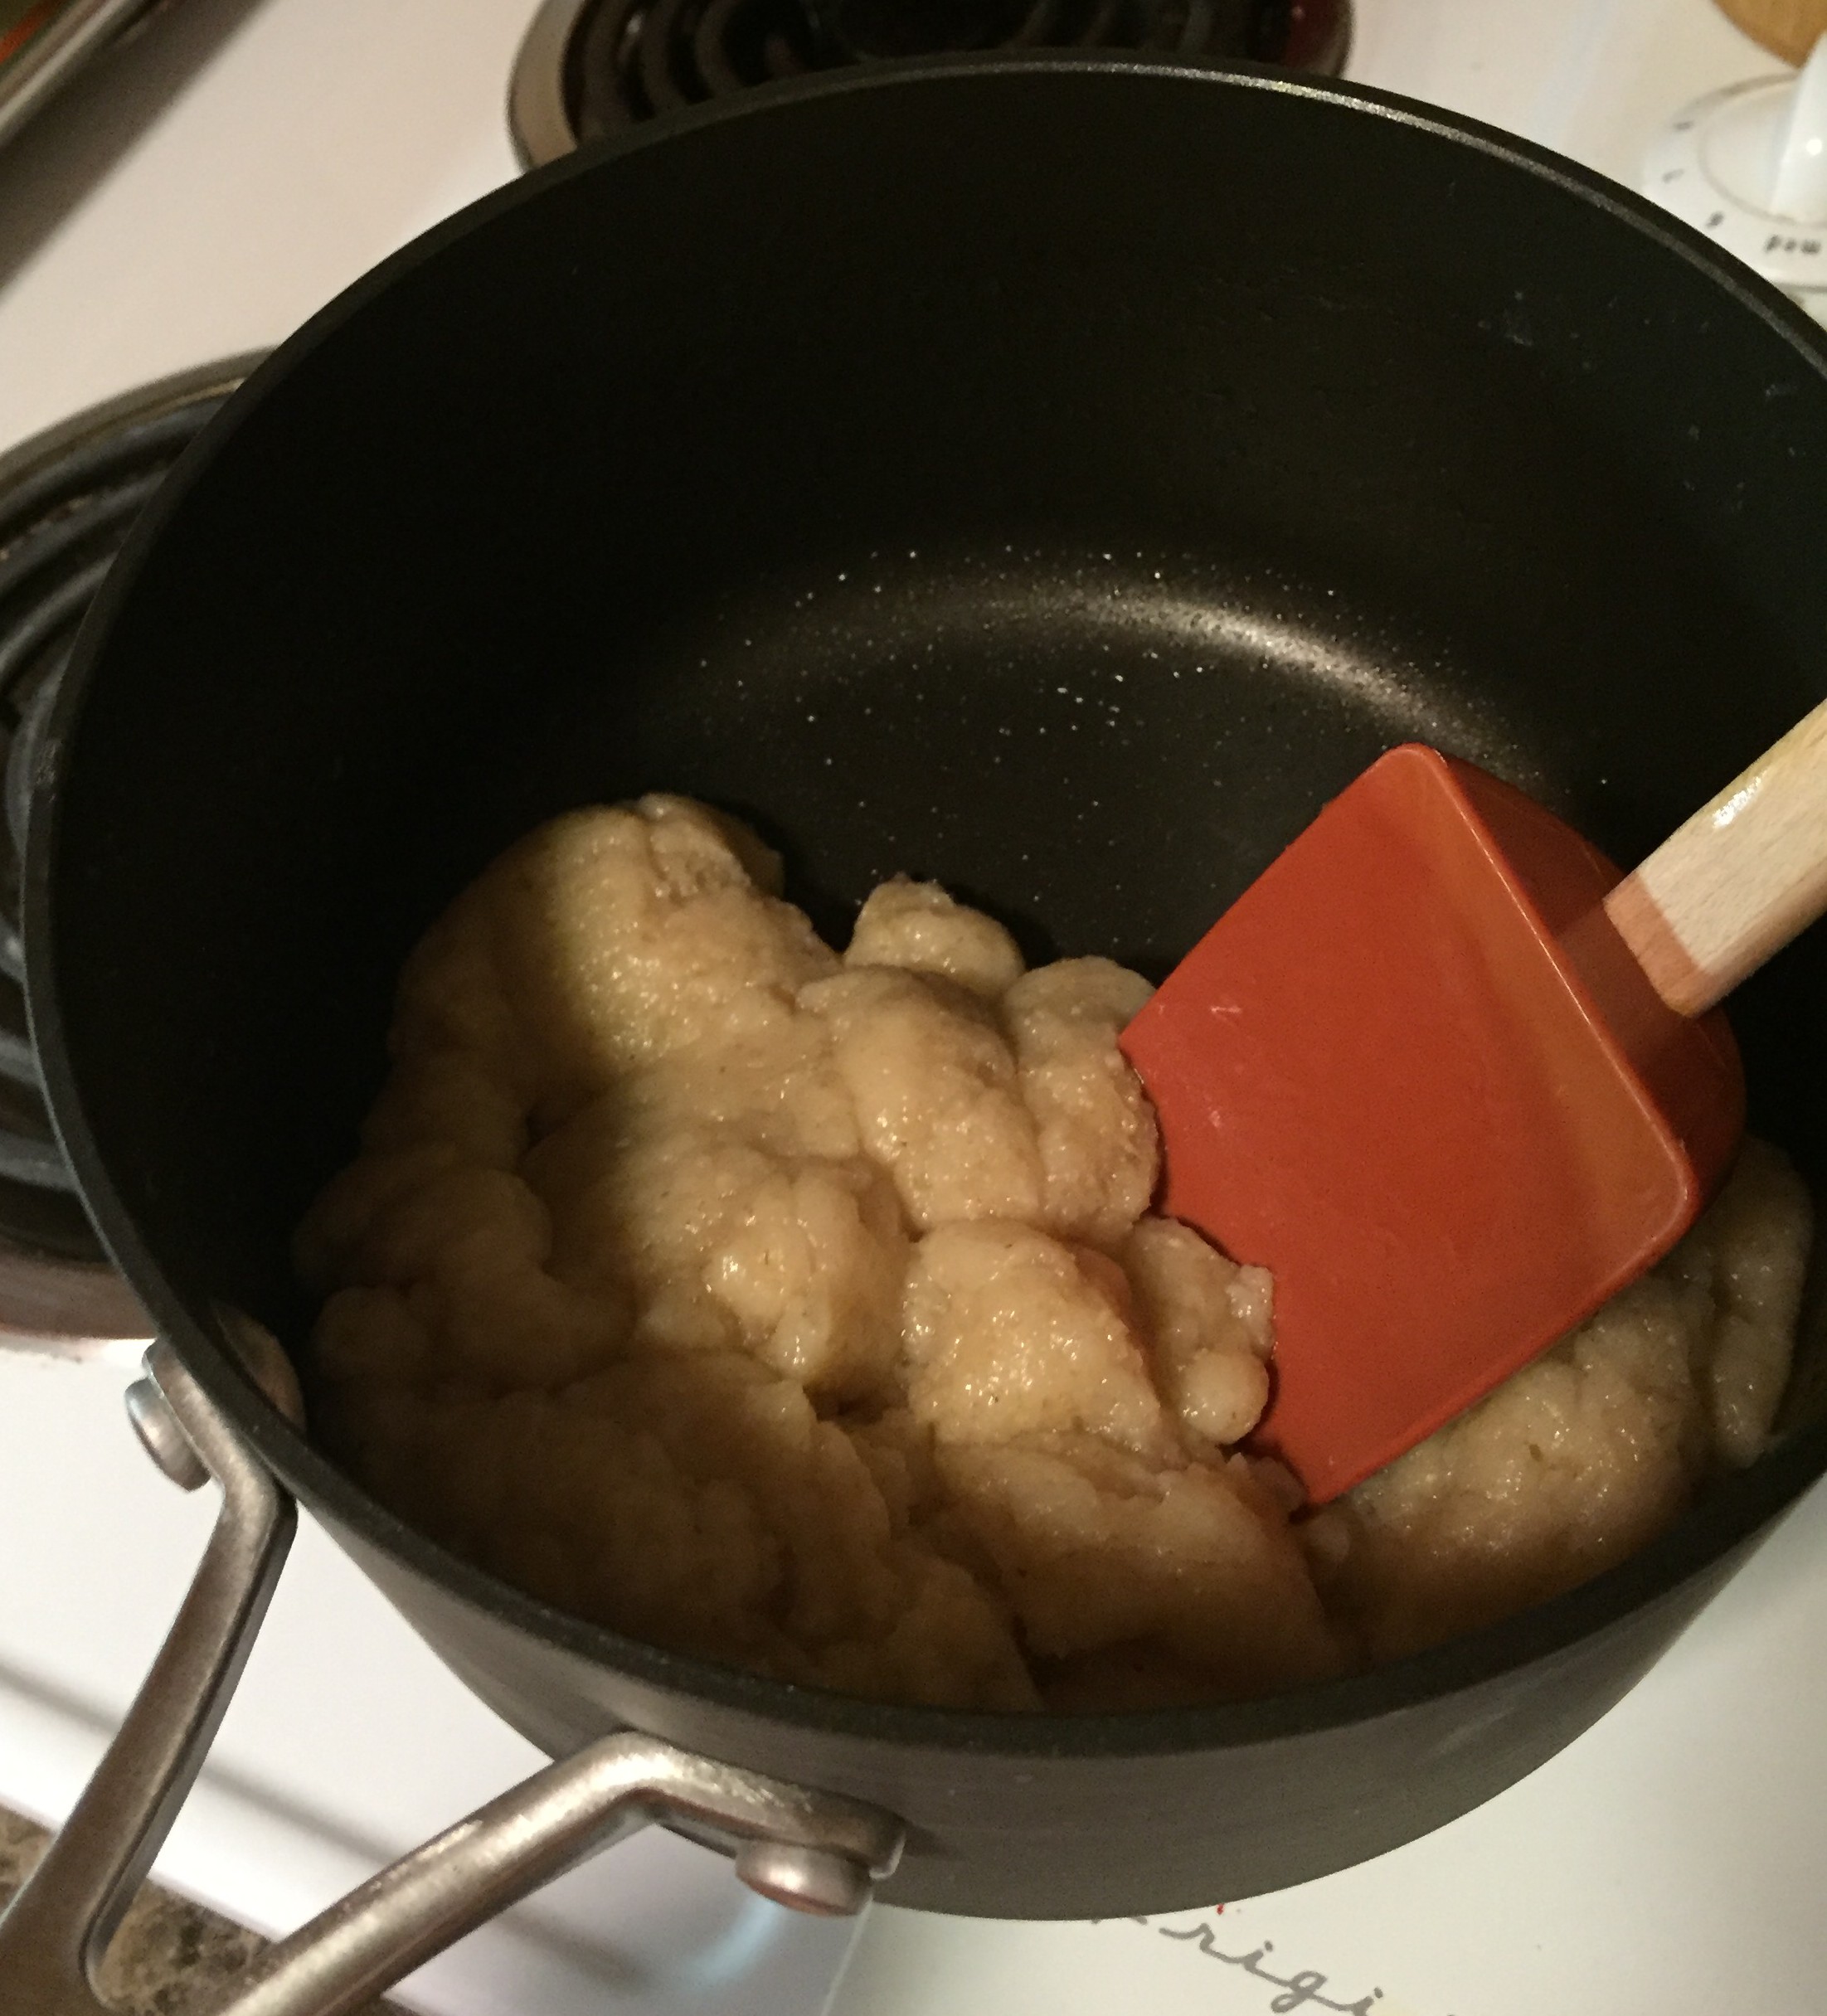
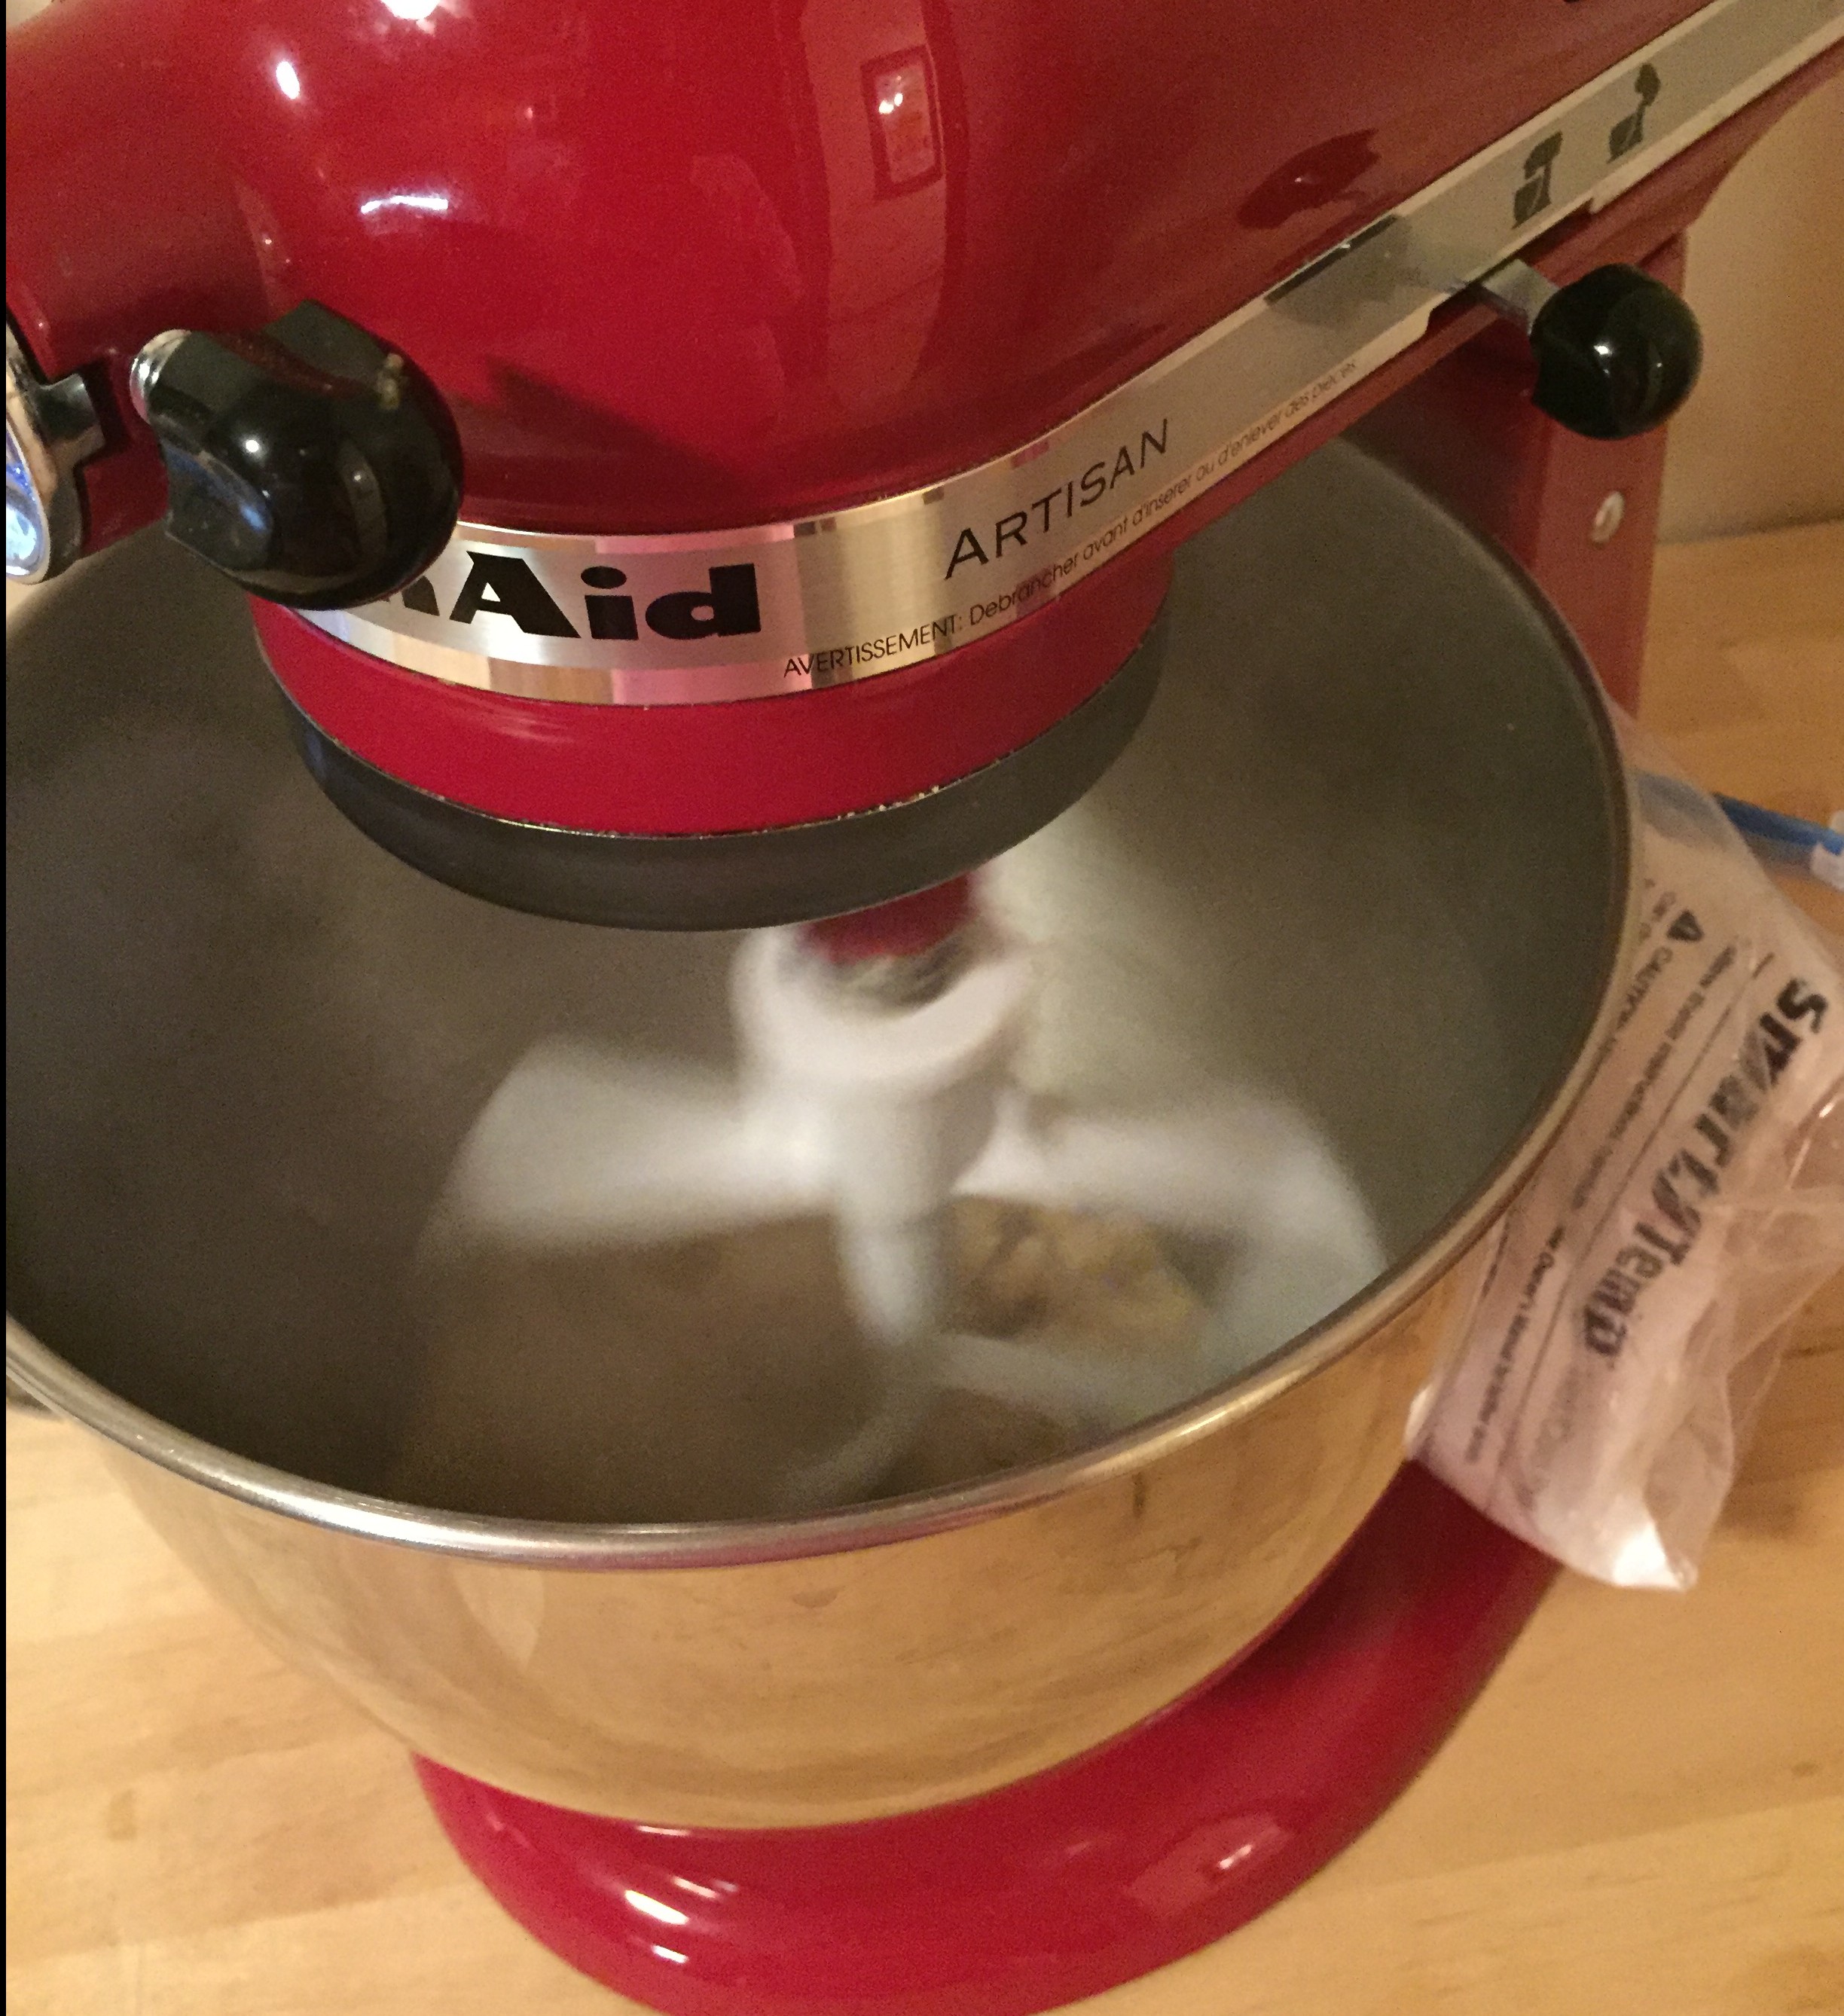
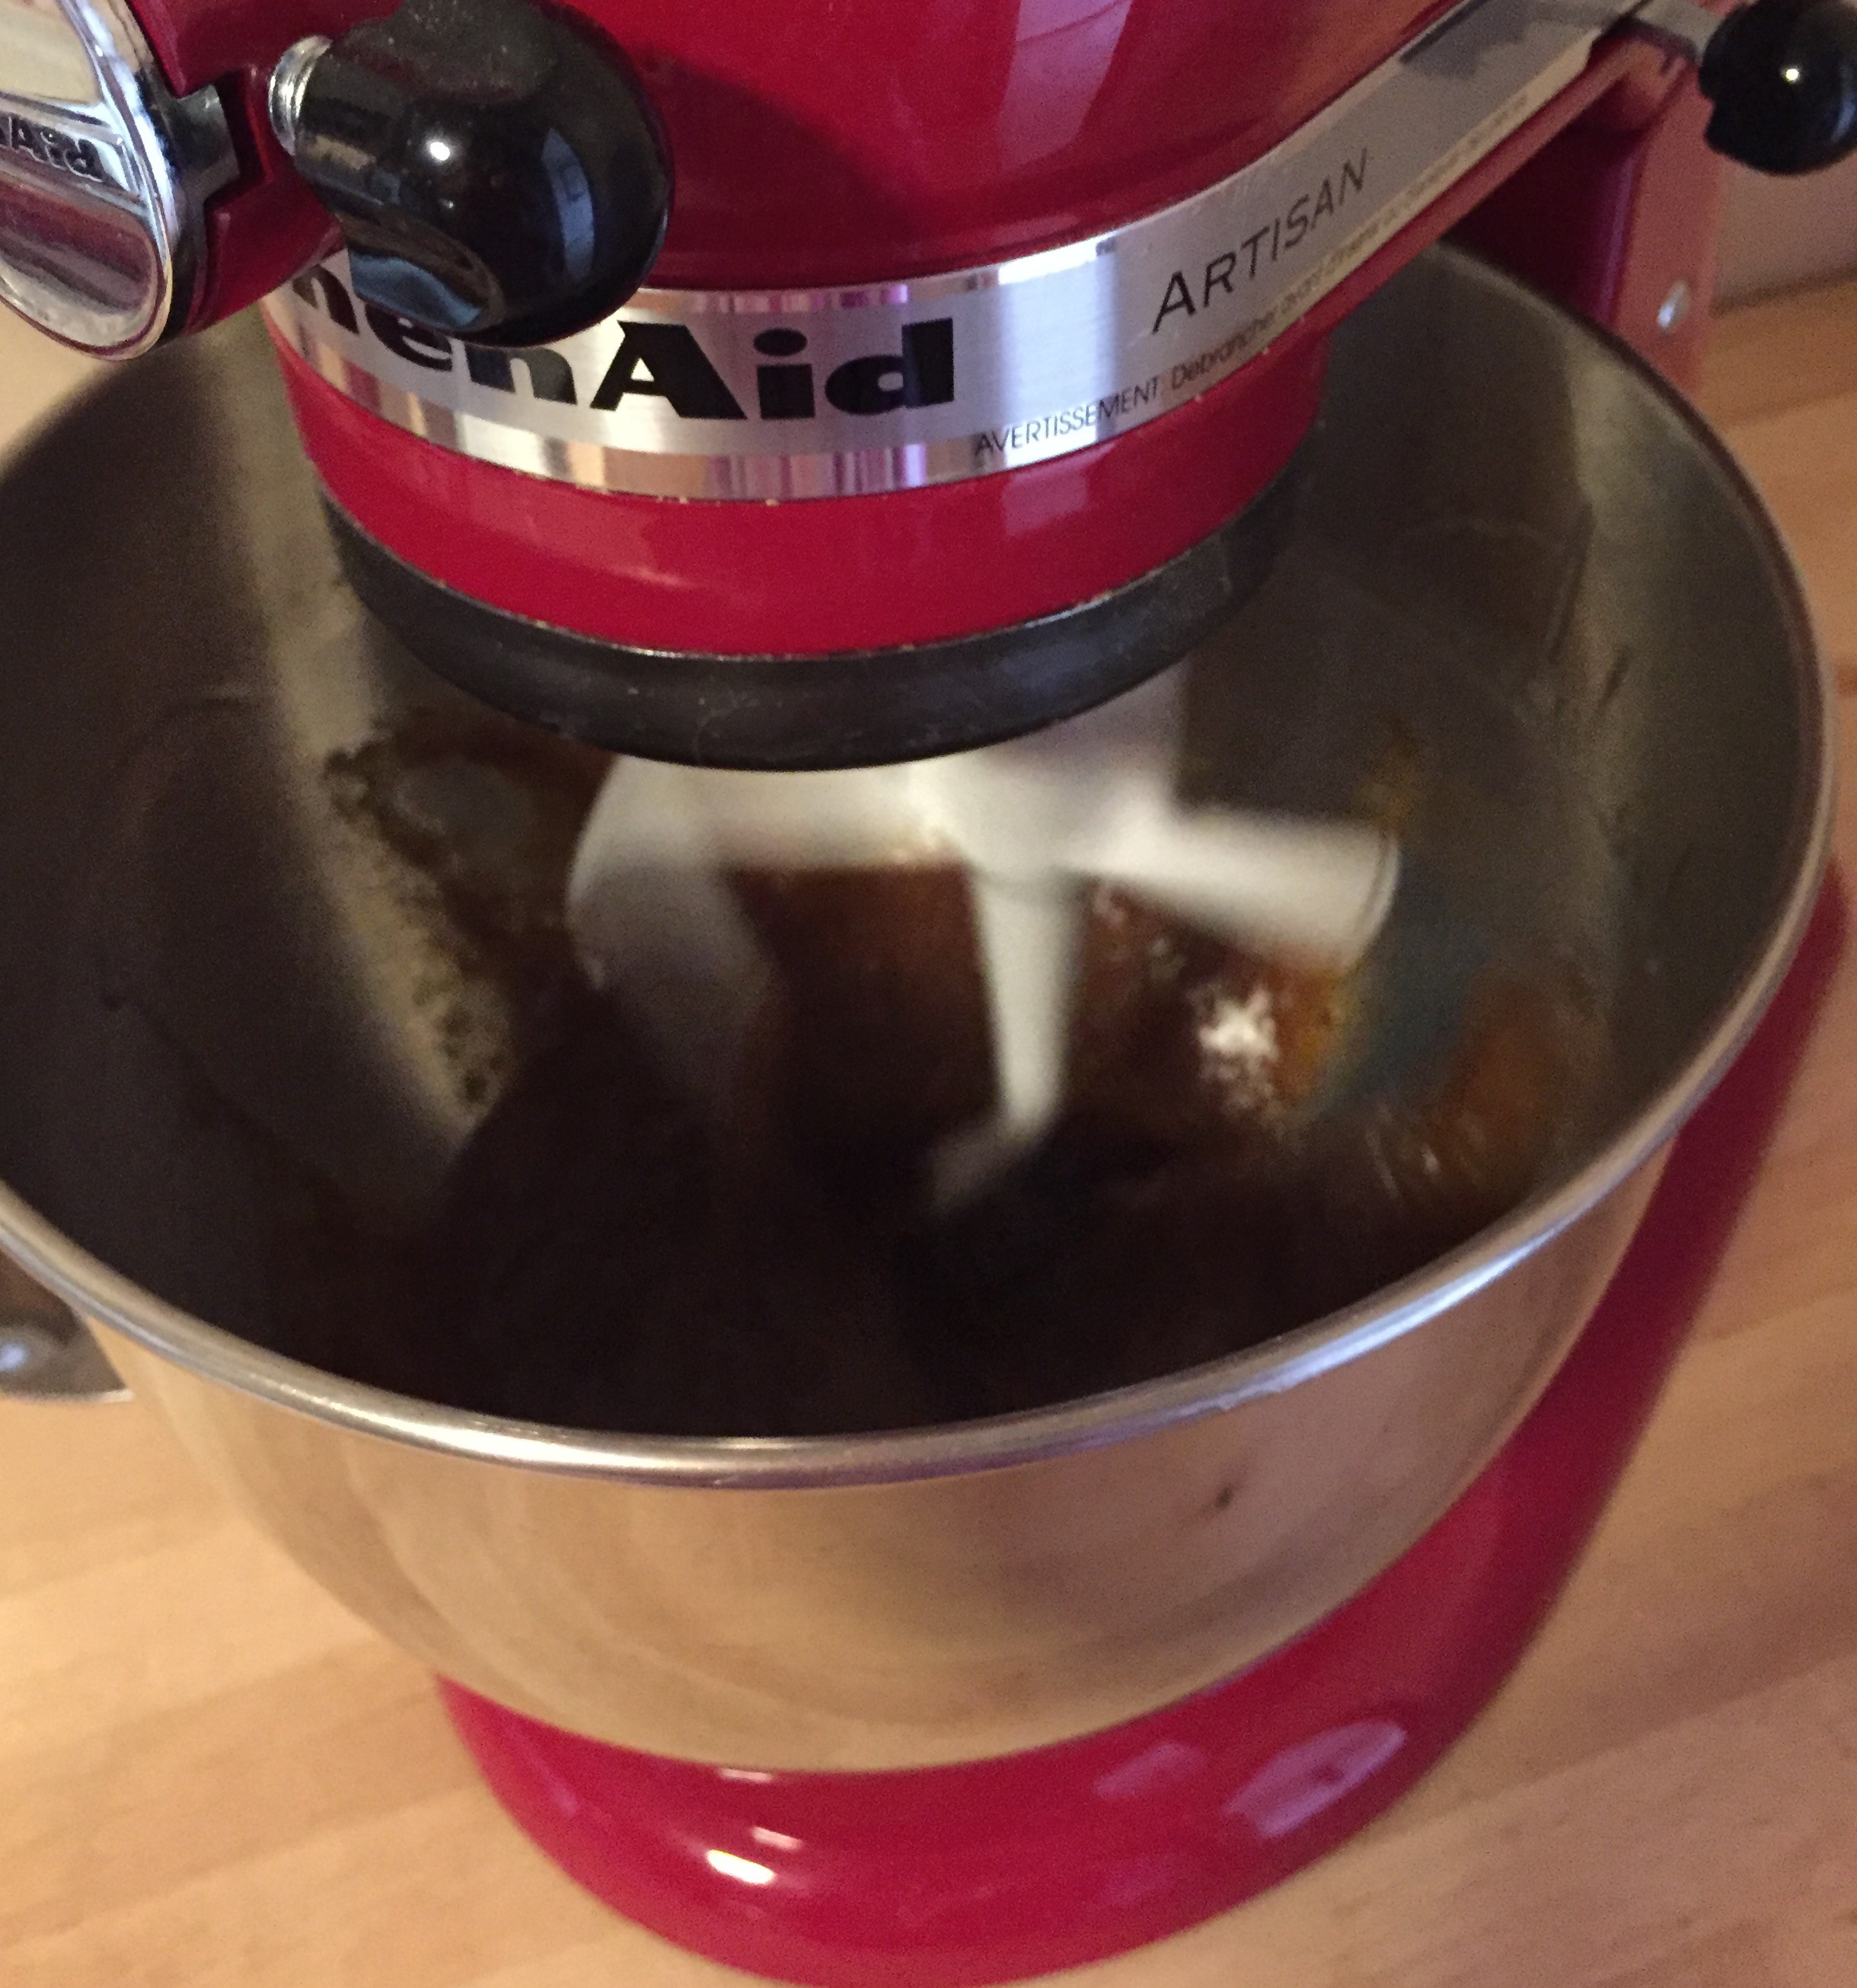
  • Add all wet ingredients to a large mixing bowl and mix well using a stand or hand mixer

Now combine the two mixtures ever-so-slowly…

  • Turning your mixer on low/medium-low, ever so s-l-o-w-l-y add your dry mixture to your wet mixture one heaping tablespoon at a time
  • Continue to add the dry mixture a tablespoon at a time until both mixtures are entirely combined and well-mixed

All that’s left is to add in the mix-ins…

  • Add in the chopped peanuts and chocolate chips and stir to combine

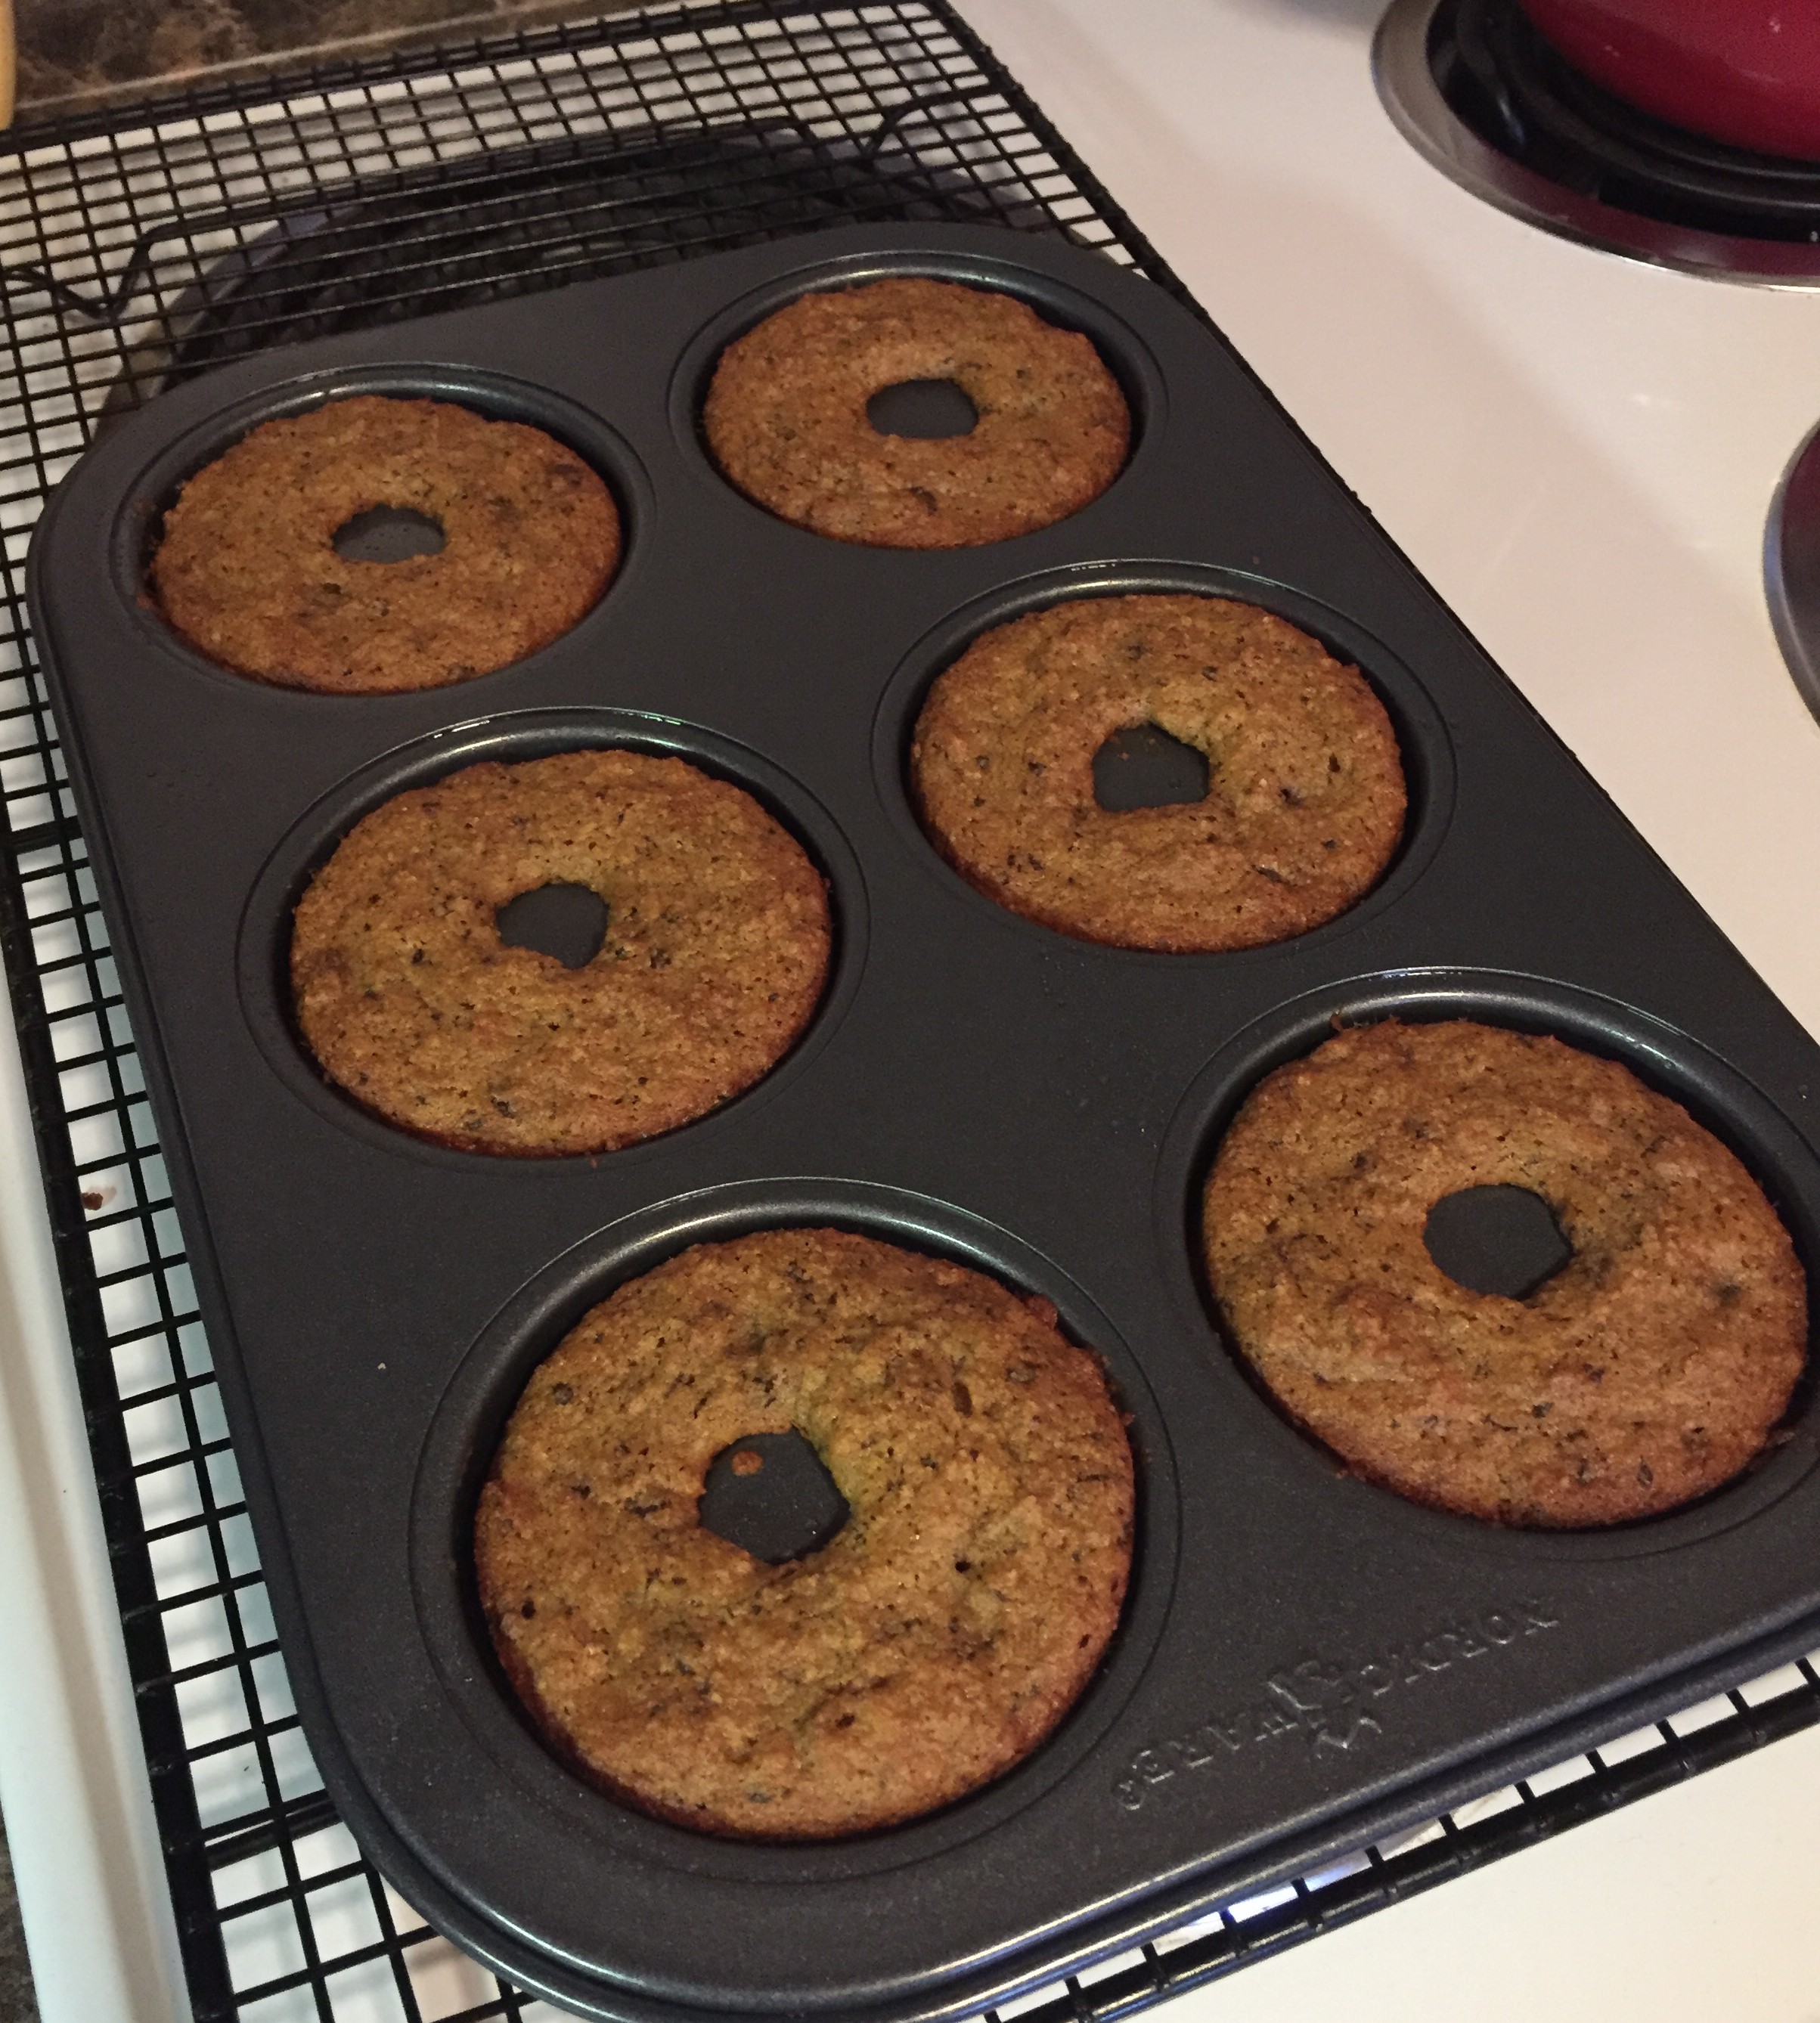
Now get these babies in the oven!

  • Fill each mini-bundt cake section 2/3rd’s full
  • Bake cakes in the oven for 25-30 minutes (or until a toothpick can be cleanly inserted and removed)

Now the waiting game…

  • Let cakes cool for 10 minutes
  • Place a cooling rack on top of the cakes and flip the cake pan upside down to invert the cakes onto the cooling rack
  • Once cool (or almost cool…let’s get real), ENJOY!
  • Cakes should be stored in a loosely sealed (read: NOT AIR-TIGHT) container or zip-top bag
    • Why, you ask? Well, almond flour makes a very moist cake base…you need to give it some air so it doesn’t become so moist that it’s mushy. That would be no bueno.

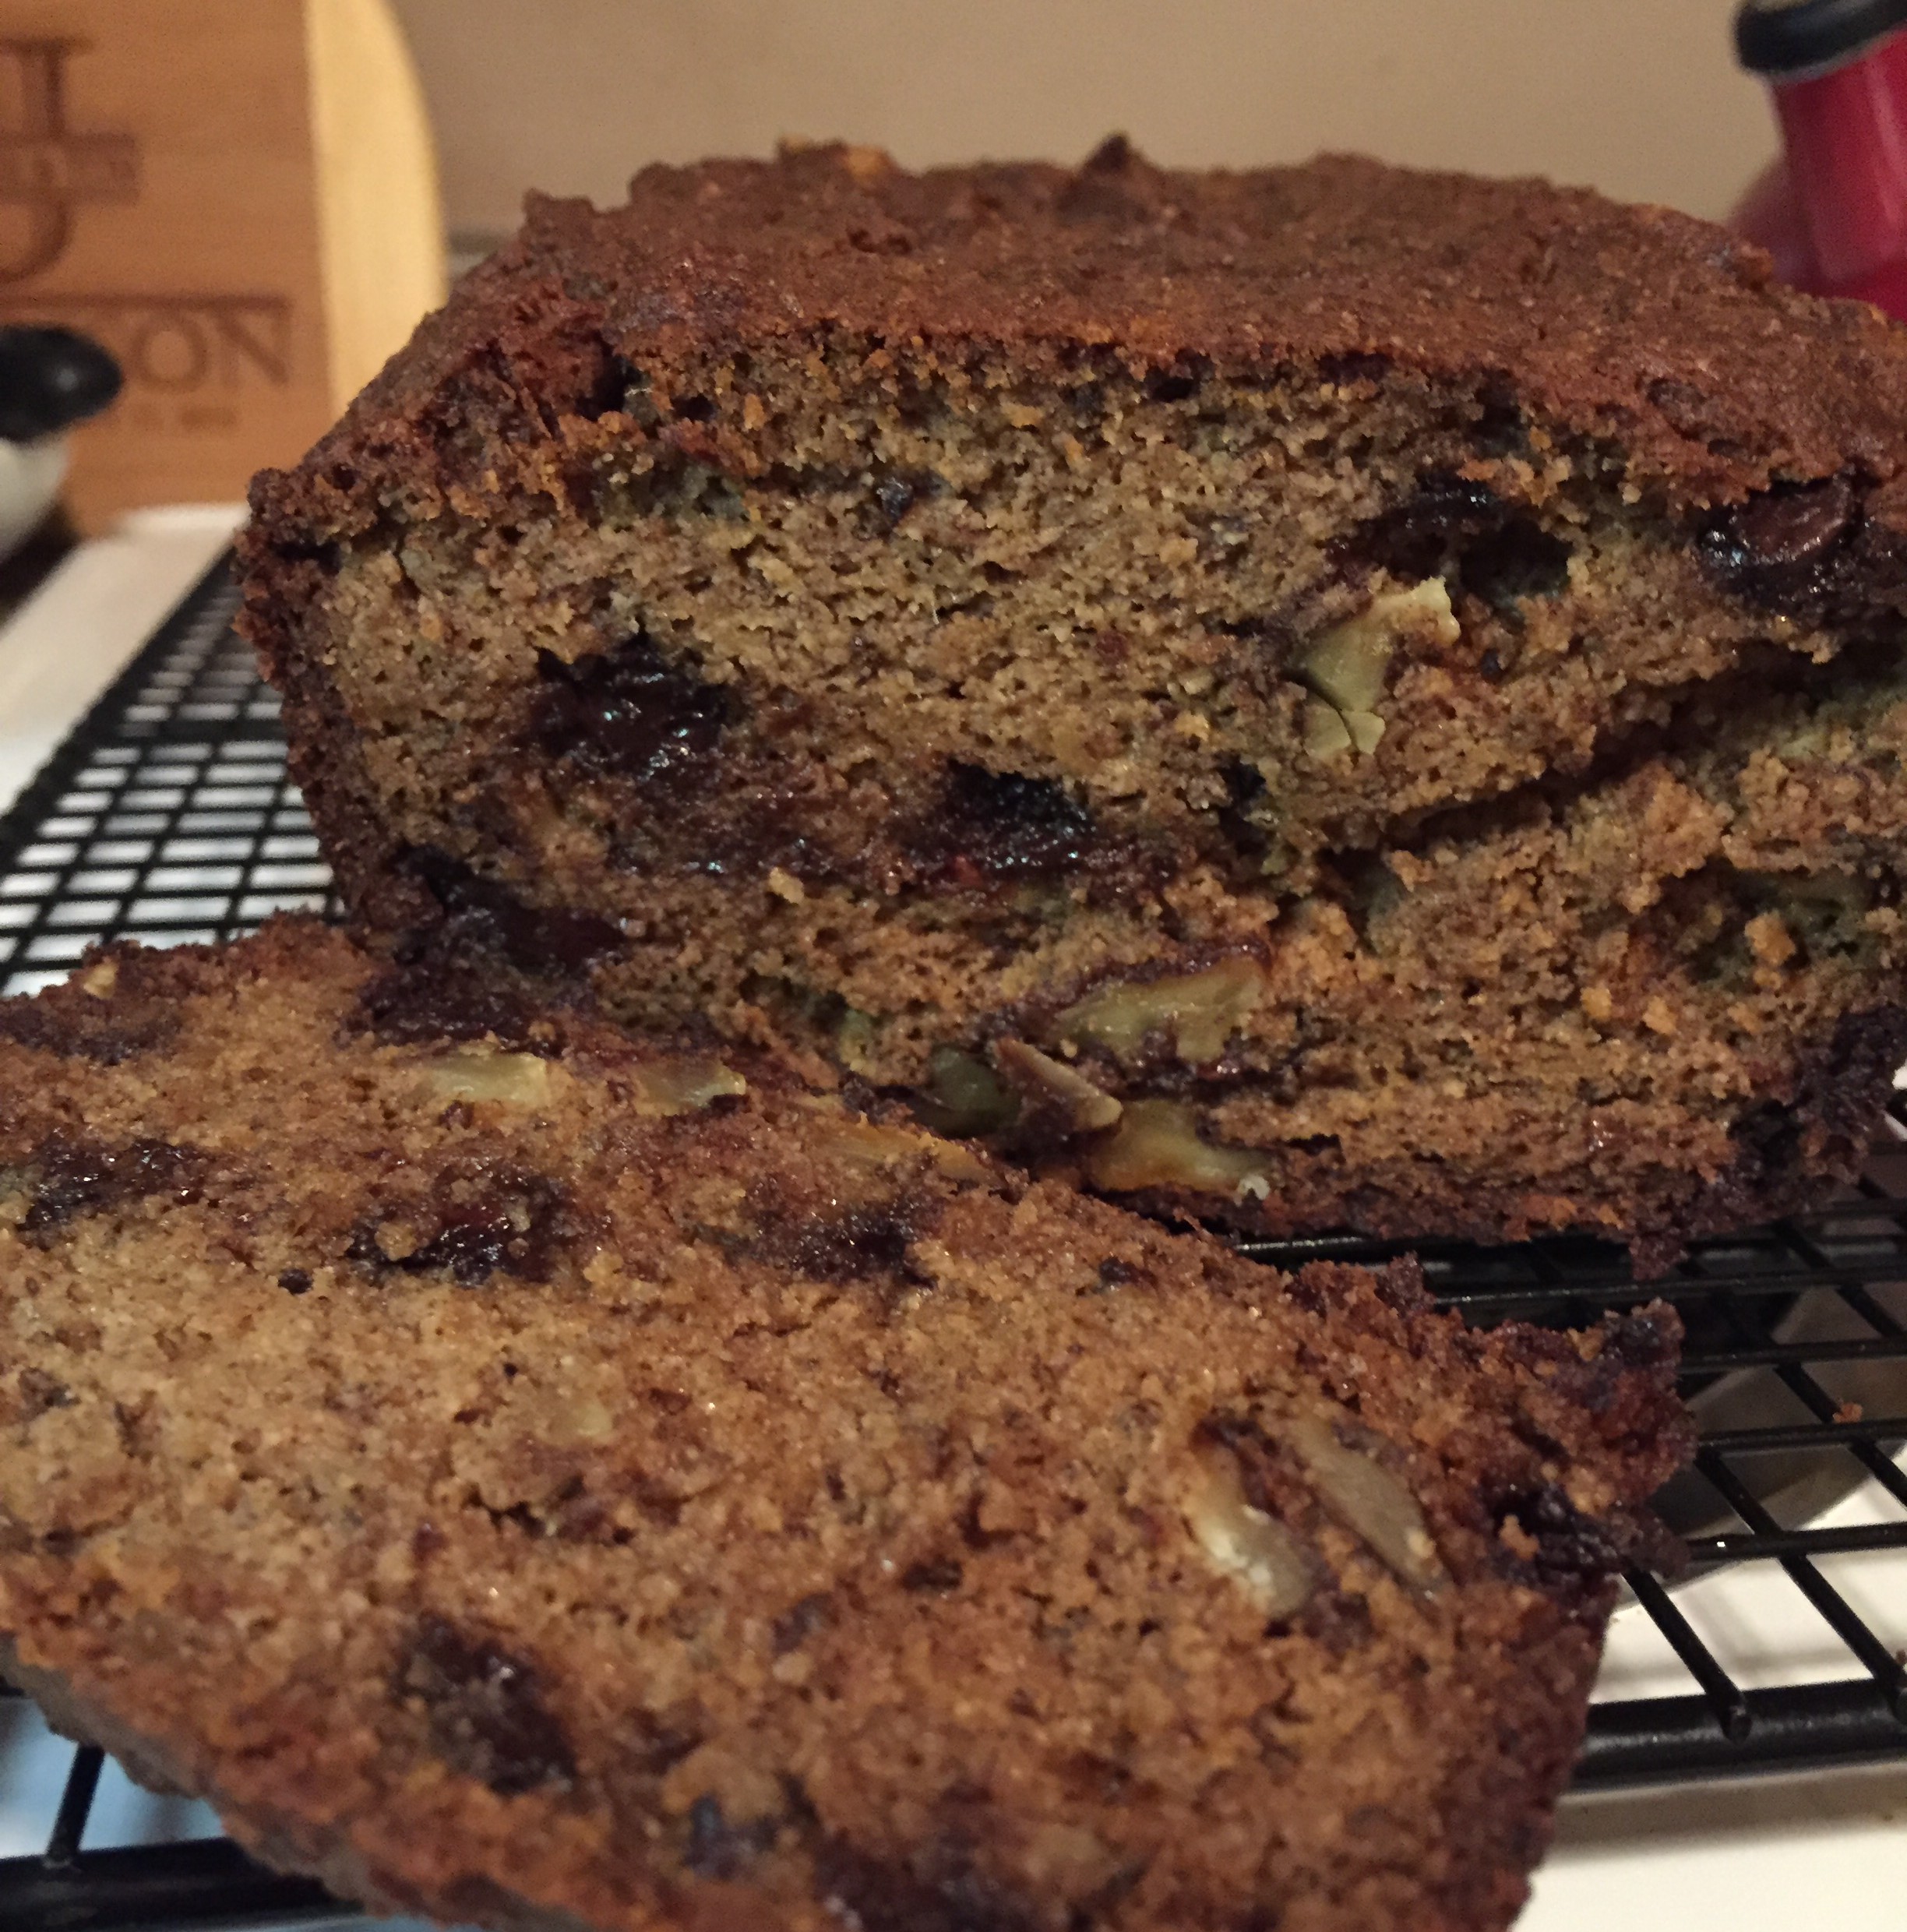
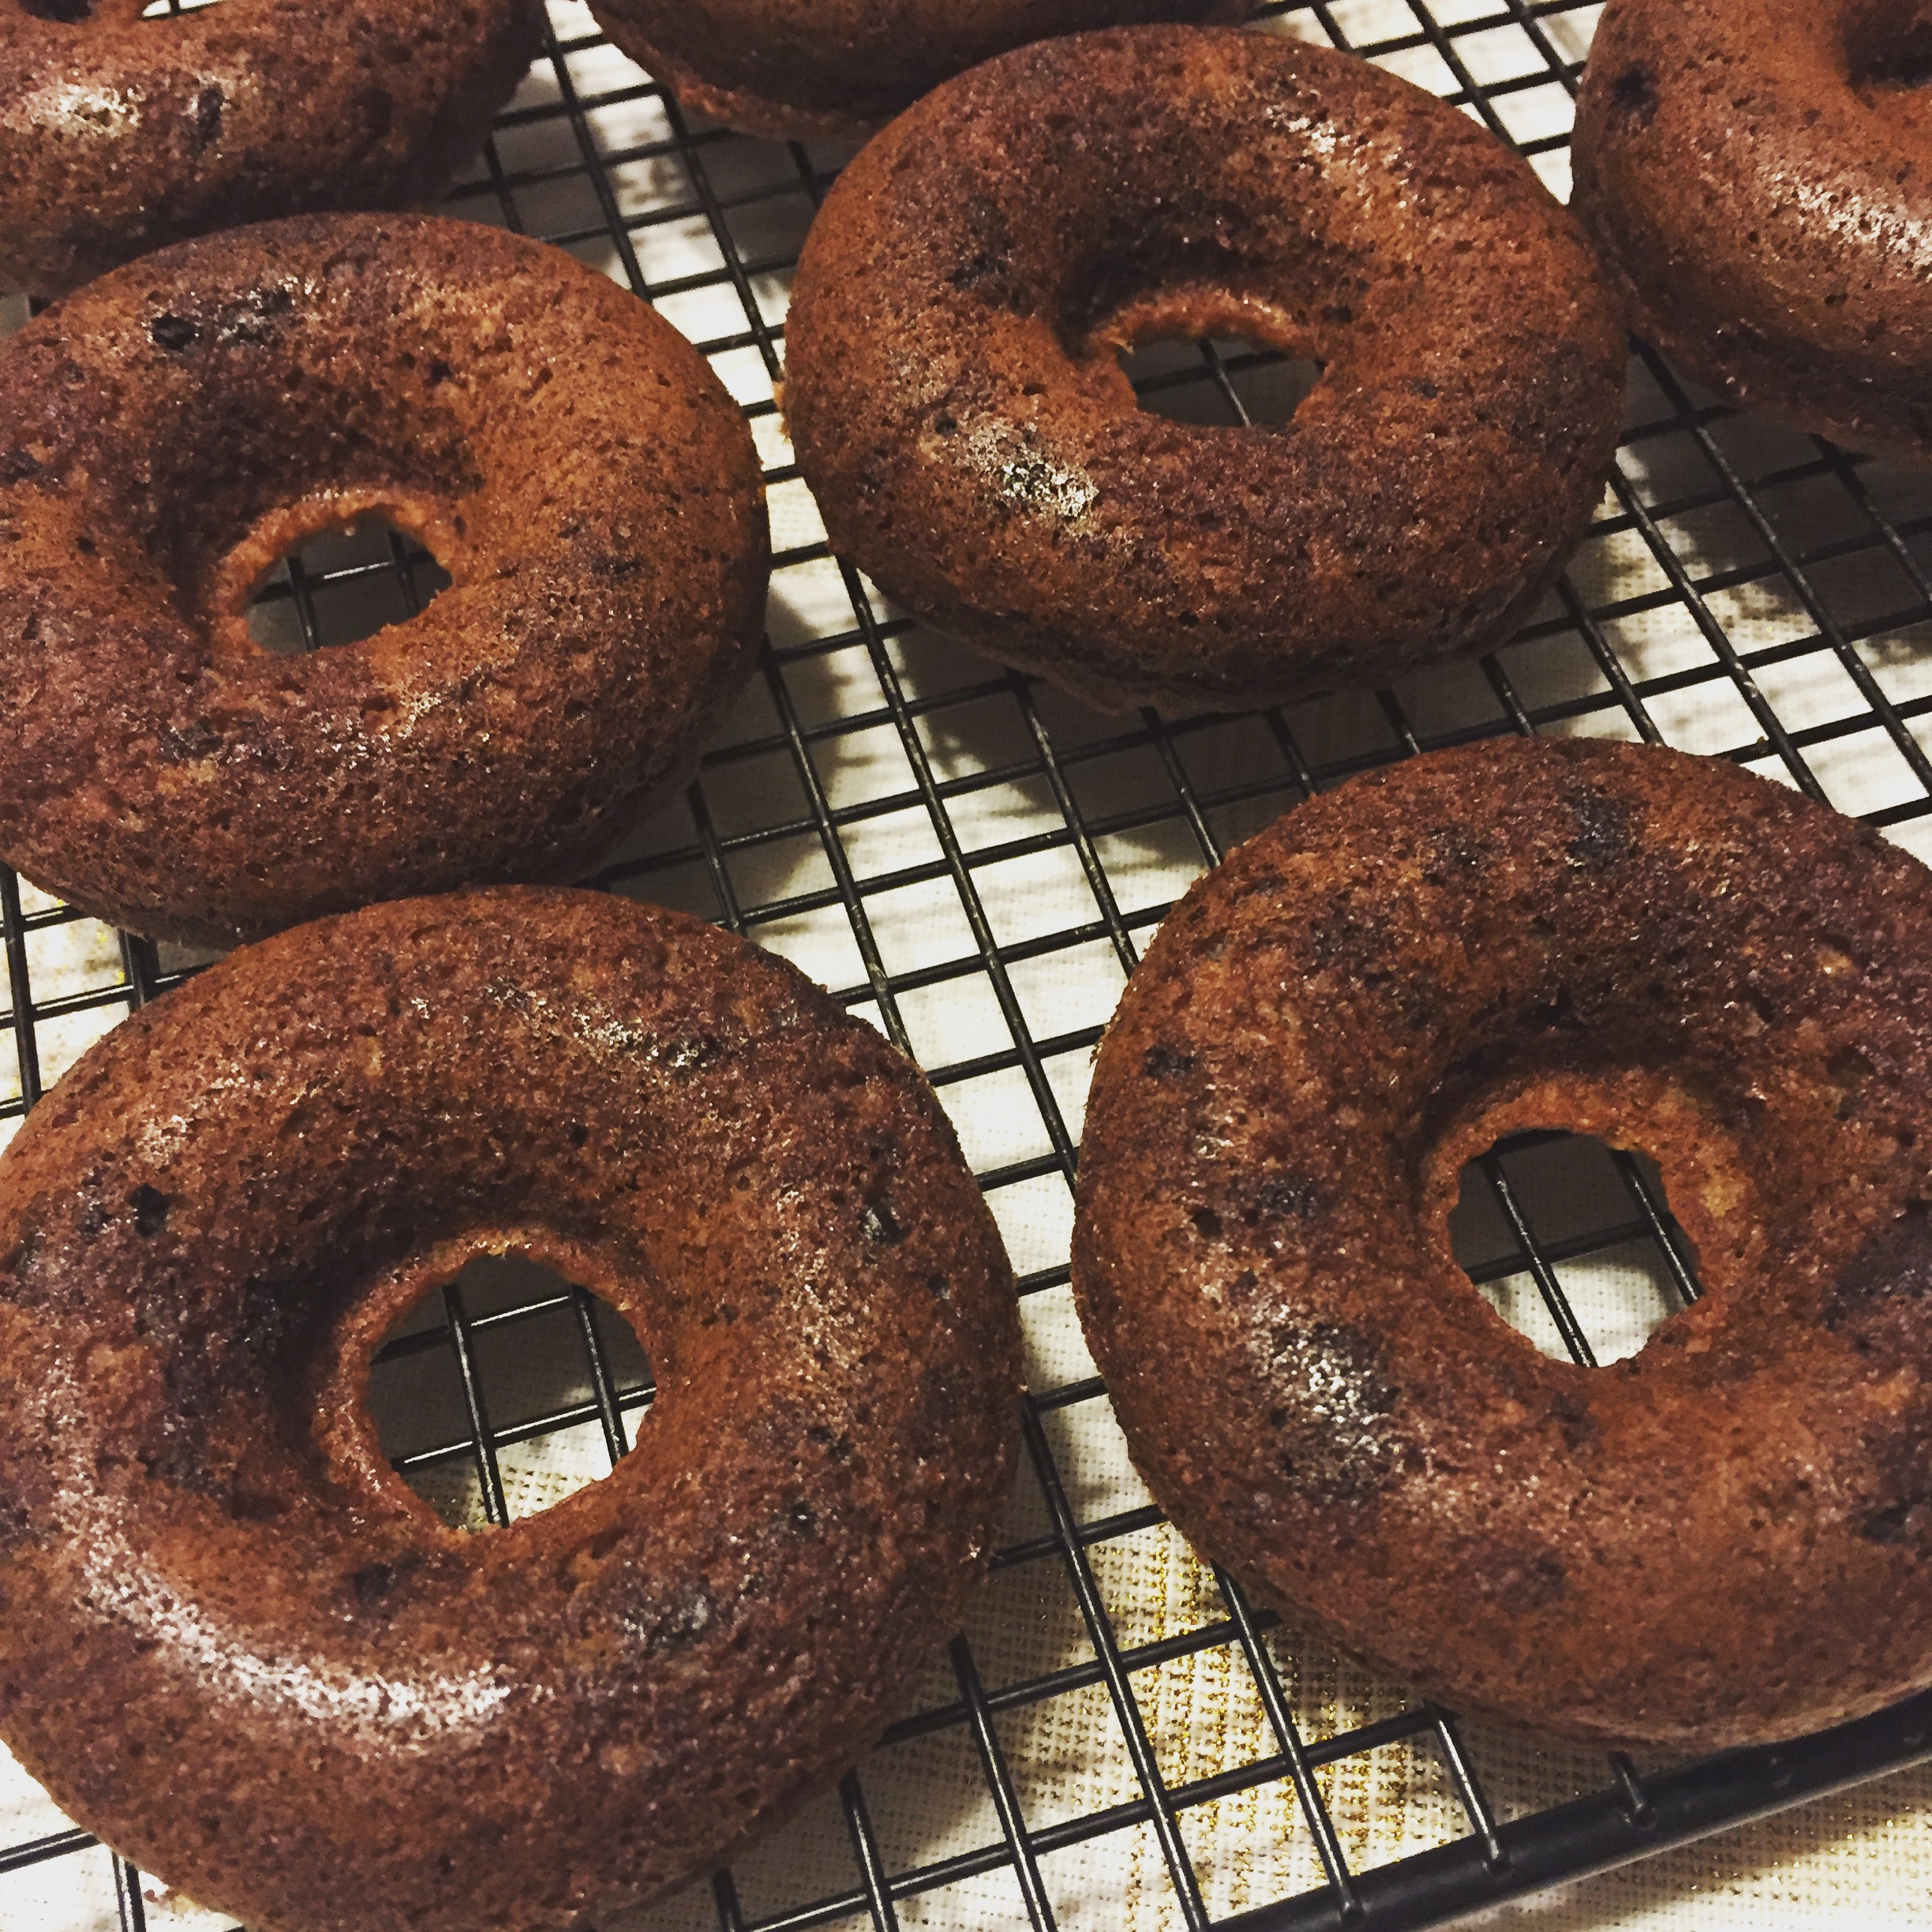
To put it simply, this cake is everything a cake should be. It’s moist, it’s chocolatey, and smells absolutely divine.

IMG_2910

After you take a moment to admire the beauty of your perfectly-portioned personal mini-bundt, the first bite is killer: you get a burst of chocolatey-goodness right away, but then as you continue to eat the flavors of the peanut butter and the banana shine through. And then, just before your swallow and just as you ask yourself “Am I in heaven?“, you get a brief taste and crunch of semi-sweet chocolate and a slightly salty peanut that enhances the flavor profile of the entire bite.

At the time, this cake was exactly what I needed. I know this cake is nothing particularly fancy, but there’s power in creating something from scratch and seeing it blossom into something delicious you can share with others.

On top of that, as I sat down to enjoy this cake with Tom over a glass of ice cold milk, we savored not just the cake but the time to take a deep breath, forget our worries for a moment, and be truly present with each other.

IMG_3054
my new form of meditation: take a breath, take a bite, take a breath, take a bite…

While things didn’t get better at that exact moment as I took a bite of cake, they did get betterMy mom had her lumpectomy and found out she was cancer-free (#hallelujah) and at the moment will only need to attend frequent cancer screenings. My weekly injections seem to be helping and hopefully will get my blood cell levels where they should be over the next year. And as for that job? It turns out that while the team does so awesome work, I truly don’t think I’d be as happy in that role as I am in my current job–a job where I actually get paid to design programs and grant Target’s money to help people live healthier lives.

So while I don’t give all the credit to the cake–it’s obvious that time and a lot of faith got me where I am today–I do think that the moment of calm and joy given to me by this cake kick-started my journey to feeling the way I do today.

In short, what I’m trying to say is this: the power of some homemade chocolate cake should never be underestimated.

So, whether times are good or bad, happy or sad–make some cake for you and your loved ones. Put simply, just let them eat cake. You’ll be surprised what good a bit of homemade cake can do you.

Here’s to making many more culinary compromises…all in the name of love.

xoxo,

alaina


a good deal more

IMG_2835
our version of what to make with leftover ham: delectable split pea soup chock full of ham, veggies, and FLAVOR

I love a good deal.

Now, to be clear, I am not a crazy coupon lady. I ain’t got no time for that…nor do I have a newspaper subscription or own a printer (#millenial). But that being said, I do leverage Target’s Cartwheel app*, weekly sales, and a little bit of retail know-how in our weekly meal planning.

cartwheel
this little icon can save you BIG $$$

{Note: If you don’t use Target’s Cartwheel app you are MISSING OUT. I’ve heard a lot of people say that it’s too much of a hassle to scan/search out items to get a typical 5%-10% discount, but we frequently use offers for up to 50% off AND they just added manufacturer coupons for $ off to the app. Also, if you have one person scan & one person shop it’s beautifully efficient…and you know I love me some efficiency!}

Why do I do this? Because nothing beats the rush of getting a super good deal on nutritious food to feed our little family…and because there is nothing little about the size of my husband’s appetite.

Now here’s the extra fun part–if you just put on your retail merchant cap (which who DOESN’T want to do that?!) you can really save even more in your weekly grocery shopping.

For example:

  • Stock up on baking items between Q4 (November/December) and Easter–this is when you’ll find the best deals on flour (even almond flour!), raw nuts, and BUTTER*. These items really don’t go on a decent sale outside of these time frames…and the nuts and butter freeze super well!
    • I regularly get made fun of for getting giddy when a pound of butter comes down to $2.50. Knowing it was the last time it would be on sale for a while I may or may have not have bought five pounds of butter during Easter peak week. I mean, TWO FIFTY, PEOPLE! Normally it’s around $5! STOCK UP!
butter
If you bake, you always need butter. ALWAYS.


  • Stock up on grilling items (ground beef/ground turkey/burgers/hot dogs/buns) during May through July and freeze it. These items last for months in the freezer–and then you’re set for when you need some ground turkey for chili once it gets colder out!
    • This timeframe is also the best time to buy ice cream. Regular pricing is usually already lower than other times of the year, and you can find some screamin’ good deals around 4th of July. And guess what? A little bit of ice cream is good for the soul #treatyoself


  • Wait until peak holiday weeks to purchase your food for a holiday meal–you may think you’re getting a good deal on your Thanksgiving turkey two weeks prior, but most retailers offer their hottest deals the peak holiday week (or even offer deals like “Spend $50 on food, get a $10 giftcard)


  • And finally, keep your eyes peeled for CRAZY deals on seasonally-sensitive bulky items post-holiday–you can frequently get deals at LEAST 40%-50% off normal retail price (ie: watermelons post-4th of July/Labor Day, turkeys post-Thanksgiving, and hams post-Easter). A retailer never wants to run out of these key items for a holiday, so they tend to over-order. This means there will almost always be some product leftover that they cannot fit in their backrooms due to its bulky size.

This last tip is what got me last week–50% off a spiral-cut ham.

Now, there may be a reason I get teased for how excited I get about getting a good deal…

Exhibit A:

  • Tom sends me a picture of his AWESOME seats at the Wild game
  • I send him a picture of our fridge
hamexcitement
bless him for marrying me…seriously.

Now I know that everyone is usually hammed-out post-Easter, but I don’t think Tom could ever turn down a ham sandwich on pumpernickel bread with all the fixings…nor could I. I knew we would be able eat this huge ham eventually…I just didn’t know how to keep us from eating it immediately in the form of delicious sandwiches.

And while sandwiches are pretty great, I have to be careful about the amount of bread I eat (for me, carbs–> sugar–> diabetic blood sugar spiking= no bueno), so I needed to get creative in ensuring that we could use the remaining nine pounds of ham (or at least some of it!) in a way that we could both enjoy without worry.

So…where’s the compromise?

Here’s our answer:

  • Lean on my grandma’s traditional split pea and ham soup recipe, but eliminate the sugar and increase the amount of naturally-sweet carrots in the base to maintain a hint of sweetness
  • Significantly increase the amount of vegetables (celery, onions, carrots, and, of course, peas!) found in a traditional split pea soup–upping the nutritional value and making the soup base hearty enough for a 26 year old man’s appetite
  • Elevate the flavor profile by using bay leaves, thyme, and crushed red pepper to make this healthy soup intriguing enough to keep your taste buds wanting more
  • Add lots and lots of ham…because, well, I’ve got a lot of ham on my hands!

| Post-Holiday Ham & Split Pea Soup |

Serves: 6 Tom’s or 8 Alaina’s

Ingredients Needed:

  • 2 1/2 cups water
  • 4 1/2 cups low-sodium chicken broth
  • 1 ham hock (ham bone), ideally with some meat still attached
  • 2 cups split peas
    • If you’re like me, you have no idea where to find split peas in a grocery store. They’re by the dried beans and rice! 
  • 1 large, flat sweet yellow onion, chopped
    • Remember, the flatter they are the sweeter they are!
  • 1 1/2 cups carrots, chopped
  • 1 1/2 cups celery, chopped
  • 1 bay leaf
  • 1/2 tsp. black pepper
  • 1/2 tsp. thyme
  • 1/4 tsp crushed red pepper
    • I promise this does not make the soup spicy–it just adds a bit of extra flavor!
  • 2 cups skim milk
  • 1 cup heavy whipping cream
    • Now before you freak out, this makes the soup and is something I will never change from my grandma’s original recipe. Why? I’ve said it before= fat=flavor! And this one cup of heavy whipping cream has only 150 calories, 13 grams of fat, 7 carbs, and 4 sugars. Your body needs some fat–and this is the only fat in the dish. Trust me, don’t dare leave this out. 
    • If you just can’t stand it, add another cup of milk…but I’d recommend using a fattier milk like 2% instead of skim for all the milk in the dish.
    • And also, DO NOT SUBSTITUTE GREEK YOGURT. That is, unless you like chunky bits of slightly chalky-tasting dairy be-bopping around your soup bowl. 
  • 2 cups ham, chopped
  • Salt, to taste

Directions: 

  • In a large dutch oven or stock pot, add your water, broth, ham hock, and split peas

IMG_2801

  • Bring ingredients to a boil and then simmer on medium-low for 30 minutes, stirring occasionally (feel free to cover pot)

IMG_2803

  • After 30 minutes have passed, add your onion, carrots, celery, and spices

IMG_2804

  • After stirring to combine, let simmer on medium-low for 45 minutes; stirring occasionally (feel free to cover pot)

IMG_2806

  • Once 45 minutes have passed and you’re sure your peas have softened, remove your ham hock and bay leaf
  • Your next step is to puree your soup–either by pouring soup into a blender or by using a handheld immersion blender
    • If you use an immersion blender, be SURE you do not lift it up while blending–you will have pea soup splattered everywhere!
    • If you use a normal blender, return soup to pot after you have pureed

IMG_2811

  • Once pureed, gradually stir in your milk and cream

IMG_2814

  • Once your milk/cream has been added, stir in your ham pieces and add salt for taste. Just ensure you add the ham before you salt the soup–the ham will be adding a majority of the salt that you need!

IMG_2815

  • After all ingredients have been added, cover and let soup simmer on low for at least 10 minutes and for up to an hour or two–this soup is perfect for lazy days–it’s ready when you are! Just remember to stir occasionally to avoid a top layer forming on the soup.
IMG_2817
voila! I know it’s green and that’s weird, but TRUST ME IT’S DELICIOUS
  • For serving, I recommend serving with a side of good bakery-bought rye bread (Swedish Orange Limpa is ideal!) and a side salad
    • We always try to eat bakery-bought bread if we’re going to any bread at all–it’s less processed and doesn’t include the added sugars and preservatives you find in store-bought bread. 
IMG_2830
sadly, we didn’t have orange limpa on hand this weekend…but we did have some pumpernickel!

Now I would be remiss if I didn’t note the following about the above recipe:

  1. This only used like 25% the massive amount of ham we currently have at our house…luckily, sliced ham freezes and de-thaws really well. This recipe uses the ham bone though–so put together that’s like at least 3-4 lbs of the ham!
  2. Tom had never had pea soup before and was MAJORLY skeptical of this green goop when I served it to him. If you’re a little dubious that you’re going to like this soup, I urge you to at least give it a try. It tastes like a rich, flavorful chicken noodle soup with a tomato soup-like texture. This soup is basic enough to serve to a two year-old, but it has flavor depth that will please the palette of event the most gourmet cook. And also, Tom ate two HEAPING bowls of it despite his original hesitation!
  3. It’s really, really good with bread. So even if I originally made this soup to avoid having to eat the ham leftovers with bread…just keep in mind that if you’re not diabetic you should DEFINITELY eat this soup with a slice good rye bread. It’s insanely good together….and then you can use some of that butter you stocked up on!

So even if you don’t love good deal as much as I do (and you probably don’t, which is totally okay…and probably normal), I still challenge you to head out to your favorite local grocery store this week and see what sort of deal you can get on a “leftover” Easter ham. It’s supremely easy to just cut off the pre-cut slices* and freeze whatever you don’t plan on using within the week, and then you can try this even easier one-pot soup.

{Note: Much to contrary belief, you do NOT need to use the glaze packet that comes with your ham! Save yourself the sugar…and the time it takes to apply!}

At the end of the day, we all want to feed our family healthy meals that will nourish both their bodies and their soul. Even if you’re one of the supremely lucky individuals in this world who doesn’t have to worry about finding a “good deal” to be able to afford nutrient-dense food, it never hurts to have a recipe in your back pocket that can allow you to feed your family a good meal at a good price.

So while Tom still may not agree with me that my deal on a ham was as awesome as his seats at the Wild game, I know he appreciates this approach that we take to feeding our family. Although we are almost always purchasing the traditionally more expensive non-packaged/non-processed foods, we are thoughtful about how much we spend and how we spend it.

Why? Because there’s lots of people in our world and in our own backyard that can’t afford to eat in a way that is nourishes their body. We can gain empathy by reminding ourselves of this while we are running around town doing our monotonous weekly errands and maybe even potentially thinking about either donating the money we save, donating items to our local food bank, or donating our time to an organization like  Feed My Starving Children.

packing for fmsc
ps: if you are interested in volunteering at feed my starving children, you should definitely let us know! tom and I would love to join you! here’s a picture from the last time we went…we promise it’s fun!

So while I hope you enjoy our latest culinary compromise, I also hope I can give you some food for thought. Tom and I feel so blessed that we even have the opportunity to access and afford healthy meals for our little family of two, and we never want to forget how there are so many others in this world who don’t have this same luxury.

And even though there are just two of us and we can’t tackle this reality by ourselves, we can still do a good deal more than we think to help our neighbors both near and far away.

Here’s to making many more culinary compromises…all in the name of love.

xoxo,

alaina

feeling fancy

IMG_2682
our version of a a “fancy” filled treat: flour & refined sugar-free cream-puffs filled with delectable agave whipped cream!

I have a completely & totally irrational dislike of all filled-foods.

Cream puffs, éclairs, filled donuts, tortellini, even crab rangoons–you name it, I’m not a fan. 

On the flip side, I married a man who loves long-johns filled with bavarian cream more than just about any other food in the universe. I literally cringe when I watch him take a bite and wait for the inevitable yet unpredictable SQUIRT! of cream that comes popping out of the pastry…bleh!

bavariancreamdonut
I see that hole…and now I’m just waiting for the squuiiirrrrt once Tom takes his first bite

In doing my best to avoid extensive therapy to understand why I dislike filled-foods so much, I have three theories for why I avoid these food items like the plague:

  • I don’t like the unknown-ness: I like feeling in control (very Type A, I know) and I don’t like feeling like I don’t know what I’m about to eat. Sure, the nice bakery counter lady said it was filled with a nice simple raspberry jam, but what if it’s almond-flavored cream?! This is simply a risk not worth taking.
    • It would be remiss if I didn’t note here how much I hate almond flavoring. Yes, I said it: HATE. My grandmother has told me repeatedly that this makes me a terrible Scandinavian, and I understand that this is just something I am going to have to live with. The overly-sweet floral nuttiness of this disgusting flavor makes my stomach churn. Even the smell makes me feel slightly sick–which is rough when you went to a college with a Swedish heritage that used almond-scented dish soap in all their campus buildings. It was torture.
almonddishsoap
I can smell this soap just looking at it ::shudders::
  • I don’t like the texture mix: This seems like slightly less of reason, but it is true that the odd texture differences between what you’re eating (ie: a flaky, yeasty donut) and what it’s filled with (ie: cold, wet, gelatinous goop) is a bit unsettling. My mouth is like “I thought we were eating a donut, what’s with this creamy stuff? Are we supposed to chew this or just swallow?
  • I don’t like the mess: I don’t care if your 5 or 95–eating filling things almost always means some of it is going to end up on your shirt.

Now despite all this uneasiness regarding filled baked goods, Tom and I have been watching a lot of baking shows this winter. All of the “Baking Championships”, The Great British Baking Show, The Great Holiday Baking Show (not nearly as good as the British version, just saying!), Cupcake Wars–the list could go on and on. Basically, if it involves competition and an oven we’ve watched it.

Throughout our many hours of viewing of these competitive food shows, I began to have a fascination with pâte à choux, (pronounced pat-a-shoe for the non-French speakers out there like me), the light pastry dough that you make cream puffs and éclairs out of. While I didn’t like eating these items, I was enamored by this versatile pastry dough that you start on the stove (say what?!), bake in the oven until it blows up like a balloon, and finally turn into fancy-sounding things like profiteroles and croquembouches.

After more thought, I realized that if every competitor on the baking shows Tom and I love makes pâte à choux, I figured I better get on board and figure out how to make them myself for when I eventually fulfill my lifelong dream of competing on Food Network. Although I was still dubious re: eating all filled things, the fact of the matter is that I married a man who is obsessed with them…or at least their cream filling. So, knowing that at least someone would eat whatever I came up with, I got to work.

Being that it’s me, I began a hunt for a more diabetic-friendly pâte à choux recipe.  I hunted high and low and found a lot of odd recipes that claimed to be “healthy” but then still had refined flour and sugar. I finally stumbled on a recipe that used ground oatmeal instead of flour (crazy, right?!) and that’s what I used as a starting point when I started getting crafty in the kitchen. A few (dozen) collapsed cream puffs later, I finally, finally came up with the below–a just-sweet-enough cream puff that’s both flour & refined sugar-free.

But remember, this was a recipe that I was making for Tom to eat–so it couldn’t taste like a sneakily healthier knock-off of his favorite bavarian cream-filled donuts. It had to be rich, it had to be sweet, and it had to be filled.

So…where’s the compromise?

Here’s our answer:

  • Ditch the white flour (and add some whole grains!) by utilizing ground oatmeal for the base
  • Use natural agave syrup instead of refined sugar or a fake sweetener to keep it sweet yet diabetic-friendly
  • Fill it with lots & lots & lots of homemade whipped cream that only has three ingredients: heavy cream, vanilla, & (you guessed it!) agave syrup

| Feeling Fancy Cream Puffs |

Serves: 8 Tom’s or 16 Alaina’s

Ingredients Needed:

  • 1 cup water
  • 6 tbsp. butter, salted
  • 1/2 cup oatmeal, finely ground
    • Use a food processor or coffee grinder to get the oatmeal ground finely enough
  • 3 tbsp. corn starch
  • 2 tbsp. non-fat milk powder
    • Similar to my hot cocoa recipe, I really recommend the Market Pantry brand–although any other brand (like Carnation) works as well!
  • 3 eggs, beaten
  • 2 tbsp. light agave nectar
    • Simply Balanced is my favorite brand–it’s sweet but doesn’t add flavor (super key!)

15080303

Directions:

First up, get everything prepped (this makes your life easier in the long run!)…

  • Preheat the oven to 400 degrees F
  • Place the bowl from your stand mixer into your freezer to chill
  • Line a baking sheet with parchment paper or a silicon baking mat
  • In a medium sauce pot, add your water and your butter–set aside
  • Combine all dry ingredients (oatmeal, corn starch, milk powder) in a medium mixing bowl using a whisk or fork–set aside 
  • Combine beaten eggs and agave in a small mixing bowl–set aside 

Next up, get your dough a cookin’…

  • Bring your water/butter mixture to a boil, stirring frequently

IMG_2631

  • Once boiling, carefully dump your dry ingredients into the boiling mixture
  • Using a sturdy spoon (I use a wooden spoon with a sturdy rubber spatula tip) beat, beat, BEAT that dough until it begins to form a a doughy ball (about a minute and a half or so)
IMG_2637
your arm WILL get tired. accept this fact, but know that the deliciousness of your cream puffs will be so. worth. it.
  • After its begun to form into a ball, remove from heat and continue to beat for another minute or so until it has a slight sheen and maintains it spherical shape

After that, get your dough a coolin’…

Note: After you are done beating the dough, it is crucial you give your dough ample time to cool before you add the eggs…you don’t want to cook them!

  • Add your dough to your chilled mixer bowl and beat on low for 8-10 minutes
    • For a little extra chill, I sometimes add an ice pack next to the bowl–anything to chill my dough faster!
IMG_2641
note sneaky icepack behind the bowl!

Once cooled, you’re ready to finish your dough…

  • Increase the speed on your mixer to medium-high and ever so slooooowly add your egg/agave mixture to your dough a tablespoon at a time (be patient–only add the next tablespoon once the previous one is completely incorporated!)
    • If your dough starts to look runny, don’t add the remaining mixture–the dough should be smooth and stretchy

Now that’s your dough is done, just get it in the oven…

  • On your prepped baking sheet use a pastry bag or a spoon to place tablespoon-sized dollops of dough about an inch apart on the baking sheet
    • If you don’t use a pastry bag, wet your finger and smooth out the tops of your cream puffs to ensure even baking (this will also create a crisper crust for your cream puff!)
  • Place baking sheet in the oven and bake for 10 minutes at 400 degrees F
IMG_2654
You may notice that there are only 13 cream puffs here…I accidentally made the puffs in this batch a bit bigger, but normally I get about 16 cream puffs out of the dough!
  • After 10 minutes have passed, reduce the heat to 350 degrees and bake for another 30 minutes
    • Do NOT open the oven until all 40 minutes of baking time have passed–your cream puffs will de-puff!
  • After your 40 minutes of baking time, turn off the oven and crack it open for 10 minutes
IMG_2655
this may seem odd, but this is super crucial to get them to dry out properly!
  • Following those 10 minutes, close the oven door and let the cream puffs continue to dry out & cool in the off, closed oven for another 20 minutes
  • After all that (I know, it’s a lot to remember!), your cream puffs are done! Remove them from the oven, place your puffs on a cooling rack, and let them continue to cool for and dry out for at least 6 hours and up to 12 hours

YOU DID IT! But, now that your “fancy” cream puffs are done, you have one of two options:

  1. Eat them as-is (unfilled)
  2. Fill them to the brims with homemade whipped cream

While I can’t believe I’m saying this, OPTION 2 IS THE WAY TO GO. When these babies are filled with my homemade whipped cream, they are to die for.

See Exhibit A:

IMG_2668
you can’t tell…but there is delicious whipped cream in this cute little puff

…and Exhibit B:

IMG_2673
SURPRISE!

…and Exhibit C:

IMG_2674
shut. the. front. door.#ahhhmazing

All you need is a mixer and a plastic bag with a metal tip (or, if you’re truly desperate, any can of whipped cream) to take this simple puffed pastry to a new level of profiterole perfection.

From a girl who hates filled things, this is saying a lot. Tom loved these cream puffs, but he also loves basically every food under the sun. When I hesitantly took my first bite of these cream puffs I was prepared for an instant dislike and the dreaded squiirrrrt of the cream to end up all over my lap. But, to my surprise, the flaky crispness of the choux pastry matched with the smooth creaminess of the whipped cream was divine. And the best part? The crust of the pastry was crisp enough that the whipped cream didn’t come spattering out all over me (…as long as I watched that filling hole, that is!)

So believe it or not…I have to admit it: I was wrong. Filled things can be delicious. Tom is jumping for joy that I’ve gotten on the filled bandwagon, and even though I’m still not quite sure if I’m ready to bite into a unmarked jelly donut any time soon, I’m at least I’m willing to try some new things.

And that’s the beauty of marriage: you grow, you change, and you develop new and expanded tastes–in food, in activities (did I mention I (try to) play broomball now?), and in the way you think.

…annnnnd you also have a built-in person who will always take that first bite into your donut to make sure there’s no almond-flavored cream inside. And let me tell you, folks: that’s love.

Here’s to making many more culinary compromises…all in the name of love.

xoxo,

alaina


feeling hot, hot, hot

IMG_2599
our version of warm beverage we can both enjoy: ready-in-under-three-minutes homemade hot cocoa that’s both decadent and refined sugar-free!

When Tom and I registered for our wedding we were thoughtful in only registering for things that we both wanted…with two exceptions:

  • Tom: OXO Storage Containers
    • I thought the tupperware we had both accumulated over the years was good enough, but Tom really wanted these containers. He was never truly able to articulate why he wanted them so badly…although I have my suspicions that it has something to do with him liking pushing the button on top to make them air-tight…
Tom's wish
I’m not kidding…the man loves these containers…
  • Alaina: Keurig Coffee Maker 
    • Although I had already had one, I had lent it to my parents to use since my roommate Birgetta already had one we could use while we lived together. Suffice to say, they loved it so much I never got it back. It was CRUCIAL to me to have a one-cup coffee maker since Tom hates coffee. And since he hates coffee, he had NO desire to register for a coffee maker. 
My NEED
This machine is necessary for my survival.

Luckily, we both got the item that we individually really wanted. Tom got his fun (?) containers and I got the lifeline to my ability to function as a human being in the morning: a COFFEE MAKER.

Beyond registering differences, Tom’s dislike (which is often more like disdain) for coffee frequently arises as a topic for discussion…especially due to the fact that I love it so much I could literally marry it (if I hadn’t married Tom first, of course!)

For instance, when we go out for our beloved donuts, I get coffee…and Tom gets orange juice. When I realize that I will not make it through our #targetrun without some espresso, I get a grande Starbucks latte…and Tom gets a smoothie. On weekday mornings when we’re exhausted, I refuse to leave the house without my mug of coffee…and Tom grabs an energy drink*

{Note: To be fair, Tom is pretty amazing at not drinking much caffeine. He drinks water religiously, he rarely drinks soda, and he powers through most tiredness with a strength that I will never know. His one vice on desperate mornings? Monster energy drinks}

Now for those of you who aren’t new to the blog, you may have picked up on something in the alternatives to coffee that Tom often consumes: they’re all filled with sugar.

THIS is where I found myself struggling this past weekend when we stopped into Starbucks to get my free birthday drink* and I was scouring the menu for something that Tom could get and enjoy that wasn’t filled with sugar. Hot chocolate? 43 grams of sugar. Strawberry lemonade? 32 grams of sugar. Tea? Well…there’s no sugar, but if he doesn’t drink coffee he’s sure as heck not going to like tea. I literally came up with nothing…so he ordered his smoothie and was as content as a clam. But me? I figured that there had to be something better.

{Note: Free birthday drinks at Starbucks are literally one of my favorite things about birthdays. A venti latte with an extra shot? Don’t mind if I do!}

starbucksbday
cue the hallelujah chorus!

As I thought about the fact that there was literally no beverage that Tom and I could both drink and both enjoy at Starbucks (le sigh), I got to thinking about what we could make at home that’s something we could both enjoy during rushed weekday mornings on-the-go as well as during lazy Saturday trips to the bakery or running errands.

Whatever I came up with, I did know that it had to accomplish at least three things:

  • It had to be relatively easy-to-make (for those rushed mornings!)
  • It had to have at least a little bit of caffeine (because I will die without it)
  • It had to taste good with a donut*

{Note: This is probably the most important part. We love our donuts.}

IMG_2540
if whatever I came up with didn’t taste good with donuts, it was a no-go {also, for reference we normally do not order this many donuts…but it WAS my birthday!}

So…where the compromise?

Here’s our answer:

  • Create a warm beverage that can be made from a pre-made mix that can be stirred into warm milk or water to save time on busy mornings
  • Utilize cocoa power for both flavor and a tiny kick of caffeine
  • Ditch any fake sweeteners or syrups that are commonly found in sugar-free coffees and energy drinks and substitute agave nectar

| Donut-Worthy Hot Cocoa |

Serves: 20 Tom’s or Alaina’s

Ingredients Needed:

For the pre-made mix:

  • 3/4 cup cocoa powder
  • 1 cup dry non-fat milk
    • This is key to making it super decadent and also give you the versatility to make this mix with water if you don’t have any milk on-hand!
    • Carnation is the most well-known brand, but I recently stumbled upon a Market Pantry version that comes with three pre-measured one cup pouches…#score
  • 2 tsp cornstarch
    • This makes it so it’s a bit thicker and richer–trust me, add the cornstarch!
  • 2 tsp salt

For the cup o’ cocoa:

  • 1 cup milk or water
    • Milk is eight million times more delicious, but you can always sub water in if you don’t have any on-hand!
  • 1 tsp. light agave nectar
15080303
simply balanced is my favorite–it doesn’t have any additives and there’s only 5 grams of sugar in a teaspoon
  • 1/4 tsp vanilla

For the optional whipped cream:

  • 1 cup heavy whipping cream
  • 2 tbsp. powdered sugar OR 3 tbsp. light agave nectar
  • 2 tsp. vanilla

Directions:

First order of business: make your mix!

  • In an airtight container that can hold all of your dry mix ingredients, add your cocoa powder, milk powder, cornstarch, and salt
  • Closing the container, shake/shake/shake it off until it’s well mixed
  • Store in airtight container for up to three months

{Note: Did anyone else get distracted by that music video? I personally took a good five minute break from writing to dance around my living room} 

ANYWAYS…back to that recipe…

Next up, you’re ready to make your delicious cup o’ cocoa!

  • In a microwave-safe mug, add one cup or milk or water*
  • Warm milk/water in the microwave for 1 minute & thirty seconds
  • Add 1 tbsp of mix, agave, and vanilla; stir until mix is dissolved
  • Return to microwave for thirty seconds; stir well
  • Enjoy!

{*Note: For on-the-go mornings this can be done in any travel mug by adding all the ingredients then adding hot water using the biggest cup setting on your Keurig or any other hot water dispenser}

Finally, if you so desire, you can add some delicious whipped cream…

  • Place metal mixing bowl & beaters in freezer for 15-20 minutes
    • FYI: You can use a hand mixer or standing mixer here!
  • Once chilled, add heavy cream to the bowl and beat on medium-high until soft peaks form

IMG_2567

  • Add powdered sugar and vanilla

IMG_2569

  • Continue to beat on medium-high until stiff peaks form

IMG_2572

  • Add to cocoa and ENJOY!
IMG_2600
the way the whipped cream just barely melts into the top of the hot cocoa is just TO. DIE. FOR.

To make it so your delectable homemade whipped cream doesn’t go to waste and it’s readily available on weekday mornings…try my Grandma Patty’s trick…

  • Scoop tablespoon-sized dollops of whipped cream onto a metal baking sheet lined with parchment paper and/or a silicon baking mat
IMG_2573
you may think this is crazy…but it WORKS!
  • Freeze overnight
IMG_2574
ignore our tetris-style rig to get the pan in the freezer…
  • Once frozen, use a cookie spatula to remove frozen dollops from baking sheet and store in a freezer-thickness zip-top bag
  • Remove dollops of homemade whipped cream anytime you have a need for whipped cream!

Now while that may seem like a lot of steps, the reality is that this diabetic-friendly & Tom-approved hot cocoa is ready in literally three minutes on weekday mornings…and that includes the time it takes to get that delectable whipped cream out of the freezer and pop it on top for an extra-special treat*!

{*Note: You shouldn’t feel that bad about adding the whipped cream–it only adds .8 grams of sugar for a total of 18.8 grams/serving…all of it but .8 coming from the milk (13 grams) & agave (5 grams)! }

This cocoa is truly unlike any other hot chocolate that I’ve ever made. I’ve made “diabetic-friendly” mixes before, but almost every recipe called for some sort of fake sweetener that would give the final product a bit of an off-taste…and it also somewhat freaked me out that I was eating chemicals. This recipe is the exact opposite: the agave adds the perfect touch of natural sweetness without any of the off-flavors.

Even better, this hot cocoa is incredibly rich and chocolatey without being overwhelmingly sweet (I’m looking at you Caribou hot chocolate…bleh!).  The addition of the vanilla adds to the decadent flavor–especially when matched with the base of the slightly sweet milk. The salt rounds out the entire thing, and if you’re feeling crazy and add the dollop of frozen whipped cream? Well…you just may die and go to heaven.

IMG_2601
JUST LOOK AT THAT WHIPPED CREAM.

So while I must admit that this cannot completely substitute my need for coffee, it does actually give you a small kick of caffeine (~8 mg) that can sometimes be just enough to get you going. On top of this, it’s so deliciously decadent I usually forget all about coffee after the first sip.

And, for the record, it passes the donut test. Tom and I both love this easy-peasy drink to take on-the-go or enjoy while we’re cuddling on the couch on a Saturday morning watching Shark Tank* and eating our favorite homemade donuts.

{*Note: Yes, we religiously watch the recording of Shark Tank from the night before every Saturday morning. It’s just so good!}

markcuban
nothing better than our mugs of hot cocoa and the mug of mark cuban on our tv screen #dowehaveadeal?

So while Starbucks may not be able to meet all of our warm beverage needs (bummer, I know), it’s nice that we now have a homemade option that we truly both love. And the best part? I finally found a dish that can use both those containers Tom loves so much and the Keurig I can’t live without. A true win-win and a recipe made in wedding registry heaven.

And Tom has a point…pushing those buttons on those containers is pretty fun.

Here’s to making many more culinary compromises…all in the name of love.

xoxo,

alaina


going bananas

IMG_2525
our version of banana bread: a delectably moist, protein-packed almond-flour based quickbread that’s sweetened with only bananas (duh!) and honey

You learn a lot in the first year of marriage. You learn a lot about yourself, you learn a lot about your spouse, and you learn a heck of a lot about what I like to call each other’s “learned truths“–otherwise known as things that you take to be true simply because that’s the way it was for you growing up.

For example, not long after we got married Tom left the gallon of milk on the table while we were eating dinner. I thought he was insane to leave a dairy product out of refrigeration for thirty minutes. When I questioned him about it, he looked at me with a puzzled look on his face–“Isn’t this what your family does?”

milk
apparently milk is a point of tension in our marriage…we also disagree on which is the best type of milk to buy (I say skim, he says 2%)

Tom’s not the only one. Shortly after we got married we took a trip to the grocery store and picked up a few items. As we were putting them away, I noticed Tom staring at me like a crazy person. “Did you just put the bread away…in the freezer?” Apparently it was only my house where a single loaf of bread lasted for so long if we didn’t put it in the freezer it would go bad…I didn’t even know where else you would even store bread if it wasn’t the freezer.

I could give you countless more examples, but the reality is that a big part of the first year of marriage is un-learning what you know to be true about how you were raised and consciously deciding how you both want to run your own brand new home.

Over the past nine months, we’ve adapted. We’ve held our ground on some things and relented on others. From the trivial to the momentous, it’s all been about compromise.

As I’m sure is not a surprise to anyone who reads my blog, compromise is at the root of how I cook for our little family of two. That being said, it’s usually because of the nutritional value of the food…not because of how it’s stored.

So as I was thinking about how we’ve gone through trial and error in deciding how to store our bread*, I had an idea. Oftentimes the reason we have to throw our bread in the freezer is because I don’t eat much of it and Tom can’t eat an entire loaf before it goes bad. So what if I baked a bread that we both could eat and enjoy?

{*Note: Oh yes…there is a such thing as trial and error in how to store your bread. Keep it out for a week then put it in the freezer, take out a few slices and then put it in the freezer, never put it in the freezer and just throw away what goes bad….I could go on AND on…}

My first thought? Since we sometimes feel like we’re going bananas (aka: CRAZY) when we disagree on things like where the milk should go during meals and how to store bread, my obvious choice for a type of bread to make was clear: BANANA BREAD.

So…where the compromise?

Here’s our answer:

  • Bake a versatile bread that can be eaten at multiple eating occasions (breakfast, snack, dessert, etc.) so we can eat through it faster
  • Ditch the typical ingredients (white flour, refined, sugar, etc) that make bread something not-so-great for a diabetic
  • Ensure that the bread can be ready-to-eat if left on the counter OR popped in the freezer

| “Gone Bananas” Bread |

Serves: 10 Tom’s or 12 Alaina’s

Ingredients Needed:

Wet Ingredients:

  • 4 ripe bananas, mashed
    • The more ripe the better–this is where a lot of the sweetness comes from! 
    • I always keep ripe bananas in the freezer so I’ve got them ready when I want to bake–just peel and slip into a zip top bag when you have an overly ripe banana! 
  • 3 eggs
  • 1 stick butter, melted
    • You want salted butter here! 
  • 1/4 cup honey
    • Check the label here–you want pure honey, not corn syrup! 
  • 2 tsp. vanilla

Dry Ingredients:

  • 3 cups finely ground almond flour
    • Like I’ve said before, almond flour is an awesome low-carb/high-fiber substitute for white flour–but it also can be expensive. You can find sales on Bob’s that is sold in 1 lb. bags for about $10, or Costco sells a 3 lb. bag for $22 (~$7.33/lb)
  • 2 tsp. cinnamon
  • 2 tsp. baking soda
  • 1 tsp. baking powder
  • 1/4 tsp. nutmeg

Optional Mix-Ins:

  • 1/2 cup walnuts, roughly chopped
    • Tip: We buy walnuts in bulk at Costco, take out a cup or two at a time to store in the pantry for yogurt topping & baking, and keep the rest in the freezer. Then we simply just take out a cup or two as we need them. You save a decent amount of money when buying in bulk and you extend the life of your walnuts up to a year!
walnuts
3 lbs of walnutty goodness
  • 1/2 cup semi-sweet chocolate chips or cacao nibs

Directions:

First up, get prepped…

  • Preheat your oven to 300 degrees F

Next, get your wet mix a mixin’…

  • In the bowl of your stand mixer (or any other medium/large mixing bowl), add all of your wet ingredients; mix well and set aside

Then get your dry ingredients ready for the party…

  • In a separate medium-sized mixing bowl, add all your dry ingredients
IMG_2468
Honeyville is the brand of almond flour you get at Costco–it’s my favorite!
  • Once all your dry ingredients are added, combine well with a whisk
    • Note: It is super important that the dry ingredients are well-incorporated to ensure the bread rises properly!
IMG_2469
mix it…mix it good! (feel free to sing to the tune of “whip it”…I know I do!)

Now combine your mixes…

  • Slowly incorporate your dry mixture into your wet mixture using your mixer
  • If desired, once combined stir in chopped nuts and/or chocolate chips

IMG_2485

You’re almost done! Now just get this baby in the oven!

  • Pour/scrape your batter into a well-oiled loaf pan
    • I used a 9 by 5 by 3 inch pan and would recommend this size if possible!
IMG_2477
yum. yum. yum.
  • Bake loaf in the oven for 1 hour 25 minutes to 1 hour 35 minutes, or until toothpick can be removed cleanly and the loaf doesn’t “wiggle” at all when you lightly press it in the center
    • I recommend checking the loaf at around 1 hour and covering with foil if the top seems to be browning too quickly–this often happens with baked goods made with almond flour
  • Once baked, let cool in the pan 15 minutes before inverting onto a cooling rack to completely cool before slicing (at least 2 hours)
  • Once cool, slice and serve!
IMG_2500
look at that marble-y, banana-y deliciousness!
  • To store, loosely cover with plastic wrap or store in a zip top bag
    • Tip: For easy breakfasts, I recommend pre-slicing and storing slices in individual sandwich-size zip top bags in the freezer for a quick grab ‘n go meal that’s ready-to-eat by the time you get to work!

Knowing that this bread was dreamed up somewhat out of the blue and to create a compromise, we were completely surprised when it was absolutely delicious. To put it mildly, we’re obsessed with this bread–even without the inclusions of walnuts and chocolate chips

In fact, this was the exact email I got at 7:52 AM when Tom had it for breakfast the first time I made it just plain (ie: no inclusions):

breademail
it it not every day I get an email from my husband on how much he loves his food. this says a LOT.

And Tom is hitting the nail on the head: this bread most notably delectably moist. Unlike most almond flour-based items, this bread is not dry and crumbly, but instead balances being perfectly dense with being wonderfully light. My favorite part? Its flavor profile emanates a strong banana presence, but it doesn’t overwhelm the subtle notes of vanilla, cinnamon, and nutmeg.

A slice of this bread is truly like a slice a heaven…especially when you include the walnuts and chocolate chips. Although I normally stray away from adding any refined sugar if I can help it, the decadence it adds to this recipe is just too good to pass up.

IMG_2525
just LOOK at that. I mean, c’mon. I’m drooling just staring at it.

And the best part? This bread is still good for you (and diabetic-friendly!)–even if you add the chocolate chips! A slice of this deliciousness (with the mix-ins!) has only 18 net carbs and 13 sugars*–with almost all or the carbs/sugars coming from one of three natural sources: the almond flour (aka ground up almonds), the bananas, and the honey. In fact, if you remove the mix-ins, one slice has just 17 net carbs and 12 sugars…so in my opinion you might as well just throw on in those extra bits of goodness.

{*Note: For reference, the average slice of banana bread usually has between 40-50 grams carbohydrates and 20-30 grams of sugar. If store-bought (ie: Starbucks} it’s usually toward the higher-end…yikes!}

It’s also worth mentioning that each slice has 9 (yes, NINE!) grams of protein. You can eat a slice of this bread for breakfast and not be hungry until lunchtime*. It’s also great for Tom to get a shot of protein in the morning before he works out over lunch, and it makes me feel good he’s not getting his morning energy from other typical breakfast items that are loaded with sugar.

{*Note: Normally, if I don’t eat peanut butter with my breakfast I want to eat my arm off by 11AM. This bread solves this problem completely and also helps me with the whole trying to cut-back-on-my-peanut-butter-addiction thing. Win-win}

And, of course, you don’t have to have this bread just for breakfast. It makes a yummy (and filling!) dessert that’s a perfect way to subdue your 8PM cravings for a little taste of something sweet…especially when paired with a big glass of milk.

Having this bread for breakfast and dessert also serves another purpose: you go through the loaf a heck of a lot faster. And if you go through the loaf faster, you don’t have to put it in the freezer. And if you don’t have to put it in the freezer, your husband doesn’t think you’re a crazy person.

So while we’ve learned a lot about ourselves and each other in this first year of marriage, we’ve also gotten a lot wiser. There’s ways to compromise on the big things and the little things, and baking a bread that we can both eat and enjoy has been a great way for us to compromise on the little thing regarding how we store our bread.

And while this little thing concerning storing bread in the freezer may seem trivial, the reality is that how we approach the small disagreements is a direct reflection on how we will approach the bigger ones that are sure to come when bigger life changes (read: a house, a baby, etc.) come our way.

We’re each slowly building our compromise muscles with every little disagreement that will make us a stronger and more empathetic spouse for the other when more difficult situations inevitably occur.

So enjoy this delectable bread and the silly reason it came to be. But remember: there is only one type of milk you should ever enjoy it with: SKIM, the best type of milk the world.

{*Note: We still may or may have not yet agreed upon what type of milk is best…but this is my blog so I’m making the decision. SKIM. IS. BEST. Sorry, Thomas 🙂}

Here’s to making many more culinary compromises…all in the name of love.

xoxo,

alaina


mindful milkshakes

serve separately...
our version of a chocolate peanut butter milkshake that’s both pre-portioned and protein packed!

Last Wednesday was Ash Wednesday, and in our household that means it’s the time of year for two things:

  • The Annual Ramsburg Family Ash Wednesday Cross Contest
  • Alaina to give up something borderline unreasonable for Lent

To give you some more context, let me give provide more detail…

The Annual Ramsburg Family Ash Wednesday Cross Contest

First of all, Ash Wednesday is a sacred time in the Church and for our family. The remembrance of your frailty and humanity is humbling and sobering. Following such a somber service, our family was always somewhat subdued–which is a rarity in our household.

While we of course embrace this time of reflection and deeply respect this Church holiday, my dad started a goofy tradition a few years back to break the silence in the car ride home after church. His idea? Play on our internal competitive natures by sparking debate on who had the most “perfect” or symmetrical/evenly spread ash cross on their forehead.

While this is dumb, we do eagerly embrace this tradition and have roped Tom into it for the past three years as well. Since my brother and dad were both out-of-town this Ash Wednesday, the competition was a bit smaller this year…and I’m about 90% positive I won…which NEVER HAPPENS.

But I guess I can let you decide…although I think Tom may get brownie points for such a great face in his picture…

So that’s the one thing that happens this time of year…the other?

Well, it has a history as well…

Alaina to give up something borderline unreasonable for Lent

Giving up something for Lent is a pretty popular tradition–especially in more traditional denominations.

{Note: Being Lutheran, we really go either way in this tradition…although I have a feeling Martin Luther would have some major thoughts on anyone giving up something because they think it would make them more favorable or holy. I can hear him now…”Don’t mess with grace, bro!” Or, you know, something like that}

martinluther
i love me some martin luther #savedbygrace

Personally, I’ve had a pretty bad habit of giving up borderline unreasonable things for Lent:

  • ALL refined sugar…when I was 10…when Lent ran over my birthday
    • Note: This was before it was trendy. There were not a lot of options to eat. It was a rough forty days. 
  • Carbohydrates…when I was 13 and I was trying to support my dad who was doing the Atkins thing to help with his diabetes…
    • Carbohydrates=energy. When you’re 13 and on a competitive dance team you kinda need energy doing competition season. This was not my best idea…and I totally didn’t make it the forty days. More like fourteen. Whoops. 
  • Kissing…when Tom and I had only been going out a year…
    • First of all, this is just dumb. It makes no sense. I have no idea what I was thinking. 
    • Second of all, Tom if you are reading this THANK YOU FOR NOT BREAKING UP WITH ME FOR BEING SO WEIRD

Suffice to say, after I suggested we give up kissing for Lent and Tom actually went along with it and supported me I pretty much knew I was going to marry this man. He’s a saint.

I mean COME ON. How could I not want some time with just him sans kiddos?!
I know I’ve shown this picture before. But let’s get real…it took MAJOR DISCIPLINE not to kiss this man for 40 days. I still have no idea how we did it….I think I ate my feelings in donuts.

Anywho, I can’t blame my family for always being weary when I announce what I’m going to give up (or add!) that year for Lent. This year, I was trying to kick my habit of selecting unreasonable things and decided to really think about what area of my life where I could use more discipline.

The answer I came up with? Food. 

Now if you’ve read this blog at all, you know that Tom and I have a love affair with food. It’s a central part of our relationship, and providing food for Tom that I can eat and that will satisfy his appetite is a major way I show him how much I care.

That being said, this is a dangerous game. While you often don’t think of healthy food as something that can be bad for you, I’ve noticed that I personally consume good-for-you food for reasons other than when I’m hungry.

I eat because I’m on vacation. I eat because it’s delicious. I eat because Tom is still eating and it feels weird to not be eating so I might as well have another serving.

crepe o clock
For example, we were recently in Mexico and every day at 4:30 I dubbed “crepe o’ clock” when the crepe stand opened. Was I always hungry? Nope. But it was there and it was so good!

When you love food like Tom and I do, we’ve found it’s hard to slow down and savor. So this Lenten season, we’re mindfully eating and being disciplined about listening to our bodies and actually stopping eating when we’re full.

But let me be very, very clear: this is not a diet. Far from it. We’re not changing what we’re eating at all…just the way we eat. We’re practicing spiritual discipline and mindful consumption in a society that constantly says more is always better.

Now, fast forward to this past weekend: Valentine’s Day. The holiday of chocolate-covered everything. Being that we were relatively new to this whole “mindful eating” thing…it was a bit of challenge to find a dessert that was diabetic-friendly, fulfilled our need for something divinely chocolaty, and also would not tempt us to consume more than we should.

So…where the compromise?

Here’s our answer:

  • Prepare a pre-portioned dessert that wouldn’t make any leftovers
  • Ditch any refined sugar and just use bananas and a touch of honey
  • Swap Dutch-process cocoa powder for the Hershey stuff to give the dish a smooth, rich chocolate flavor
  • Add in some natural peanut butter to balance out the flavor profile and give the dish a protein-punch that will leave you feeling more satisfied and full

| Mindful Milkshakes |

Serves: 1 Tom & 1 Alaina

Ingredients Needed:

  • 3/4 cup skim milk
  • 2 frozen ripe bananas, sliced
  • 3 tbsp. Dutch-process unsweetened cocoa powder
    • This is not Hershey’s! Dutch-process powder is less acidic and more mellow-tasting, which is important when we’re not adding much sweetener
    • I have found you can get a great big thing of it at Costco that’s cheaper per ounce than Hershey’s! #score 
rodelle
Rodelle (pictured above) is the kind you can get at Costco, but any will do!
  • 4 tbsp. natural crunchy peanut butter
    • I recommend Market Pantry–it’s inexpensive and (believe it or not) tastes the best out of all the natural peanut butters
    • If using another brand, ensure there is no added sugar. The ingredients should read “Peanuts, salt”
    • You can use creamy peanut butter, but the crunchy gives the shake an added texture that’s really too good to pass up!
  • 2 tsp. vanilla
  • 1 1/2 tsp. honey
    • You can use agave if you’d like, but I personally think the honey complements the flavor profile better

Directions:

  • Place all ingredients in blender and pulse to combine

IMG_2426

  • Blend on low for 10-15 seconds to fully mix

IMG_2427

  • If desired, add more milk a tablespoon at a time if you prefer a thinner shake
  • Pour into two glasses and serve with a straw

…and that’s all folks! This dessert takes under five minutes to prep and make. It’s crazy easy, but it’s also crazy delicious…and filling!

Milkshakes really are an easy way to help you have some portion control. The leftovers (if there are any…which in our house there isn’t!) don’t keep well, so (unlike my dancing brownies…which will be the death of me) you can’t keep nibbling or snacking on your dessert for days after.

I also love that this recipe doesn’t use flavored almond milk or flavored yogurt–two common “healthy” milkshake substitutions for ice cream. While it is most definitely true that these are healthier options, the reality is that these is a lot of added sugar in these bases. Save yourself the additives and just use plain milk–you can then adjust your sweetness based on the ripeness of your bananas by changing the amount of honey in the dish. Either way, you’re saving your body a lot of sugar you don’t need!

So while everyone in my family is taking a big breath of relief that I haven’t decided to do anything crazy for Lent this year, I still know that practicing mindful and disciplined eating isn’t going to be easy. When you love food as much as we do…you always want just a little bit more.

So I invite you to join Tom and I as we embark on this Lenten journey over the remaining thirty or so days. While discipline in anything isn’t easy, it’s always a little but easier if you have someone doing it with you.

And personally, I know I’ve got the best partner in the world. He sticks with me through my crazy ideas (hello, giving up kissing?!) and my more sane ones and supports me 110%. Even if I don’t think I can do it on my own, I know I can do absolutely anything with Tom on my team.

IMG_2445
my fellow milkshake lover and valentine for life

Here’s to making many more culinary compromises…all in the name of love.

xoxo,

alaina

na-cho average nachos

IMG_2358
our version of loaded nachos: all our favorite fixings in a flavorful & spicy broth base that is hearty enough to be eaten with a spoon OR a tortilla chip!

Tom and I are truly soulmates. Or, as it often seems, stomach-mates.

How do I know this? Well, when Tom and I visited my grandparents in Florida last week, our combined “Top Five Things to Do on Vacation” was almost entirely consisting of things we wanted to eat:

  1. Eat nachos at Moe’s 
    • Moe’s is like Chipotle. But better. Why? Because there’s no food poisoning and everything’s named after Seinfeld & other similar references
      • Note: There is a Moe’s in MN now but it’s terrible. The FL ones are so much better!moe's
  2. Eat ice cream at Royal Scoop
    • I have eaten a LOT of ice cream in my life (seriously, like everything in the aisle at Target) and there is NOTHING like Royal Scoop. NOTHING I TELL YOU! 

      royal scoop
      you can eat ice cream on a cow bench there…why wouldn’t you go?! (note: this photo was not taken on this year’s trip to FL–it was never warm enough to wear an outfit like that when we were there!)
  3. Run outside everyday
    • 65 degrees make stink for laying on the beach, but it’s great running weather!
  4. Eat at Junkanoo during sunset
    • Required touristy stop

      IMG_2283
      Not a bad post-dinner view!
  5. Eat at Cheddar’s 
    • Restaurant chain that is crazy cheap, has everything made from scratch, and makes delectable buffalo chicken wrapscheddar's

I somewhat wish I was kidding about the above…but it’s no secret that we literally plan our daily itineraries around what and when we get to eat. We love food and we love sharing meals together. And while I may love the running part more than Tom, it still made the “Top 5” list out of necessitythere’s no way he could eat both an entire 16 inch pizza and over 50 pieces of sushi if he didn’t work up an appetite, now could he?!

{Note: Yes, he did do both of those things. No, they were not in the same sitting. Yes, I was oddly proud of him. It was quite a feat. Although I did refuse to kiss him after eating all that sushi. I mean…c’mon…it’s like the equivalent of kissing someone who just ate a few whole raw fish…bleh!

For photo evidence, see the below time lapse:

That’s my man. I still think he’s the most attractive man in the world…even after he ate over three pounds of pizza}

Anywho, while the pizza-eating at Junkanoo may have made the best story, our favorite thing to eat in Florida is the “Billy Barou Nachos“–delectable chicken nachos that you can top with as many toppings and fresh salsas that your heart desires:

IMG_2252
this is after we already devoured over half of the basket…mmmm…

Because that’s truly the best part of vacation: you eat the foods you don’t normally eat at home.

Besides eating ice cream at Royal Scoop multiple days in a row, we ate nachos at Moe’s twice in our six days in Florida and we even made nachos at home after we went to a minor league hockey game one night (for those keeping score at home…we ate nachos 50% of the days we were on vacation)

To put it simply, we were eating nachos like they were going out of style and loving every minute of our vacation diet (or lack thereof)…until we landed back home.

Returning home post-vacation diet is rough. Besides the positive fact that Tom gained back a significant portion of the weight he lost since we got married during our vacation (yay!), we returned home feeling kinda gross and craving our normal diet that included a heck of a lot less tortilla chips.

That being said, while we were craving our normal way of eating, I couldn’t help but think that there had to be a way to fulfill our craving for nachos year-round to help alleviate our binge-fest on nachos every time we go on vacation.  So while nachos themselves are inherently unhealthy (they’re 90% chips & cheese for pete’s sake) the toppings themselves are usually pretty good for you–grilled meat, veggies, etc. Noting this, I was determined that there had to be a way to satisfy our craving without sacrificing taste.

So…where’s the compromise?

Here’s our answer:

  • Invert your typical nachos by making the traditional toppings the base of a flavorful, chunky soup and using the tortilla chips as a topping and way to eat the soup
  • Maintain the delicious textures and flavors from loaded nachos by packing the dish full of meat, veggies, beans, and spices
  • Ditch the queso and sour cream and replace it shredded cheese and plain greek yogurt

| Na-cho Average Nacho Soup |

Serves: 6 Tom’s or 8 Alaina’s

Ingredients Needed:

For the soup base:

  • 1 large onion, chopped
  • 3 bell peppers (any color), chopped
  • 1 tbsp. minced garlic
  • 2, 15 oz. cans low sodium black beans (drained & rinsed)
  • 1, 16 oz. bag steam-in-the-bag frozen corn
  • 2 cups rotisserie chicken, chopped
    • Or any pre-cooked chicken/meat you have on hand!
  • 2, 10 oz. cans Rotel
    • We use one can of “original” and one can of “hot”–but you can substitute the mild or even do two cans or “hot” if you’re feeling feisty!
  • 6 cups low-sodium chicken broth
    • Ensure it’s low-sodium–you don’t need all that salt!
  • 6 tsp. tomato paste
  • 2 tsp. lime juice
    • Both fresh squeezed lime juice or lime juice from a bottle work–just use whatever you have on hand!

For the soup spice mix:

  • 2 tsp. chile powder
  • 1 1/2 tsp. cumin
  • 1/2 tsp. garlic powder
  • 1/2 tsp. onion powder
  • 1/4 tsp. salt

For the toppings:

  • Tortilla chips
  • Plain 0% greek yogurt
  • Shredded cheese
  • Chopped cilantro
    • Yes, you need the cilantro–it makes it the dish! If you live somewhere where it’s actually warm enough to grow cilantro, I am very envious. This is what my sad indoor cilantro plant looks like…so I obviously had to get mine from the store…IMG_2342

 Directions:

Prep Tip:

  • Chop up ALL your veggies/chicken, steam your corn, rince your beans, and mix your spice mixture together before you start cooking
  • Once you have everything chopped, the soup comes together in just 10 minutes of active cooking time and then you just let it simmer on its own for 30 minutes–easy peasy!
IMG_2329
this is what my prep work ended up producing–hooray for bright colors in the middle of winter!

First up, you need to get your raw veggies a-cookin’…

  • Dig out a large stock pot–this will eventually need to fit all your veggies, beans, corn, & six cups of chicken broth
  • Heat pot on medium-high and add a splash of olive oil to the pan
  • Once pot is warmed warmed, add your chopped onion, peppers, and minced garlic to the pot and saute until onions just become translucent
IMG_2333
mmmm…veggies!

Next, you get to add some flavor and more of the hearty additions…

  • Add both cans of Rotel to the pot along with your entire spice mixture; stir until combined
IMG_2336
lets all pretend we don’t see the shadow from the terrible lighting in my kitchen. deal? deal.
  • Once that well mixed, all your steamed corn, rinsed beans, and chopped chicken; stir until well combined

All that’s left for you to do is make some deliciously flavorful broth…

  • Add about half (no need to measure!) of your chicken broth to the pot; stir
  • Add your tomato paste, lime juice, and remaining half of your chicken broth; stir
IMG_2340
the tomato paste and lime gives the broth an amazing flavor punch…as well as some nice color!

Now all YOUR hard work is done…the soup is going to do the rest…

  • Cover pot and reduce heat to a low/medium-low and let simmer for 30 minutes (stirring occasionally)
  • Once 30 minutes are up, you’re ready to serve!
IMG_2343
all simmered and delectable!

To serve, get out the rest of your favorite nacho fixings and go to town…

  • I recommend topping with cheese, cilantro, and greek yogurt for SURE, but avocado, guacamole, or some crushed chips are delicious as well!
    • Remember, you eat it with chips/a spoon–so you may not want chips on top of it as well! Unless you’re Tom…then of course you will want chips on top of it 🙂
  • This dish has a bunch of veggies in it, but we like serving with a simple salad with some of the remaining chopped cilantro, a dash of lime juice, and some greek yogurt dressing that is a perfect cool complement to our nacho soup!
    • Like our favorite greek yogurt blue cheese dressing, Bolthouse Farms also makes a great greek yogurt cilantro avocado dressing!

IMG_2346


So there you have it! Nachos! In soup form! How magical.

Now I know you might think I’m teeny bit bonkers for saying that this soup is a healthier version of nachos…but I SWEAR it gives you the exact same satisfaction as eating a big ol’ plate of melted chips and cheese.

On top of that, what I love most about this dish is how Tom and I can each choose the amount of carbohydrates (read: chips) we want to eat with our meal. If Tom is SUPER hungry (which he normally is) he can eat half a bag of tortilla chips with his serving and I can eat a big handful with mine. We each leave the table satisfied and feeling good about what we ate.

{Note: We LOVE the Costco tortilla strips with this soup. Are they any healthier? Heck no. Are they way cheaper than most chips, way more delicious, and easily scoop up the hunks of deliciousness in our nacho soup? You betcha they do!}

tortilla chips
so GOOD. SO SO GOOD. salt is so good, isn’t it? le sigh.


So while your vacation “top to-dos” may not include mostly foods you want to eat like ours, I can almost guarantee that every single one of us falls off our normal eating bandwagon when we go on ANY trip–it doesn’t matter if your trip was to Florida or to Fargo.

So enjoy your vacation diet filled with your pizza, your burgers, your fries, your ice cream and neverfear--you’ve got a delicious nacho soup that will help make your transition back into normal life just a little bit easier.

Because let’s get real: it’s not vacation if you don’t eat some ice cream.

Here’s to making many more culinary compromises…all in the name of love.

xoxo,

alaina


game-day goodness

cover meatballs
our version of football food: buffalo turkey meatballs stuffed with carrots, celery, onion, and cheese and tons of delicious spices

To be frank, I’m not exactly a football fan. I like cheering for my home team (and I also went through a Tim Tebow phase. I know…. I was young), but in general I would rather be doing anything other than an activity that requires me sitting for hours on end.

tebowing
tebowing #classic

That being said, my attitude towards football always shifts a bit this time of year. The games leading up to the Super Bowl are woven with a sharp intensity from the players, the fans, and even the announcers. Every yard matters more. Every mistake is scrutinized more harshly. Every play seems like the game is on the line.

In general, there just seems to be a magical spark in the air that makes you believe that anything can happen and that the underdog just may win it all. It’s emotional for all parties involved; there’s a multitude of tears of both joy and sorrow shed by players and fans alike.

On top of this riveting drama playing out on our television every Sunday, I would be remiss if I didn’t mention the other highly important part of playoff football: the food.

We’ve all been to game-watching gatherings and we all know the usual spread:

  • Dips (usually of the cream-cheese or sour-cream based variety)
  • Chips/Nachos
  • Buffalo wings
  • Lil’ smokies/Pigs in a Blanket
  • …and (last but certainly not least) meatballs

Now my husband loves himself some meatballs. He loves them on his spaghetti. He loves them on their own. He even really, really loves them from the bag in the freezer. In fact, he thinks that frozen meatballs are pretty much the best thing since sliced bread–open the bag, dump ’em in the crock pot, and cover with barbecue sauce. In his mind, this is basically heaven.

meatballs

And while I completely understand the beauty of the simplicity from going from bag to crockpot, I do have some hesitations when he looks at me with puppy-dog eyes as we push our cart through the Target frozen aisle and he lingers by the frozen pre-cooked meat products:

  • Sodium
    • Most heat & serve meatballs are packed with sodium–even the “all natural ones” can easily have almost half of your daily sodium intake in one serving of six meatballs…and there is no way in heck my husband is only eating six meatballs (try more like twenty-six)


  • Saturated Fat
    • I’m not afraid of fat (fat=flavor is my mantra) but these items are often filled with your entire day’s allowance of saturated fat in one serving. Tom–despite being the epitome of health and working out every day–has some cholesterol issues that (while getting better since we’ve gotten married!) are still lingering from his bachelor days of consuming a lot of Jimmy John’s. I love this man’s heart–so there is no way I’m taking any chances in him eating too much of this type of fat.


  • Added Sugar
    • Believe it or not, most heat & serve meatballs contain corn syrup and other added sugars in them to add flavor to the meat. On top of this, most barbecue sauce’s are almost all sugar. The combination of frozen meatball drenched in sugary barbecue sauce is one that just doesn’t work for my pre-diabetes. 
      • Note: Stubb’s Original BBQ sauce is the one exception to this rule. There’s still some sugar, but it’s way less than anything else you’ll find in the sauce aisle!
stubbs
If you have to have BBQ sauce, this is your best bet!

And while I am usually a sucker for Tom’s puppy-dog eyes, these frozen meatballs are where I draw the line. Not because I don’t want him to enjoy some meatballs, but because I know that we could make something so much better*

{*Note: The one thing Tom’s puppy-dog eyes will ALWAYS work on is sushi. I know he loves it…but there is no way in heck I’m making him homemade sushi. I hate the smell of fish. Luckily, he knows this…so he tends to get sushi a lot…}

And since I’ve recently been joining my football food-loving husband in these all-day football watching-filled extravaganzas, I decided we needed to find a way to create a healthier version of his favorite game-day treat…and amp up the flavor without having to drench it in sugary barbecue sauce so I could enjoy it too.

So…where’s the compromise?

Here’s our answer:

  • Swap the traditional fatty ground beef used for meatballs and replace it with ground turkey and add a touch of shredded cheese to make up for the lack of fat in such a lean meat
  • Use my mom’s trick of swapping oats for breadcrumbs to keep the carbohydrates down
  • Increase the nutrient-density of the dish by adding ground carrots & celery
  • Toss out the idea that meatballs have to have sauce to be flavorful by filling the meat with lots of spices 
  • Replace the sugary barbecue sauce with a Frank’s Red Hot mixture that delivers additional flavor and moisture to traditionally dry meatballs

| Game-Day Meatballs |

Serves: 5 Tom’s or 15 Alaina’s

Ingredients Needed:

For the meatballs:

  • 1.5 lbs ground turkey
    • Use 1 lb and adjust accordingly below if you’d like, but this is how it comes at Costco and it makes the perfect amount for a crowd!
  • 2 cups quick cook oatmeal, roughly processed or finely chopped
    • You want the oats to be broken down–not in their full “oat” form; this is most easily done in a food processor to get them to be the consistency of bread crumbs
  • 3/4 cup finely shredded cheese
    • I prefer a “mexican” cheese blend or a colby-jack blend for this dish, but any will work!
  • 3/4 cup carrots, finely chopped
    • This is about 4 carrots
  • 1/2 cup celery, finely chopped
    • This is about 4 stalks of celery
  • 1 large onion, finely chopped
  • 1 tbsp. garlic, minced
  • 1 egg
  • 1 tsp. garlic powder
  • 1 tsp. onion powder
  • 1/2 tsp. cayenne
  • 1/2 tsp. pepper
  • 1/4 tsp. salt

For the sauce:

  • 2 cups Frank’s Red Hot
  • 4 tbsp. butter
    • Yes, you need the butter. It thickens the sauce so it sticks to the meatballs! This is key. 

Directions:

First up: get everything ready…

  • Preheat your oven to 400 degrees F
  • Line one or two baking sheets with parchment paper or a silicone baking mat
    • One is fine, but the process will go quicker if you have two pans going!
  • Dig out your crockpot, set aside
    • We all know that getting your crockpot out is a process…ours is in the most hard to reach cupboard! 
  • Using a food processor (can also use a knife), process your oats, carrots, celery, and onion one ingredient at a time and set aside in a large mixing bowl
image
careful with the oats–you still want them to have a texture similar to bread crumbs or panko–not be dust!

Second, get your meatball mixture together…

  • Once you’ve processed/chopped the above, add the remaining ingredients to the bowl

image

  • Using your hands, mix ingredients together until well combined and ingredients are evenly distributed

image

After you wash that sticky, meaty mess off your hands, start making your meatballs…

  • Using your hands (I know you just washed them…sorry!) form 1 1/2 inch meatballs by grabbing a heaping teaspoons worth of mixture and tightly rolling into a ball
  • Place meatball onto baking sheet, leaving about 1 inch between all meatballs

image

Now you just have to quickly bake ’em to set their shape and color…

  • Once baking sheet is full, bake in the oven for 10 minutes
  • Once ten minutes have passed, transfer to a plate or other baking sheet until all meatballs are complete
  • Continue above steps until all meatballs are rolled and cooked
    • This recipe makes about 85-90 meatballs! Just FYI! 
IMG_2155
I know it’s a lot of meatballs…but they WILL be devoured. I guarantee it!

Now that your meatballs are done, you have to make your sauce…

  • In a medium saucepan or medium microwave-safe bowl, melt your butter into you Red Hot–stirring frequently
    • Note: Although I did it in the microwave in the photos, I will say that doing it in a saucepan is easier!

Woo hoo! Now you just have to put it all together!

  • Gently (this is key!) place all of your meatballs in your crockpot
  • Pour sauce mixture over meatballs
  • Gently (again, this is SO key–you don’t want broken meatballs!) and using a silicone spatula or other soft-edged kitchen utensil, combine your meatballs and sauce until all meatballs are well-coated

IMG_2166

Now the crockpot does all the work!

  • Set crockpot to HIGH and cook for one hour–stirring halfway through
  • After the first hour, set crockpot to LOW and cook for an additional hour–stirring halfway through
  • After two hour have passed, you’re ready to serve!
    • The meatballs can stay in the crockpot on low for another 2 hours if needed–just be sure to continue to stir every twenty to thirty minutes
image
don’t be worried if there isn’t much sauce left at the bottom of the pot when they’re done cooking. you will notice that these meatballs soak up a lot of the sauce…its what makes them so moist &  flavorful!

Ready to serve? Here’s a few ways to do it…

For a crowd/football-watching soiree:

  • Plain Meatballs: Nothing fancy here–let people serve themselves out of the crock and give them a fork. Mission accomplished.
  • Meatball Appetizer: Using toothpicks, stab one meatball onto each stick and dip into blue cheese dressing; sprinkle with blue cheese crumbles and chopped green onion; serve with more blue cheese dressing and celery sticks.
  • Build-Your-Own Meatball Sub: Create a meatball sub assembly line: lay out buns, cheese slices, chopped onions, and extra Frank’s/blue cheese on the counter next to the crockpot containing the meatballs. Tell your guests to go to town with their creations…but make sure you have extra napkins handy!

For dinner:

  • Buffalo Chicken Salad : Serve over lettuce with a drizzle of our favorite greek yogurt blue cheese dressing
image
I may be biased…but this is my favorite way to eat these meatballs! It makes such good lunch leftovers for the next day! You don’t even need to warm it up.
  • Buffalo Chicken Wrap: Follow the recipe in my previous blog post and substitute the meatballs for the pulled chicken

Tip: No matter what you make, ensure you have this greek-yogurt based blue cheese dressing…it’s our favorite!

bolthouse-farms-chunky-blue-cheese-lgn

As you can see, the options are endless with these delectable meatballs. They are so flavorful–it’s honestly the tastiest meatball we’ve ever had. There’s obviously a kick from the Red Hot and the cayenne, but the flavors run so much deeper: a subtle sweetness from the carrots, a savory bite from the onion, and a slight saltiness from the cheese. It’s truly unlike any meatball you’ve ever had.

On top of all this, these meatballs are actually really good for you. They are packed with nutrients from all the veggies, and they have a ton of lean protein. A serving of meatballs (which I think is about eight meatballs) contains 235 calories, 12 carbohydrates, 2  sugars, and a whopping 16 grams of protein!

Here’s the best part: Tom loves them. And I know the bar for Tom to love a meatball isn’t set all that high (I mean, he loves the frozen ones too), but he ate 26 of them when I made them for dinner last week. TWENTY-SIX.

If he ate that many of the frozen ones I’d be concerned for his health…but with these? He can eat as many as his heart desires. His crazy serving of 26 meatballs was still under 800 calories (with only 38 carbohydrates and 8 sugars) and gave him over FIFTY grams of protein.

This weekend our hometown Vikings have a big playoff game and I am truly excited to watch it with my husband. Being that it’s supposed to be a high of zero on Sunday, I can’t imagine a better dish to serve than some easy, spicy meatballs that will warm us and our friends from the inside out.

So enjoy this playoff season and make your fellow fans (or maybe just your family) this easy crockpot dish that’s sure to leave everyone feeling like they’ve won the big game.

Here’s to making many more culinary compromises…all in the name of love.

xoxo,

alaina

PS: Go Vikings!

cikings


lazy saturdays

IMG_2200
our version of our favorite saturday morning treat: banana chocolate chip donuts made with almond flour and sweetened with just a touch of honey

My phone is filled with pictures of two things: snapshots of little ones we love (normal) and snapshots of donuts (not so normal).

Yeah…I’m not kidding. I found the below in just a two second scroll through my phone:

I know having this many pictures of donuts is quite odd, but I like taking pictures of things I love…and in this case I love fried dough.

Tom and I are a bit crazy in our love for donuts (as is exhibited below by the fact that instead of cake we had donuts at our wedding), but our shared love for this bakery treat actually blossomed out of something pretty simple.

donuts-wedding
Our version of wedding cake

As a dating couple, we really didn’t have a “casual” place to go on a date. Why? Tom hates coffee (which eliminated having dates at my beloved Starbucks or local coffee shop) so we had to get a bit creative in finding a place we could go on lazy Saturday mornings.

Knowing that I still needed my Saturday AM coffee fix, we created our first “culinary compromise” without even realizing it. By choosing to go to a local bakery on a Saturday morning we could both get something we wanted: I could get my coffee and Tom could get as many creme-filled donuts as his heart desired.

Now if I was someone with self-control, I would have just had my coffee when we had these Saturday morning adventures. But alas, the smell of warm sugar overtook me every time we went on these excursions…and as we continued this Saturday morning tradition I fell deeper and deeper in love with both my then-boyfriend and a good donut.

how could you not fall in love over this gorgeous bakery case at yoyo donuts?

{As a quick aside, Tom and I have eaten at almost every donut shop in the Twin Cities area. Here is our list of the best donut shops in town…which may or may not be completely against what most people think and the what the “trendy” shops are…but psh…this is my blog 🙂

BEST:

  • YoYo Donuts (Minnetonka, MN) | Best Cake Donut/Filled Donut
    • All-around best donut shop in the Cities–you seriously cannot go wrong with any item in their case. Tom loves their “bombs”–mini bavarian-creme filled donuts 

yoyodonuts3

  • Hans’ Bakery (Anoka, MN) | Best Raised Donut
    • Split a Texas donut (it’s literally the size of your face) with a friend! Or, in my case, get your own smaller raised donut because your husband can eat the entire Texas donut by himself

texasdonut2

  • Lindstrom Bakery (Lindstrom, MN) | Best Traditional Donut
    • Get a classic Scandinavian donut and watch your life be changed forever. Also, it’s worth the drive just to pick up a loaf (or three) of their Swedish Orange Limpa bread. 

scandanavian donut

WORST:

  • Bogart’s Donuts (Minneapolis, MN) | Best Terrible Donut
    • Awesome company, terrible donut. If you like your donuts to taste like straight yeast…this is your place.

brioche donut

Phew, I digress…that’s enough about our local donut preferences!}

Now I know what you’re thinking: isn’t this girl pre-diabetic? Why in the heck is she eating so many donuts that she can write a local donut review?

Well, that is a very good point. And you’re right, I shouldn’t be eating very many donuts. But even with my diet restrictions, there is room to have some sugar in moderation. One or two Saturday donut shop adventures a month is a-okay with how I limit my diet the other 90% of the time…but it doesn’t mean I still don’t crave donuts basically every time I open my Instagram feed.

instagram
darn you, @hansbakery…you always make me so hungry!

So with this silly fried food having such a special place in our relationship, I decided it was time to get creative. There had to be a way for Tom and I to enjoy our special food in a way that doesn’t sacrifice taste or leave me feeling guilty for eating something so delicious.

Luckily for this challenge, this Christmas I received a donut pan (thanks, Jenny!) and I put it to use straightaway. I knew I wanted to go for a unique flavor profile that would eliminate the need for any topping (aka the need for any additional sugar) and have the right texture and mouth-feel of one of our favorite YoYo donuts.

On top of all this, I also knew I wanted it to be decadent (it’s a donut!) and it had to be something we could easily whip up with ingredients we had on-hand on a lazy Saturday morning. We needed a new “culinary compromise” tradition that would allow me to have my coffee…and eat my donut too!

So…where’s the compromise?

Here’s our answer:

  • Ditch the deep fryer (and all that oil!) and bake the donuts in the oven
  • Replace traditional all-purpose flour with almond flour–my go-to high protein, low-carbohydrate (and gluten-free!) substitution
  • Use banana to both naturally flavor and sweeten the donuts
  • Eliminate the need for refined sugar by adding just a touch of honey
  • Maintain the decadence of regular donuts by using just a small amount of semisweet chocolate chips or cacao nibs

| Lazy Saturday Baked Donuts |

Serves: 4.5 Tom’s or 9 Alaina’s

Ingredients Needed:

Dry Ingredients:

  • 1 cup almond flour
  • 1 tsp. baking powder
  • 1/2 tsp. baking soda
  • 1/2 tsp. cinnamon

Wet Ingredients:

  • 1 ripe banana, mashed
    • Keep peeled ripe bananas in your freezer for when the Saturday morning donut craving hits–then you always have them on-hand!
  • 2 eggs
  • 2 tbsp. butter, melted
    • Would this recipe work without the butter? Yes (I’ve even tried it!). Does it taste as good? No. Fat=flavor, my friends. And the touch of salt from the butter is just perfect in this recipe. 
  • 1 tbsp. honey
  • 1 tsp. vanilla

Mix-Ins:

  • 1/2 cup. semi-sweet chocolate chips or cacao nibs
    • Cacao nibs are cacao beans that have been roasted and broken up into smaller pieces–you get a less-sweet chocolatey taste (and a TON of fiber) when you use this chocolate chip substitute
    • You can also sub-in 1/2 cup of chopped walnuts if you want to nix the chocolate. I just add it for a touch of decadence since there’s not frosting or filling. I mean, it IS a donut! Treat yo’self!

Special Equipment Needed:

  • 6 cavity non-stick donut pan
    • NordicWare makes a great one (you can get it at Target for under $15!) otherwise the bakeware brand Wilton has one as well 

donut pan

 Directions:

First off, get everything prepped and ready for these delicious donuts…

  • Preheat oven to 300 degrees F
  • Using cooking spray, spray your donut pan and use a paper towel to ensure each nook and cranny of each of the six cavities is well-oiled
    • As I’ve said before, Simply Balanced cooking spray is the best!

Next, mix together your dry ingredients…

  • Mix together the almond flour, baking powder, baking soda, and cinnamon in a medium mixing bowl using a whisk
    • Whisk the dry ingredients well–this is key to ensuring the donuts rise properly!

image

  • Set aside

Once that’s complete, mix up your wet ingredients…

  • In another medium mixing bowl, use a mixer (stand or hand) together your banana, eggs, butter, honey, and vanilla

image

That was easy! Now just combine the two mixtures…

  • Slowly incorporate your dry mixture in your wet mixture until well combined using your mixer
  • Once well-mixed, stir in your chocolate chips/cacao nibs

image

Now you just have to get these donuts into the oven…

  • Using a piping bag or small spoon, fill each donut cavity about 3/4 full

image

  • Bake donuts for 20 minutes
    • Check donuts to ensure they’re done using a toothpick–if the toothpick’s clean, they’re good to go!
  • Let donuts cool in the pan for five minutes, then flip onto a cooling rack
image
Whack the back of the pan if they don’t just pop out–they should come out without much trouble at all!
  • Bake second batch of donuts and repeat above steps
    • Just FYI: the recipe should make about nine donuts
  • Let donuts cool completely before storing in an airtight container–ideally overnight, if possible
    • Almond flour baked goods tend to get overly moist when stored in airtight containers, that’s why it’s so important to let them cool and dry out completely. If the donuts get too moist when stored, simply set them out on a plate to let them dry out a bit. 
image
yummmm

We love these donuts. Why? 

  • They don’t sacrifice taste for flavor. At all.
    • They taste like a vanilla cake donut and a slice of chocolate chip banana bread had a baby. There can be no wrong in that. They’re to-die-for. 
  • They allow us to guiltlessly enjoy donuts together
    • Each donut has only 165 calories, 10 net carbs, 8 sugars, and a whopping 5 grams of protein
    • If you eliminate the chocolate chips (which, again, I actually don’t recommend…live a little!) each donut has only 120 calories, 5 net carbs, 3 sugars, and 4 grams of protein
  • They allow us to easily whip up donuts on a Saturday morning in under thirty minutes…and with only two bowls to clean
    • This is very important. I hate doing dishes. 
  • They allow for us to carry on our favorite lazy Saturday tradition on any Saturday we want without even having to leave our house
    • Again, it’s winter in Minnesota. It’s not always a bad thing to stay in when it’s supposed to be a high of 10 degrees!

Now, despite the above, we will of course still go and visit our favorite bakeries for a donut now and then. Tom can only go so long without his favorite “bombs” from YoYo Donuts and I can only go so long without some pink sprinkles.

That being said, our tradition that grew out of one of our first compromises has blossomed into a new tradition that we can share with our family and friends during brunches and after-church breakfasts. Although it seems silly, it’s our special tradition and our special food that I know we’ll be whipping up for our kids someday*

{*Note: Because let’s get real…once we have kids we’ll be lucky if there is ever a such thing as a “lazy” Saturday morning where we have time to head to our local bakery. We’re going to have to make the donuts at home!}

All in all, this is one of my favorite culinary compromises because it’s so quintessentially us. Because if you know us, I would hope you’ve picked up on three key things:

  • We really love donuts
  • We really love each other
  • We really love Jesus

Because at the end of the day–that’s what matters. So whip up a batch of donuts and spread some love this week. I promise you won’t regret it.

Here’s to making many more culinary compromises…all in the name of love.

xoxo,

alaina


win/win/win

our version of gingerbread cookies: protein-packed cut-outs made with almond flour and sweetened with applesauce and a touch of maple syrup
our version of christmas cookies: protein-packed cut-outs made with almond flour and sweetened with applesauce and a touch of maple syrup

In general, I think that men and women aren’t really all that different and that the “men are from Mars, women are from Venus” arguments are pretty silly. It my experience, it’s often used as a cop-out to avoid actually learning how to communicate with your significant other.

That being said…I swear my husband is from a different planet.

Let me explain:

Over the past few weeks and and while seeing many family and friends at holiday get-togethers, a significant number of people have been commenting that Tom has lost weight. I personally didn’t see it at all and thought these people needed their eyes checked…until Tom told me he has lost over fifteen pounds since our wedding day.

Ummmm…what?!

My gut reaction was panicWhy have you lost weight?! Are you okay? How is this possible when I serve you enough food to feed an average family of four?!

My hysteria was calmed when we realized what was actually causing this change:

  • He wasn’t eating Jimmy John’s for lunch every day 
  • He’s been running more–either with me or while choosing to play more basketball over lunch

Being that I sensed this change bothered him, we talked about it. In doing so, I learned that he had stopped adding mass gainer to his protein every day and that he thought he needed to add it back in. Somewhat confused, I asked for clarity on what exactly “mass gainer” actually was. His response? It’s a powder that adds significant calories and carbs to your protein.

My response? WHY IN THE WORLD WOULD YOU WANT TO CONSUME A CRAP TON OF CALORIES AND CARBS THAT YOU CAN’T EVEN TASTE? If you’re consuming the same amount of calories and carbs that are in two ginormous slices of chocolate cake…why would you not choose to eat the cake?! The cake has taste! The cake has flavor! The cake has CHOCOLATE.

yum
Tom works within walking distance of some of the best chocolate cake in town…yet he chooses to consume the same amount of calories in the form of two scoops of chalky powder. WHY?

On the flip side, I personally literally not imagine a world where I would consume calories knowing I couldn’t taste and savor them. If I am knowingly consuming the same amount of calories and carbohydrates as I could find in one of my favorite desserts I would go straight for the killer brownies at Byerly’s and call it a day.

killer brownies
If you haven’t had a killer brownie from Byerly’s you haven’t LIVED

Hence, my conclusion that my husband is from a different planet.

Understanding that my pre-diabetes (and thus our cooking) usually limits the amounts of carbohydrates and sugar we’re consuming, I can understand why Tom was seeking out another source for these nasty buggers. But his desire for more calories got me thinking–especially since we don’t try to limit our calories in any way; we just try make sure most of them are coming from nutrient-dense sources like nuts or fruit.

Being that it’s the season of baking, I got to brainstorming about how I could create a satisfying Christmas treat that was diabetic-friendly AND could also pack a protein punch to help continue to supplement Tom’s desire to gain back the weight he’s lost. And if I could find a way to sneak in some cardamom? Well, that would be a classic Michael Scott “win/win/win” situation.

So…where’s the compromise?

Here’s our (win/win/win) answer: 

  • Replace traditional all-purpose flour with almond flour–a high protein, low-carbohydrate (and gluten-free!) substitution
  • Utilize applesauce to sweeten the cookies instead of white & brown sugar
  • Pair a small amount of traditional molasses with pure maple syrup to maintain the color and richness of traditional gingerbread cookies
  • Use a heavy amount of spices (including cardamom!) to ensure that the cookies deliver on the classic gingerbread flavors…and make Scandinavians everywhere jump for joy

| First Christmas Cookies |

Serves: Makes 3 dozen cookies–so 9 Tom’s or 36 Alaina’s 

Ingredients Needed:

  • 1 lb. finely ground almond flour (~3.8 cups)
    • Almond flour is flour made out of (you guessed it) finely ground almonds–which is awesome, but also means it can be expensive. You can find sales on Bob’s (pictured below) that is sold in 1 lb. bags for about $10, or Costco sells a 3 lb. bag for $22 (~$7.33/lb)

bob's

  • 2 tsp. baking soda
  • 2 tsp. ground cinnamon
  • 1 tsp. ground ginger
  • 1 tsp. ground allspice
  • 1/2 tsp. ground cloves
  • 1/4 tsp. ground nutmeg
  • 1/4 tsp. cardamom
  • 1 stick butter, melted
    • You want salted butter here, NOT unsalted
  • 1/2 cup no-sugar-added applesauce
    • Check your ingredients–it should just say “apples, water”!
  • 1/4 cup unsulphured dark molasses
    • Also called “full”, “robust”, or “second” molasses–this is key to obtaining the classic gingerbread flavor (avoid “light” or “blackstrap” molasses)
  • 2 tbsp. pure maple syrup
    • Like with the meatloaf, no fake corn syrup “maple” syrup here–you want the real deal
  • 1 large egg
  • Flour, for dusting work surface
    • I use all-purpose flour since it’s what I keep on-hand, but you can also use any gluten-free baking flour to keep the recipe 100% gluten free
    • For another gluten-free note, make sure you are using pure maple syrup and real molasses–this is critical as most of the non-pure/real versions sub-in other ingredients that could have gluten in them

Directions:

First up, prep your dry ingredients…

  • Measure out all dry ingredients (flour, soda, & spices) into a large bowl

image

  • Whisk dry ingredients thoroughly
    • This is key to ensuring that the cookies bake properly. Normally you would sift your dry ingredients, but this is made difficult with the slightly grainier texture of almond flour

image

  • Set aside

Now get you wet ingredients mixed…

  • In a large mixing bowl, mix melted butter, applesauce, molasses, maple syrup, and egg using a whisk or mixer until well combined

image

Now you’re ready to combine your dry and wet mixes…

  • Using a spoon (do NOT use a mixer–it will make the dough too runny) gradually stir the flour mixture into the wet mixture

image

The tough part is next…you have be PATIENT….

  • Separate your dough in half, form each half into a flat disc-shape, and wrap each disc in plastic wrap
    • If you have not discovered “Stretch Tite” plastic wrap yet you are in for a life-changing moment.  I will not even touch other plastic wrap–it just makes me frustrated when it breaks and sticks to itself! This stuff is. the. best.

image

  • Refrigerate dough for at least three hours
    • You can refrigerate for up to two days, you will just have to let it thaw out slightly longer when you’re ready to work with it

Three (or more) hours have gone by…now you’re ready to bake!

  • Preheat your oven to 325 degrees F
  • Remove your first dough “disc” from the fridge and let it thaw on the counter while you prepare you working surface (~5-10 minutes)

image

  • Lightly dust your working surface with flour and brush your rolling pin with some as well
    • This is a sticky dough–this is important!
  • Unwrap your dough (saving plastic wrap!) and set it in the middle of your working surface and sprinkle a bit more flour on top before rolling out to be about 1/8 inch (or so) thick
  • Cut out as many cookies as possible and transfer to cookie sheet–positioning them about 1 inch or so apart (they don’t spread–so don’t worry about that!

image

  • Take remaining scraps, re-combine into another disc, and then re-wrap in plastic wrap and place in fridge
    • It is key that this dough stays cold so that you can work with it AND so it bakes evenly
  • Remove second disc from fridge and repeats steps above–placing dough back in fridge after you’ve rolled it out and cut out enough cookies to fill your first cookie sheet
  • Bake cookies in oven for 12 minutes on a silpat or ungreased cookie sheet–setting timer for halfway through (6 minutes) to rotate cookies 180 degrees to ensure even baking

image

  • Once 12 minutes have passed, remove cookies from oven and let cool on cookie sheet for 2 minutes
  • Once 2 minutes have passed, carefully transfer cookies to wire cooling rack
    • Almond flour cookies are notoriously fragile/crumbly until they’ve fully cooled–be extra careful!
  • Repeat above steps until all cookies have baked and are cooling
  • Leave cookies on wire cooling rack for at least 8 hours (overnight works well!) to ensure they have full cooled and dried (do not stack them when cooling)
  • Once 8 hours have passed, package them in an airtight container or ziploc bag, ensuring that you don’t stack more than two high in the container to avoid soggy cookies

You’ve baked your cookies! Congratulations! Now what?

  • These cookies are delicious plain, but since it is Christmastime, a little icing can be super fun–plus the little bit of sweetness and vanilla balances out the spice of this cookie in the most INSANELY DELECTABLE way
  • You can use any store-bought or homemade icing, but I recommend using homemade to avoid the weird ingredients that can be found in store-bought. My favorite? Alton Brown’s Royal Icing recipe is easy, uses ingredients you already have on hand, and maintains a slight softness when it dries that keeps you from breaking a tooth as you bite into your favorite cookie!
  • Once you have the icing, just pop it in a freezer-thickness zip-top bag witha snipped corner and decorate to your heart’s content…or at least to the best of your ability…which (as you can see below) is very lacking for me personally…

image

Okay, so I know what you’re thinking…and I know these cookies are putzy. There’s a few extra steps that seem kinda silly and take a tiny bit of extra time, but I’m telling you it’s so, so worth it. And really, I promise, it’s no more work than having to roll eight million peanut butter balls in sugar and then unwrap eight million chocolate kisses to put in them. We all make those cookies every year…this isn’t any different!

So why is the little bit of extra effort worth it? Let me the count the ways…

  • These cookies have the perfect consistency
    • They’re chewy on the inside, but they have crisp, smooth outside that’s perfect for decorating
  • These cookies have the perfect spice balance
    • These cookies are like a perfectly harmonious chorus of spices singing the same Christmas carol and there’s no loud soprano (like cinnamon or ginger) overpowering the soulful altos (cloves & cardamom) that make the tune so rich
  • These cookies are diabetic-friendly AND gluten-free friendly
    • Did I mention there’s only 4 carbohydrates and 3 sugars per cookie?
  • These cookies are PACKED with protein and fill you up (or at least fill me up!) with just one cookie
    • Each 100 calorie cookie has a whopping 3 grams of protein

So while all of the above are reasons why these cookies are fantastic, these cookies are also wonderful to me and Tom because they’re so distinctively usThey’re a balance of what we both want in the food we eat and the food we want to feed our family one day–which makes them incredibly special.

In fact, above all that’s my favorite thing about these cookies: they’re ours. They’ll be the cookies we bring to cookie exchanges. They’ll be the cookies we make every year and decorate for our families. They’ll be the cookies we set out for Santa…and then secretly devour while the kiddos are sleeping. They’ll be our new tradition.

Because that’s the thing they don’t really talk enough about when you do pre-marital counseling…figuring out how to balance traditions when you get married is hard It can so easily spiral into a swirl of “my family does this“, “my church has this“, “my tradition is this” instead of choosing to do what’s best for your new family unit: you and your spouse.

image
All that matters is the new family unit we created, represented by this cookie family unit we actually created

So while these cookies won’t make all the stressors of holidays disappear or make Tom magically gain weight (even though I would prefer he just eat ten cookies instead of drinking scary powder made from who-knows-what), they are a true compromise and a true reflection of our very distinctive personalities. To put it simply, they’re a win-win-win.

Here’s to making many more culinary compromises…all in the name of love.

xoxo,

alaina