dancing in the kitchen

dancing brownies: delicious, fudgy, pantry & diabetic-friendly brownies that will make you get up and dance
dancing brownies: delicious, fudgy, pantry & diabetic-friendly brownies that will make you get up and dance

I had been dating Tom for over six months before I learned something very important about my now-husband: the man loves to dance.

Being that I grew up as a competitive dancer from the age of three, I was so excited that my then-boyfriend would be my partner on the dance floor for life. There’s only one problem–Tom needs one of three things to get out on the dance floor and shake his made-for-dancing hips:

  • His best friends (usually at one of their weddings)
  • His brother (so they can dance while their mom isn’t looking)
  • The security of his own home…and his speakers bumping his latest favorite dance tune
    • For reference, I’ve been hearing a lot of a club-mix of the latest Selena Gomez track lately
I personally preferred the musical stylings of disney-channel star selena gomez...anyone else?
I personally preferred the musical stylings of the disney-channel version of selena gomez…anyone else?

Since I’ve learned of Tom and I sharing this common passion of loving to dance, I have definitely taken advantage of it. In the mornings when I can tear myself away from watching the channel 4 news (it’s hard…I love that darn weather watcher!), it’s fun to get ready for the day dancing with my husband to some dance tune. In the evenings, our dance routines pair nicely with making dinner or doing the dishes.

{Note: For reference, Adele’s new single “Hello” can actually make for great cooking music. Just be careful if you turn it into an expressive interpretive dance that you don’t hit a limb on the refrigerator…we may have learned this the hard way…}

adele
adele: the second love of tom’s life

Anyways, after getting into a baking mood last week (and it’s FALL…so I’m basically in a baking mood 24/7), I started wondering if I could make a dessert that would be SO GOOD that it would actually give Tom another reason dance…while also being something that was pre-diabetic friendly.

Since I love brownies (I don’t like cake very much, but I love brownies—how weird is that?), I decided that this would be the item that I would try to make dance-worthy. But in my pinteresting and pondering, I realized that every “healthy” version of a brownie that I had even seen or tasted included one (or many) or the following:

  • Black beans
  • Prunes
  • Coconut oil
  • Nut flours
  • Avocado
  • A LOT of honey, maple syrup, or agave

Now here’s the deal, these brownie versions are often pretty good, but I rarely have the ingredients I need on-hand to make them. And while they say that they’re “diabetic-friendly” and it is true that using honey or maple syrup are good lower-glycemic options, they typically call for a CUP of these sweeteners…which equates to 279 grams of sugar in honey, 148 grams of sugar in agave, 214 grams of sugar in maple syrup.

Ummm…WHAT?!!

While I totally appreciate the effort here, these recipes sort of end up making me feel like calling them “diabetic-friendly”  or “healthy” is a bit of false advertising. And, on top of it all, they never really taste like those delicious, fudgy brownies that you are craving. They tend to be a bit denser, have a gritty/off texture, or even sometimes don’t ever really seem to bake-through.

So…where’s the compromise?

Here’s our answer:

  • Keeping the ingredients as simple and as pantry-friendly as possible
  • Utilizing mashed bananas as the sweetener to keep the sugar levels down
  • Upping the intensity of chocolatey-goodness by using a lot of unsweetened cocoa powder
  • Keeping just a little flour and baking soda in the mix keep the texture right
  • …and, most importantly, not being afraid to use butter–because, you know what? A little bit of fat isn’t going to kill you (and it adds some salt!)

| Dancing Brownies |

Serves: 9 Tom’s or 12 Alaina’s

Ingredients Needed:

  • 4 ripe bananas, mashed
  • 1/2 cup butter, melted
  • 1 tbsp. vanilla
  • 1 egg
  • 1/2 cup all-purpose flour
  • 1/2 cup unsweetened cocoa powder
  • 1/2 tsp. baking soda

Optional Ingredients:

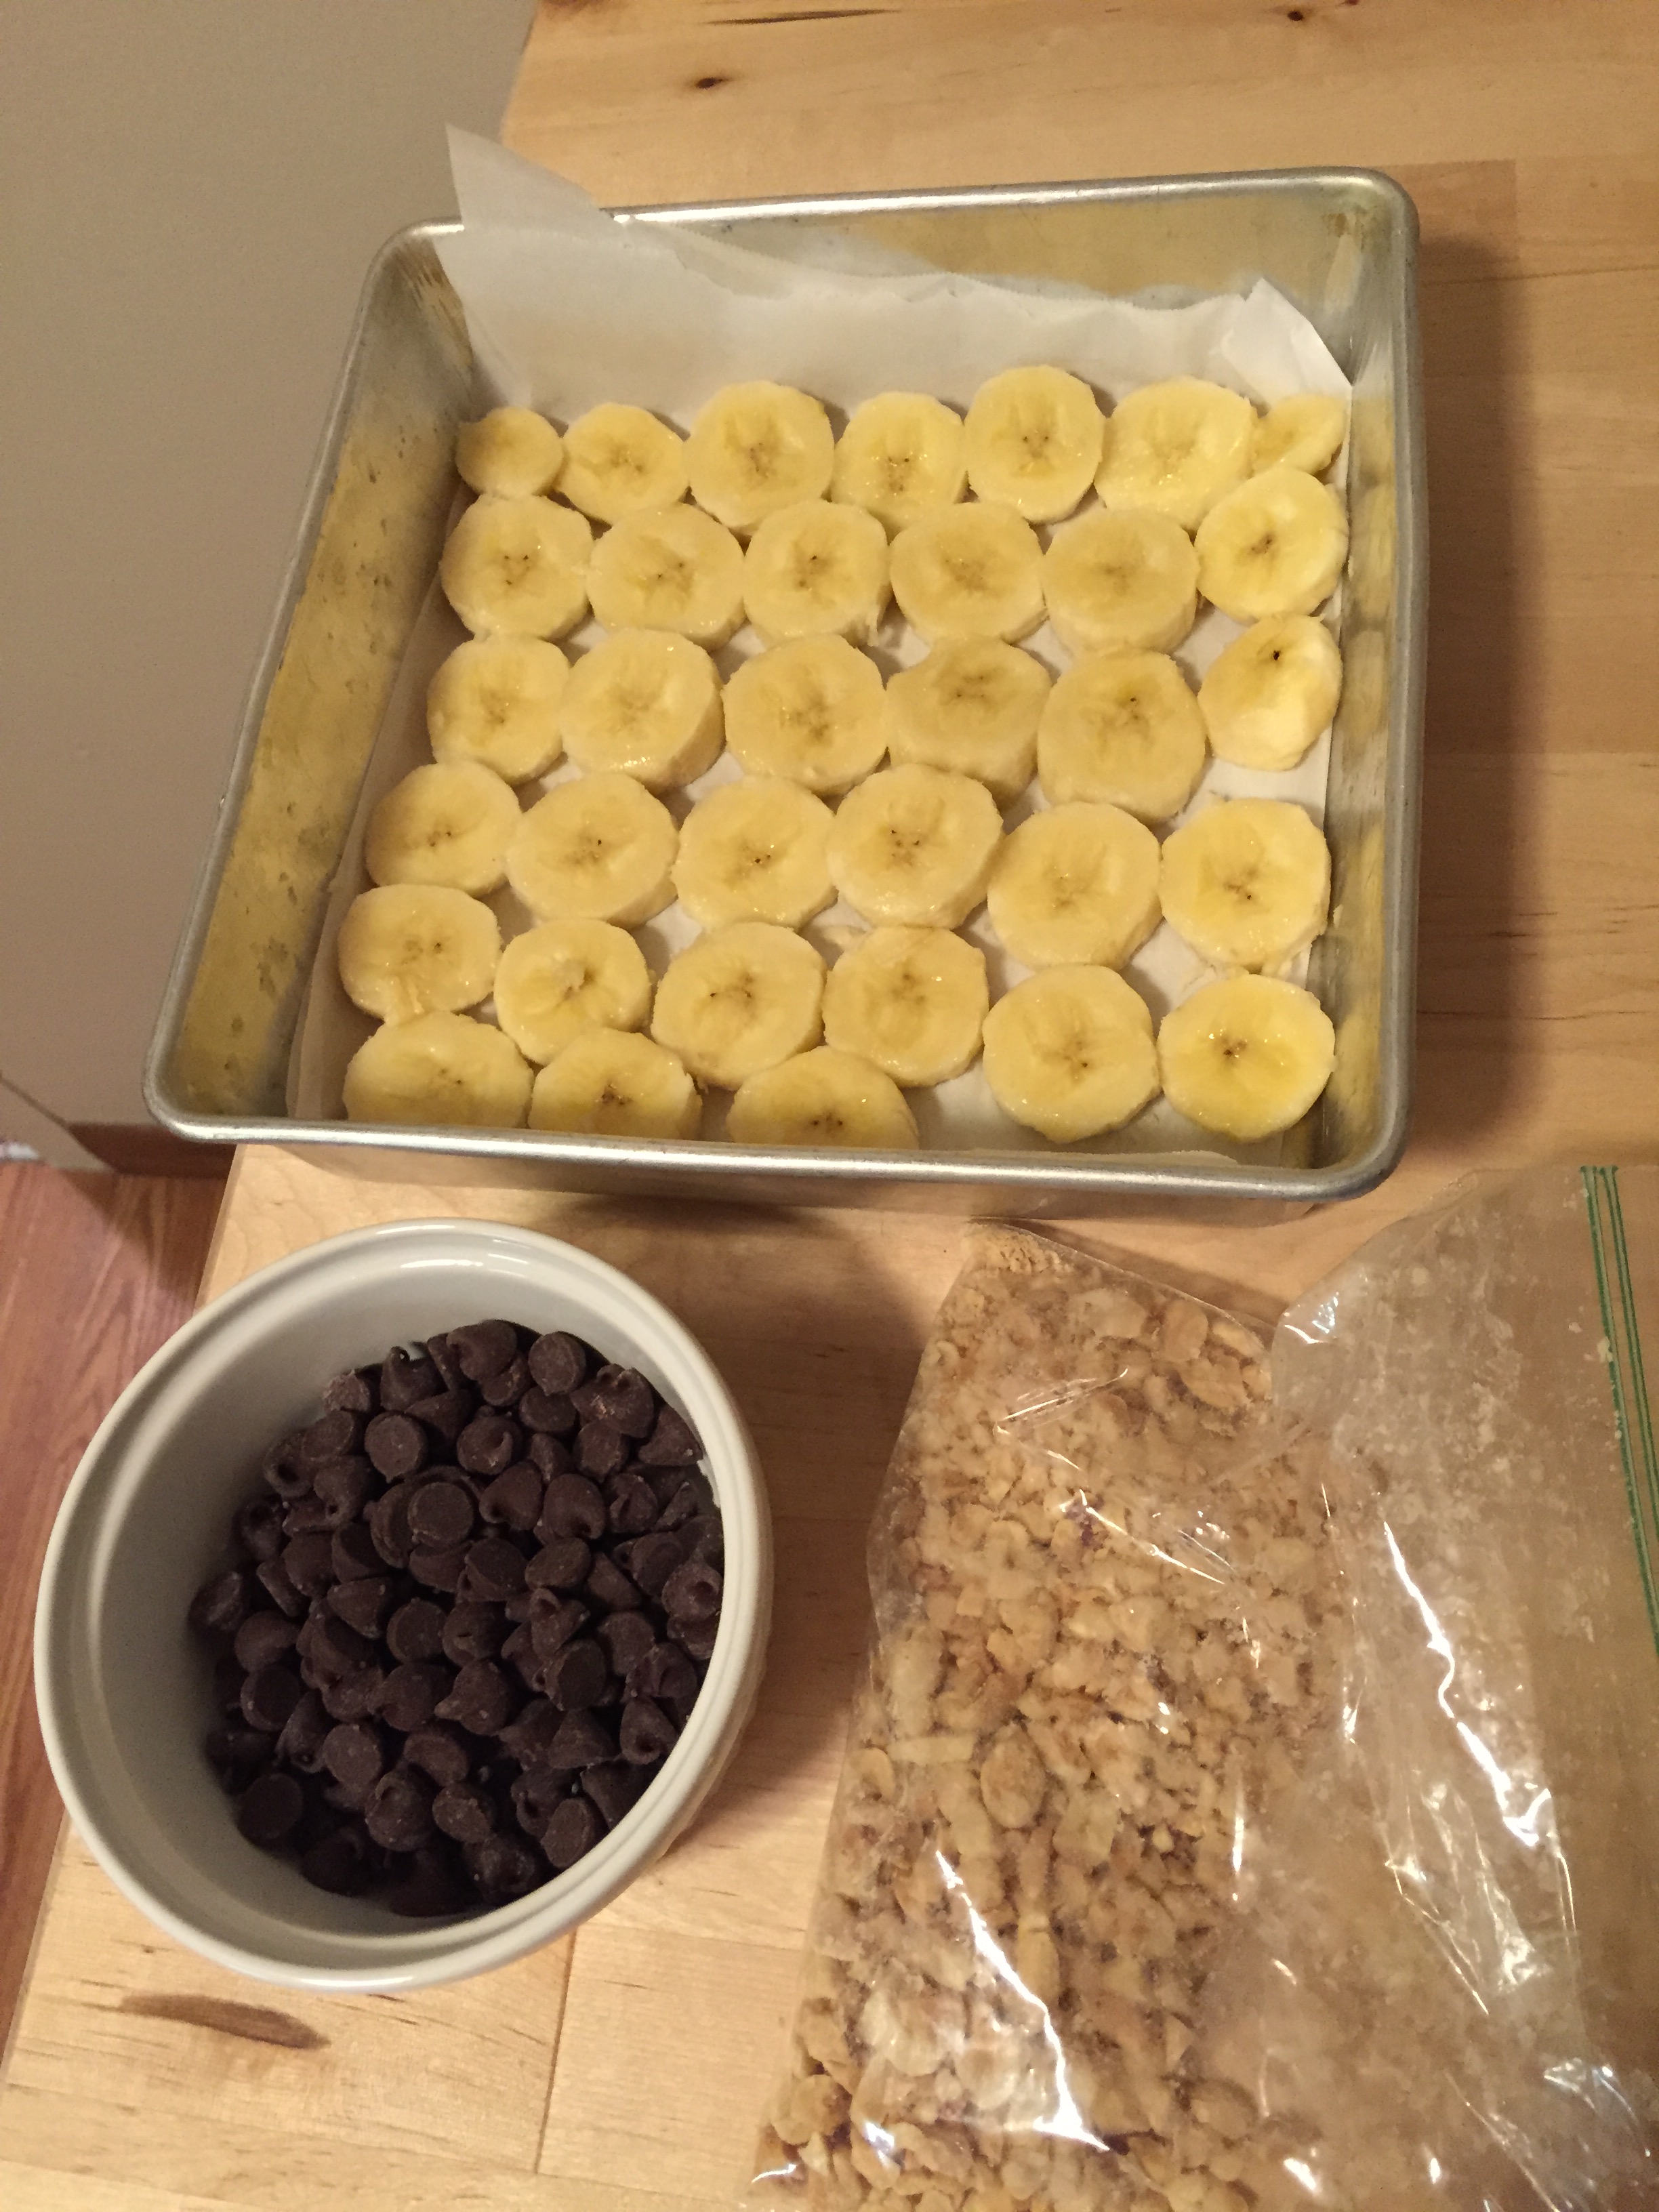
  • 1/2 cup semi-sweet chocolate chips or 1/2 cup chopped walnuts

Directions:

First, prep your oven and pan…

  • Preheat your oven to 350 degrees F
  • Using two pieces of parchment paper, line an 8×8 baking pan as seen below
line parchment paper
it doesn’t have to be perfect…whether it’s pretty or not it will make your clean-up a BREEZE!

Next, mix your wet ingredients…

  • In a large mixing bowl (or stand-mixer bowl if you have it) break your RIPE bananas into pieces and mash them well using a fork or small potato masher
    • Note #1: You want RIPE bananas. They’re sweeter!
    • Note #2: This small masher is in my top 5 favorite kitchen tools. Get one. Watch your life be changed. 
  • After your bananas are mashed, add your melted butter, egg, and vanilla and mix using a mixer (or a whisk) until combined
mix wet ingredients
mix, baby, mix!

Now you need to mix and add your dry ingredients…

  • In a separate bowl, add your flour, cocoa powder, and baking soda and whisk to combine
what it should look like after whisking

Now combine your wet and dry mixtures…

  • Gradually stir your dry mixture into your wet mixture and combine well using a mixer or spoon
ACTION SHOT
ACTION SHOT

Next, we have an optional (yet delicious) step…

  • If desired, stir in chocolate chips or nuts
I was feeling crazy...so I added some chocolate chips!
I was feeling crazy…so I added some chocolate chips!

All that’s left now is to get this baby in the oven!

  • Carefully pour your mix into your pan (ensuring to scrape out any bits that stuck to the bowl–you want every delicious bit of this mix to be baked!)
  • Bake for 25 minutes

Now…when you remove from the oven…

  • Let the brownies stand for 10 minutes
  • Then, carefully holding all four pieces of parchment paper, lift brownies out of pan and onto cooling rack

pull out of oven

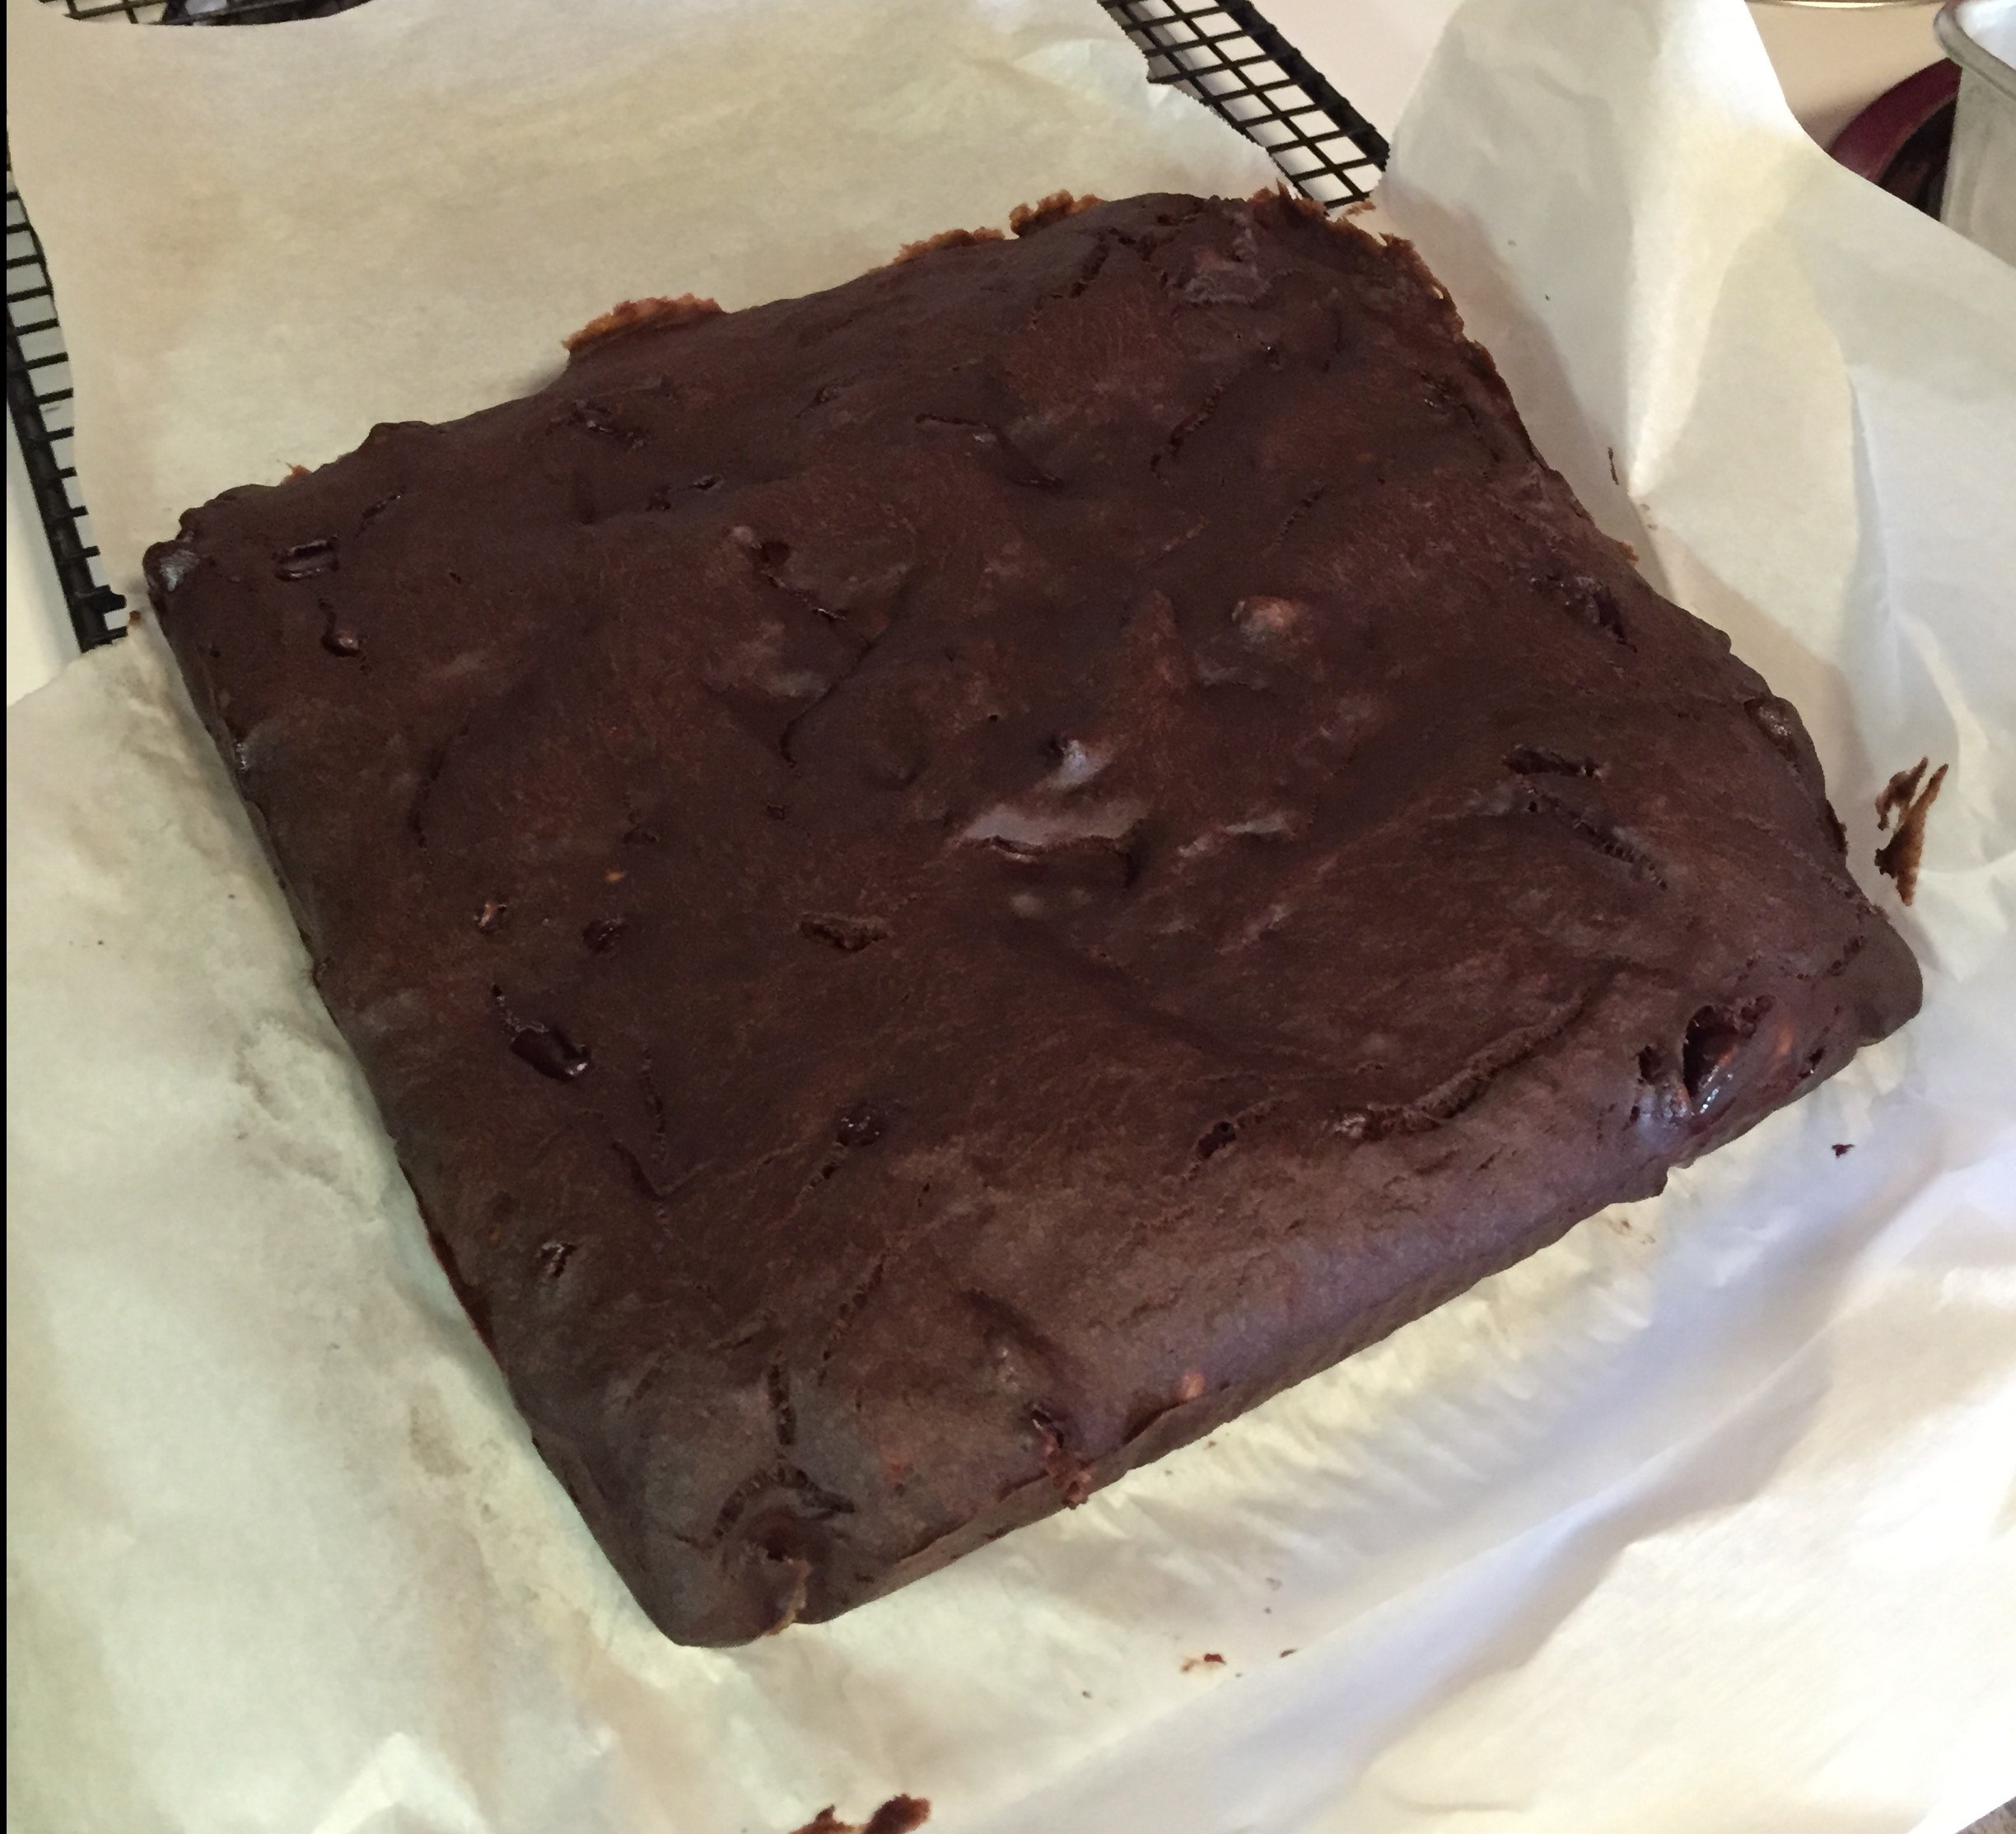
  • At this point, you could let it stand for an hour to cool before covering lightly with plastic wrap…or if you have no self-control you could eat them
    • Pssst…I recommend the second option!
if you couldnt tell from this picture...I fall into the "eat right away" group
LOOK AT THAT FUDGY GOODNESS!!!

Now, here’s the deal. I know I’m biased because I made these brownies, but I honestly think they’re some of the best brownies I’ve ever had. There’s a slight hint of banana to them, but not enough that I’d be able to pluck out that flavor without already knowing there were bananas in them.

These brownies are the epitome of what brownies should be: a delectable, rich, gooey, fudgy, melt-in-your-mouth chocolatey experience. And the best part? One brownie (that’s good-sized, mind you–whoever said an 8×8 brownie pan makes 16 brownies is seriously disturbed) has only 13 carbs and 5 sugars–almost ALL of which come from the bananas. And if you add the chocolate chips, it only adds 4 carbs and 4 sugars (which, in my opinion, is TOTALLY worth it).

Now, as I said earlier, my challenge this week was to give Tom another reason to dance. And since a picture is worth a thousand words, I’ll let you decide if these brownies made my amazing, dessert-loving husband swing his hips in celebration:

thomasbrownies

And well, like Shakira, the man’s hips don’t lie…

Here’s to making many more culinary compromises…all in the name of love.

xoxo,

alaina

pumpkin spice & everything nice

meatloaf
our version of a pumpkin-spiced fall dish: harvest meatloaf loaded with apples, carrots, and onions topped with a sweet and savory maple glaze

Although I haven’t shown much of it here, I love to bake.

To me, nothing beats whipping up a batch of chocolate-chip cookies or a basic bundt cake and having the entire house be filled with aromas that just envelop you with warmth and comfort. I love how baked goods bring people together and how they can almost always bring a smile to someone’s face (especially my husband’s face…the man loves his cookies).

In fact, I love to bake a bit too much. When I (I mean we…whoops) got a kitchen-aid mixer for our wedding I about died. It was the ONE item I wanted more than anything…specifically so I could bake even more.

KitchenAid® Artisan Stand Mixer KSM150 - Empire Red
meet one of my most-prized possessions: my empire-red kitchen aid mixer. when tom asked what three items I would save in a fire…I may or may have not had said that I would take my mixer over more sentimental items…

{Confession: I gained five pounds the month after we got married because I was baking (and eating what I baked) constantly. It was a magical, butter-filled time of my life.}

When fall comes around, I swear my baking instinct goes into overdrive. Pumpkin this! Maple that! I want to make it all.

One problemo: While I love to bake and I looooooove the flavors of the season (Pumpkin! Cinnamon! Ginger! Allspice! CARDAMOM!!!!!), pumpkin-spiced things tend to lend themselves to overly-sugared items that a pre-diabetic shouldn’t really be eating that much of. Pumpkin spice lattes, oreos, donuts, waffles, yogurts, you name it–I’d be willing to put money on it that it isn’t low in sugar.

The pumpkin-spiced item that started it all: the PSL. And with a SMALL having 40 grams of sugar...not exactly pre-diabetic friendly. Or really anyone friendly.
The pumpkin-spiced item that started it all: the PSL. And with a SMALL having 40 grams of sugar…not exactly pre-diabetic friendly. Or really anyone friendly.

And while I will most definitely bake a few loaves of pumpkin bread and some pumpkin chocolate-chip cookies before the snow flies, this week I was on the hunt for something pumpkin-spiced that wasn’t a dessert that Tom and I could enjoy as a meal.

Enter: The Sorensen Meatloaf

the sorensen ladies--all lovers of having absurdly too-clean homes and cooking food that is good for their husbands.
the sorensen ladies–all lovers of having absurdly too-clean homes and cooking food that is good for their husbands.

Now I know what you’re thinking, “Meatloaf? Really? A loaf of meat? No thank you” But here’s the deal–meatloaf is the most forgiving, versatile, perfect-for-fall dish you can imagine. Growing up, my mom took her mom’s recipe and tweaked it to make it diabetic-friendly so my dad could eat it. She swapped in oatmeal, used a lower-fat ground beef, and added a lot of cayenne and chili flakes–making it a delicious (and spicy) meal that we had at least once a week.

And this week, I decided that it was time for the third generation to give it a twist–a twist that would turn this simple dish into something even more nutrient-dense that would be bursting with fall-flavor.

And Thomas? He was more than on-board. He’s been begging for us to use more ground beef, and I’ve been struggling to find a way to incorporate it. I’m a die-hard believer that “turkey is better” in just about everything that calls for ground meat.

So…where’s the compromise?

Here’s our answer:

  • Use uber-lean ground beef…but ensure we add in delicious cheddar cheese to balance out the fat in the dish
  • Maintain my mom’s trick of swapping oats for breadcrumbs to keep the carbohydrates down
  • Increase the nutrient-density of the dish by adding the harvest trifecta of apples, carrots, and onions
  • Utilize all of the spices fall has to offer–including cinnamon, pumpkin pie spice, and cardamom
  • Top with a maple glaze to seal in the moisture of the loaf and add a savory-sweet tang into every bite

| Harvest Meatloaf with Maple Glaze |

Serves: 4 Tom’s or 5 Alaina’s

Ingredients Needed:

For the Loaf:

  • 1 egg
  • 1/3 cup skim milk
  • 2 tsp. pure maple syrup
    • Yes, pure–you want maple syrup…not corn syrup! It’s better option for blood sugar-issue friends as well
  • 2/3 cup yellow onion, finely diced
  • 2/3 cup carrots, finely shredded
    • I use my food processor for this, but you can also buy shredded carrots and just chop them up a bit!
  • 1 medium to large apple, finely diced
    • As always, I recommend a crisp apple like SweeTango or Honeycrisp
  • 1 lb lean ground beef
    • I used 93%, but you can of course use any type of ground beef 
  • 1 cup cheddar cheese, shredded
    • I buy the pre-shredded cheddar cheese in the bag–it’s easier than shredding it myself…but you totally can!
  • 1/2 cup quick cook oats
  • 1 1/2 tsp. cinnamon
  • 1/2 tsp. pumpkin pie spice
  • 1/2 tsp. cayenne
  • 1/4 tsp. cardamom
    • If you don’t have cardamom on hand, you can sub in more cinnamon instead–but cardamom is delicious!
  • 1/4 tsp. salt
    • This is on the more conservative end–don’t be afraid to add more salt when serving!

For the Glaze:

  • 5 tbsp. apple cider vinegar
  • 5 tbsp. pure maple syrup
  • 2-3 dashes of cinnamon

Directions:

First, prepare your pan and oven…

  • Using non-stick foil, line a rimmed cookie sheet with foil
  • Preheat your over to 350 degrees F

Next, mix together your loaf…

  • In a large bowl, whisk together your egg, milk, and maple syrup
  • Add in your apple, carrots, and onion and stir to coat

ingredientsmeatloaf

  • Crumble in your ground beef in small pieces
    • This makes it easier to combine…trust me!

add ground beef

  • Dump in your cheese, oats, spices, and salt
  • Using your hands, combine well
    • You really want your spices to be mixed throughout–this step is key!

final mix

That was easy! Now you just have to make your glaze…

  • In a small saucepan, add your vinegar, syrup, and cinnamon

make glaze

  • Bring to a boil, whisking constantly
  • Once boiling, reduce the heat and continue to whisk until all maple syrup has dissolved and your glaze is slightly thickened (about 1-2 minutes)
    • Note: It will not get very thick–you really just want it to be a nice, dark caramel color with all of your ingredients dissolved
  • Once complete, remove from heat and pour into a small bowl

final glaze in dish

You’re basically done–now you just need to get this loaf in the oven…

  • Take your mixture from the bowl and dump onto your foil-lined cookie sheet
  • Form meat into a flat oval–trying to ensure that it is the same thickness throughout the loaf
    • This may seem odd–but avoiding putting this in a loaf pan means that any grease that presents itself can drip away from the loaf…not get soaked into it! (note: this tip brought to you by mama ramsburg)

raw loaf

  • Using a basting brush, liberally brush the loaf with the maple glaze

glaze with brush

  • Place loaf in the oven and cook for 1 hr and 20 minutes–ensuring you brush the loaf with the glaze every twenty minutes
  • Once the hour and twenty minutes have passed, brush the glaze on the loaf one final time and bake for a final five minutes
    • For those counting at home, this means you will brush the loaf a total of four times: 20 minutes, 40 minutes, 60 minutes, & 80 minutes
    • Also for those at home, this means the loaf will bake for a total of 1 hour and 25 minutes 

in over

Now get that loaf on a plate!

  • Immediately after removing from the oven, use a spatula to remove the loaf from the pan and place on a plate
    • By doing so, you are removing the loaf from any grease/leftover glaze that has leaked away from the loaf during baking. Huzzah!
finalloaf on plate
it may not be pretty, but it is dang delicious
  • Now serve!
    • I recommend serving with the chicken salad (minus the chicken!) from my post from a few weeks back…it complements this dish beautifully!

When you remove this harvest loaf from the oven, it’s an amazing moment. The savory-sweet smell that will fill your kitchen is a crazy combination reminiscent of both apple cider and a delicious roast. It’s truly the epitome of fall flavors coming to life.

When you serve this dish, be prepared for a robust first bite. The sweetness of the apples, onions, and carrots is what hits you first–followed by the savory sensations of the deliciously-spiced beef. And just as this meatloaf makes you completely rethink your earlier doubts regarding if meatloaf can be good, it hits you–the tangy/sweet sensation of that maple glaze.

This harvest loaf is a crazy mix–but it’s absolutely delectable. Tom went back for seconds…and thirds...and I don’t think he even realized the pure amount of vegetables and fruit he was getting with every serving. On the flip side, I was beyond surprised how much I could enjoy eating ground beef–it really makes the dish, and I don’t think that ground turkey would have had the depth of flavor needed to make this dish what it is.

In all, I took a gamble this week by trying to make yet another food item pumpkin-spiced…but I think it paid off. Unlike the pumpkin-spice items being advertised in every aisle, commercial, and newspaper this time of year–this is one that is low in sugar and something you can feel good about eating.

And the best part? My husband was thrilled. He’s been craving ground beef and we found a way to marry our tastes in creative way that left us both satisfied.

{…but that being said…I really could go for a pumpkin chocolate-chip cookie….and that mixer hasn’t been used in over a week…and what’s  delicious dinner without a delectable dessert?…hmmm…}

Here’s to making many more culinary compromises (and maybe some cookies)–all in the name of love.

xoxo,

alaina


the ultimate comfort food

final for blog
our version of chicken pot pie: an entirely homemade nothing-from-a-can dish consisting of creamy chicken soup, copious amounts of veggies, and scrumptious protein-packed cheddar jack biscuits

To me, all food is comfort food…or at least cooking all food is comforting.

The aromas, sizzles, and steady rhythmic motions of chopping and whisking calm my heart and soul. The kitchen is where my stresses and fears melt away and my hands and senses take control. Recipes are simply suggestions and my taste buds and mood determine the amount of cinnamon or cayenne that will end up in my dish.

Cooking with others is fun as well…but in a different way. As a textbook extrovert, I oddly love being in the kitchen by myself–experimenting, guessing, and always imagining what those I’m cooking for would love to taste and eat.

{Note: The only thing I don’t love is doing dishes–which is why I’m so thankful and blessed that I married a man who’s okay with our split of the kitchen duties–that could have been ugly. Phew!}

NO ME GUSTA.

As I’ve said before, I wholeheartedly see cooking as an act of love. And for me, trying to take classic, traditional dishes that my husband loves and making them something we can both enjoy is a prime example of that.

In fact, I think I would say that cooking people food that they love in a way that’s good for them is my specific “cooking love language

{Note: I know there is no such thing as cooking love languages…but “Love Languages” are my favorite so I’m making this a thing. Just roll with it…

If my cooking love language is “Makes people food they love in a way that’s good for them”…maybe others could be “Brings surprise desserts for coworkers” or “Makes freezer meals to deliver for people who need them” or “Hosts dinner parties for friends”?

Oh my. I love this. Now all I want to do is talk about cooking love languages. I have issues. Anybody else?}

this is the real “love languages”…and if you haven’t read this book you should do so IMMEDIATELY. like right now. seriously.

Anyways…before I got all excited about love languages, my point was that cooking is an act of love. And there is no man that I love more than my amazing husband…although cooking food for him that he loves in a way that’s good for him is an on-going challenge.

Why? Because Tom (like most people) doesn’t see all food as comfort food. He sees comfort food as laden with creamy, potato-y, pasta-y, cheesy goodness. And comfort food can be pretty darn difficult to make low in sugar and carbohydrates.

In fact, there is one food that (up until now) I couldn’t figure out how to make pre-diabetic-friendly no matter how hard I tried: the ever-elusive chicken pot pie.

Now here’s the deal–Tom loves chicken pot pie. We literally cannot go to Costco without the man longingly looking at the pre-made ginormous chicken pot pies and giving me puppy-dog eyes that are just begging for us to buy this item that weighs as much as an small child.

the infamous costco chicken pot pie

Now because I love the man, we have bought this monstrosity before and had it for dinner. Tom literally eats half of it and he’s in heaven for those twenty minutes during our meal while he’s eating…but an hour later he’s insanely thirsty due to all the sodium he just ingested and basically comatose because of the carbohydrate crash.

And this is not just the case with the Costco version–in fact, the Costco version is arguably better for you since they make the pie-crust in-house. The real problem with the versions of chicken pot pie that I’ve tried to buy or make is that they all include (usually canned) filling that’s full of sodium and some-sort of pre-made dough that has ingredient labels ladened with preservatives and ingredients that I couldn’t pronounce if I tried:

So, with the cards stacked against me, it’s no surprise I’ve struggled trying to make an updated version of this dish. To put it simply, my “cooking love language” saw this dish as the ultimate challenge.

So…where’s the compromise?

Here’s our answer:

  • Ditching all things from a can and making surprisingly-simple from-scratch condensed cream of chicken soup
  • Using rotisserie chicken to cut-down on the cooking time
  • Upping the veggie-content by including celery, onion, peas, green beans, carrots, and corn…and leaving out the potatoes
  • Making homemade four-ingredient/protein-packed/beyond-simple cheddar jack biscuits to top your hot-pie/pot-dish

| Chicken Hot-Pie/Chicken Pot-Dish|

Serves: 6 Tom’s or 8 Alaina’s

Ingredients Needed:

For the Condensed Soup:

  • 1 1/2 cups low-sodium chicken stock
    • Broth is fine too if that’s all you have on-hand!
  • 3/4 cup skim milk
  • 1/2 cup all-purpose flour
  • 1/2 tsp. salt
  • 1/2 tsp. pepper
  • 1/2 tsp. onion powder
  • 1/2 tsp. garlic powder
  • 1/2 tsp. dried thyme
    • Yes, you need the thyme. Yes, I know you may not have this in your cupboard. It makes it the dish. Trust me. 

For the Filling:

  • 2 cups skim milk
  • 3 cups rotisserie chicken, chopped
    • Remember–get it at Costco! It’s already pulled off the bone! 
  • 2-12 oz. bags steam-in-the-bag frozen pea/corn/green bean/carrot mixed veggies
  • 1 1/2 cups celery, chopped
  • 1 large yellow onion, chopped
  • 2 tsp. minced garlic
  • 1 tsp. olive oil

For the Biscuits:

  • 3 cups self-rising flour
  • 2 1/2 cups 0% greek yogurt
  • 1/2 cup skim milk
  • 3/4 cup cheddar jack cheese, shredded
  • 1/2 cup. all-purpose flour
    • This is for dusting your working surface and biscuit-cutter–not for going in the mixture!

Directions:

Before you do anything, make sure you have a big enough dish! This hot-pie/pot-dish is almost-all filling…so you need a big casserole dish. The one I use is  a 9 by 13 lasagna pan that’s almost 3 inches deep. If you don’t have this large of a dish…never fear! Just split the dish between two oven-safe dishes

First, prep your ingredients!

  • Chop and pre-measure everything and separate into what you need for the condensed soup, the filling, and the biscuits. Set aside.
    • I know this sounds crazy…but if you do the prep work you will save yourself a LOT of grief. The recipe goes fast if you spend 15 minutes prepping! If you don’t….well, it doesn’t go fast (I may have learned this from experience…)
    • This also includes microwaving those steam-in-the-bag veggies–just pop them in one at a time as you’re chopping the rest of your veggies!

Next make your condensed soup

  • In a large soup pot that can fit all of your filling ingredients, bring your chicken stock to a boil over medium-high heat
  • While the stock is trying to boil, whisk together your flour and milk until the flour is dissolved (it’s okay if it gets a little frothy!)
  • Once the stock is boiling, s-l-o-w-l-y pour you milk mixture into the stock–whisking constantly to avoid burning
  • Once the milk is added, KEEP WHISKING and add in your seasoning
    • This is why you pre-measured your spices. You are so smart! You would have needed a third hand to measure spices while also whisking. It would been no bueno.
  • Reduce heat to medium and bring the mixture back to a boil whilst NEVER STOPPING WHISKING for about three to four minutes or until thickened
    • I know your wrist is getting sore. Be strong. This is going to be delicious.
  • Once thickened, stir in your chopped chicken and reduce heat to medium low
    • You did it! I am so proud of you! You JUST MADE CONDENSED CHICKEN SOUP!!! #winning
addinchicken
mmm. chicken.

Now you get to turn that soup into filling…

  • Stir your milk into your condensed soup
    • Ensure you are scraping the bottom as you stir so you don’t leave any delicious condensed chicken soup stuck to the bottom of the pot. You worked HARD for that soup!!
  • Stir in your pea/corn/green bean/carrot mixture you steamed earlier
  • While continuing to stir the filling occasionally, saute your celery, onion, and garlic in the olive oil on a neighboring burner
saute away!
saute away!
  • Once the celery and onion have softened, add the mixture to your pot of filling
  • Continue stirring occasionally–keeping the pot on medium-low heat
SO. MANY. VEGGIES.
SO. MANY. VEGGIES.

You’re almost done…now you get to make your biscuits!

  • Preheat your oven to 350 degrees F
  • Using the all-purpose flour, dust your working surface generously
    • Biscuits are super sticky–trust me on this
  • In a medium mixing bowl, combine your self-rising flour, yogurt, milk, and cheese
    • DO NOT OVERMIX. I’m serious. Just stir it until it’s just mixed!
just mixed means just perfect!
  • Take your dough and roll it out to be about 1/2 inch think
  • Using a floured glass or round cookie cutter, cut out your biscuits
    • You will need to re-flour your cutter every 2-3 biscuits
    • The dough should make about 15 biscuits–if you have more you can set aside and make some biscuits for later after your hot-pie/pot-dish has cooked!
    • PS–Have you been remembering to stir your filling mixture? 🙂
cuttingbiscuits
no need to be perfect–its just pot pie!

All that’s left is to put it all together!

  • Leaving your biscuits where they are for minute (aka on the counter), carefully pour your warm filling mixture into you casserole dish
    • Remember, if you don’t have a dish big enough…it’s okay! Just split it between two oven-safe dishes!
  • Once poured, line your biscuits (yes, raw biscuits. they will cook. I promise) onto your mixture in tight rows
    • I recommend brushing off any excess flour…I forgot to and that’s why mine look a bit flour-y! But hey…it still tastes delicious even if you forget! 
    • If you’re using a 9 by 13 pan, you should be able to fit three rows of five biscuits
this 9 by 13 pan fits fifteen biscuits perfectly!
  • Place your hot-pie/pot-dish into the oven and set your timer for 15 minutes
    • Remember, all you’re doing is baking your biscuits–everything else is already cooked!
    • TIP: You may want to put a cookie sheet on the rack under your casserole dish…especially if you don’t have a very deep one. This mixture can get pretty bubbly–you don’t want to have to clean up any spillage! 
inoven
I love this dish… look how pretty it is! Wedding gifts are so fun 🙂
  • After 15 minutes, check your biscuits. They will not turn golden brown –but check for done-ness by simply pressing down on a few of your biscuits. It should feel crisp and slightly hardened.
yum! all done!

And that’s it! Now simply serve! 

  • With the pure amount of veggies and protein in this dish AND the biscuits on top–I consider this dish a meal in and of itself. You can of course serve with another veggie or salad–but I promise it will fill you up all on it’s own!
inbowl
finished product–sprinkled with a little extra cheddar jack cheese!

WHOA. Take a second and bask in the glory of what you just did. You just made chicken pot pie completely from scratch. Nice work!

Now I’m telling you–this dish is good. It may be a better-for-you version of chicken pot pie…but while it does have a LOT less sugar, carbohydrates, and sodium it does NOT have any less flavor.

This dish is bursting with chicken flavor, tons and tons of crunchy veggies, and topped with cheesy biscuits that have an amazingly fluffy texture and perfectly crispy crust.

{And did I mention that the biscuits have only 15 carbohydrates and over 5 grams of protein each? HECK YES.}

I literally thought Tom was going to ask me to marry him all over again after I served him this dish. In fact, in all honesty I don’t know if I have ever made or will ever make again anything he loves more than this version of chicken pot pie.

The best part? This dish is comfort food at its finest. It warms your entire body and soul from the inside out…and you don’t feel gross after you eat it.

With this dish I got to use my “cooking love language” and make one of Tom’s favorite dishes in a way that we can feel good about eating together…and Tom knows the perfect way to show the girl with an actual love language of physical touch how much he appreciates me doing so: a great big hug.

Here’s to making many more culinary compromises–all in the name of love.

xoxo, alaina

dessert dilemma

our version of an ice cream dessert: frozen banana slices covered in semi-sweet chocolate and a salty peanut crunch

In my first job out of college, I was paid to eat ice cream every day. For a little over two years, I tried every flavor, brand, and type of ice cream you could imagine–from Blue Bell to Ben & Jerry’s to Bomb Pops.

ice cream biz
the best job in the world: being literally covered in ice cream

{Brief moment of pause to reflect on my life decisions…I moved on from a role where I got to eat ice cream as a part of my job. Every single day. For free. What in the world was I thinking?! Sigh. Moving on…}

In those two years, I learned a lot. Most relevant to this venue, I learned the following:

  • All ice cream is good–some ice cream is just better than others
    • One exception: Chicago Brick ice cream is disgusting–it’s a neapolitan-like mix of vanilla ice cream, orange sherbet, and caramel ice cream.
chicago brick ice cream
if you see this ice cream…RUN FOR THE HILLS.


  • The higher the milkfat % and the lower the overrun the better (ie: more premium) the ice cream


  • Market Pantry Ice Cream is the best ice cream you can buy for your money
    • Why? Because it’s actually ice cream…look at the fine print of your scround of name-brand ice cream in your freezer…I am willing to bet it might say it’s “frozen dairy dessert”


  • You should avoid eating ice cream every day
    • To be fair, sometimes it would just be tasting a spoonful during a vendor meeting…but it still definitely adds up!


This last one was a biggy…but also really tough to avoid when you were surrounded by ice cream on a daily basis. I also regularly brought ice cream home…which meant that both Tom and I were eating this frozen, creamy, and delicious treat more than we probably should have been.

Now, I do have to admit…ice cream is one of our two main weaknesses. Tom and I will make exceptions and eat sugar-filled delicious items on two occasions:

  • Homemade/good ice cream is involved and/or it is voted the “best ice cream” in a new city we’re visiting
  • Homemade/good donuts are involved and/or it is voted the “best donut” in a new city we’re visiting

I wish I could say that beyond these occasions we don’t crave ice cream. But here’s the thing…despite having a different job and now being married, old habits die hard. We still want ice cream. All the time. Like every night.

But…that’s not really reality. Or healthy. Or even possible for me and my prediabetes.

So…where’s the compromise for satisfying our sweet tooth while keeping my blood sugar in-check?

Here’s our answer:

  • Replacing the cold, creamy base of the old standard with frozen bananas
  • Using just enough semi-sweet chocolate chips to satisfy your sweet-tooth
  • Adding chopped peanuts to mimic the crunch you get from the inclusions in your favorite flavor

|  Banana Bites/Yummies* |

{*Note: We’re still agreeing on the name…I call them “Banana Bites”, Tom calls them “Banana Yummies”}

Serves: 3 Tom’s or 4 Alaina’s

Ingredients Needed:

  • 2 bananas, sliced
  • 1/4 cup semi-sweet chocolate chips
  • 1/4 cup salted cocktail peanuts

Directions:

First, prepare your ‘naners…

  • Line an 8 by 8 metal baking pan with parchment paper
  • Lay banana slices in rows across the entirety of the pan–being careful to avoid overlapping any slices
    • They should be touching each other–just avoid the overlap!
  • Set aside

Then get your peanuts ready…

  • In a small ziploc/other baggie, dump in your peanuts and seal the bag while removing as much air as possible
  • Using a heavy non-breakable cup or can, pound the bag to crush your peanuts until they are finely chopped
    • I always use my metal travel mug for this–it works perfectly
    • Be careful not to over-crush–you don’t want peanut powder!
  • Set aside
ingredients
almost ready to put together!

Next, get that chocolate melted…

  • Melt your chocolate in a microwave-safe bowl ensuring that you stir halfway through the melting process to avoid burning
  • Immediately after melting, use a spoon to evenly drizzle the chocolate over the bananas
    • This is where having the banana slices touching each other is helpful–you don’t waste any chocolate when drizzling!
chocolate
mmmm…chocolate…

Finally, add your nuts…

  • Sprinkle the crushed peanuts evenly across your banana slices
  • Once complete, slightly press the peanuts into the warm chocolate
    • This helps the nuts set into the chocolate when they freeze

refrain from eating just yet...it gets even yummier!

Now throw ’em in the freezer!

  • Place pan, uncovered, in the freezer for at least 3 hours before enjoying
    • You can leave them in there for up to 3 days–but no more than that! Then they turn into frozen ice chunks. Yuck.
  • Once ready to eat, use a fork to loosen the bananas from the parchment paper and from the other banana slices
    • If you try to do this before it’s been at least 3 hours you’ll regret it–the chocolate will not have set to the bananas and will pop off into separate pieces. No bueno. 
  • If you’re fancy, you can throw them on a plate…otherwise just eat from the pan!

{For reference, that’s what Tom and I do…we make a batch before dinner, patiently wait until 8 PM, and then break out the banana bites/yummies and watch an old episode of Food Network Star. We really live life on the edge…I know.}

So I know what you’re thinking: there is NO way this tastes like ice cream. But here’s the thing–the texture of frozen banana on your tongue is actually very similar to the mouth-feel of ice cream. Paired with the smoothness of the semi-sweet chocolate and the salty crunch of the peanuts…it gives you a crazy reminiscence of a big spoonful of your favorite ice cream flavor.

I’m not going to lie to you–you’re smart enough to know that this isn’t ice cream. But it is a heck of a lot easier than a lot of the other “fake” ice creams out there that you can make or buy–as well as a lot better for you. Even if you buy actual ice creams that are no-sugar added, made with non-cow’s milk, or say they’re “all natural”–they are still chock-full of sugar. There is a little bit of refined sugar in the chocolate chips used in this recipe, but the entire recipe only uses 1/4 cup of chocolate chips–which equates to the same amount of sugar (a little less than 30 grams) in one serving of ice cream.

These banana bites/yummies (we really need to agree on a name for these…) are something that Tom and I enjoy at least one to two times a week. They are a delectable treat, super easy, and crazy inexpensive.

Most importantly, these little slices of deliciousness fulfill our nightly craving for ice cream in a way that’s relatively healthy and low in refined sugar. It’s a habit we don’t feel guilty about…and one that pairs well with our love to cuddle on the couch at the end of a long day.

A sweet treat + a sweet man? Life just doesn’t get much better.

Here’s to making many more culinary compromises–all in the name of love.

xoxo, alaina